Implement an Authentication and Access Management solution
- Get link
- X
- Other Apps
Module 1
Secure Microsoft Entra users with multifactor authentication
Introduction
As a security engineer in a manufacturing firm handling sensitive client designs:
Threat: Hackers want to access confidential designs via user accounts. Even with a hardened network, a compromised username/password can bypass many defenses.
Solution: Multifactor Authentication (MFA)
Adds an extra layer of security beyond just a password.
Typically requires something you know (password) + something you have (phone, token) or are (biometric).
Even if a hacker steals credentials, they cannot access accounts without the second factor.
MFA is one of the most effective ways to prevent unauthorized access and protect sensitive data in Azure and other cloud services.
What is Microsoft Entra multifactor authentication?
Protecting your cloud assets is one of the main goals for security groups. One of the primary ways unauthorized users get access to systems is by obtaining a valid username and password. Azure can help mitigate this risk with several features of Microsoft Entra ID, including:
- Password complexity rules: These rules force users to generate harder-to-guess passwords.
- Password expiration rules: You can force users to change their passwords on a periodic basis and avoid using previously used passwords.
- Self-service password reset (SSPR): This approach allows users to self-serve and reset their password if they forget it without involving an IT department.
- Microsoft Entra ID Protection: To help protect your organization's identities, you can configure risk-based policies that automatically respond to risky behaviors. These policies can either automatically block the behaviors or initiate remediation, including requiring password changes.
- Microsoft Entra password protection: You can block commonly used and compromised passwords by using a global banned-password list (like “Password123” or “qwerty”)
- Microsoft Entra smart lockout: Smart lockout helps to lock out malicious hackers who are trying to guess your user passwords or use brute-force methods to get in. It recognizes sign-ins coming from valid users and treats them differently than the sign-ins of malicious hackers and other unknown sources.
- Microsoft Entra application proxy: lets users securely access on-premises web apps from anywhere.
- No need for a VPN.
- Traffic goes through Entra ID for authentication and security.
- It adds features like MFA, conditional access, and SSO to older on-prem apps.
👉 In short: it provides secure remote access to internal apps with modern cloud protections.
- Single sign-on (SSO): You can enable SSO access to your applications, including thousands of preintegrated SaaS apps.
- Microsoft Entra Connect: Create and manage a single identity for each user across your hybrid enterprise, keeping users, groups, and devices in sync.
Microsoft Entra Multifactor Authentication (MFA) adds an extra layer of security by requiring two or more factors to sign in:
- Something you know → password or security question
- Something you have → phone, authenticator app, or hardware token
- Something you are → fingerprint or face scan
This layered approach makes it much harder for hackers to break in. Even if they steal a password, they still need the second factor (like the user’s phone or biometric).
MFA supports easy verification options such as phone call, text message, or app notification.
It protects data and applications while giving users a simple, secure sign-in experience.
👉 Always enable MFA — it’s the most effective way to stop unauthorized access.
How to get multifactor authentication?
Multifactor authentication comes as part of the following offerings:
Microsoft Entra ID P1 or P2 or Microsoft 365 Business: Both of these offerings support Microsoft Entra multifactor authentication using security defaults to require multifactor authentication.
Microsoft Entra ID Free or standalone Microsoft 365 licenses: Both use security defaults that require multifactor authentication for your users and administrators.
Plan your multifactor authentication deployment
Before deploying Microsoft Entra multifactor authentication (MFA), plan carefully:
1. Roll out in phases – Start with a small pilot group to test how MFA works in your environment. Identify setup issues or apps that don’t support MFA. Then, gradually expand to more users until everyone is covered.
2. Have a communication plan – MFA requires users to register and may involve new steps during sign-in. Keep employees informed with clear instructions, timelines, and support options. Use Microsoft’s ready-made email and poster templates to guide your communication.
Microsoft Entra multifactor authentication policies:
Microsoft Entra multifactor authentication (MFA) is applied using Conditional Access policies.
These policies work like IF-THEN rules:
· IF a user tries to access a resource,
· THEN they must complete a certain action (like MFA).
Examples:
· IF a user opens a specific cloud app → THEN require MFA.
· IF a user connects from a specific network → THEN require MFA.
· IF a user uses a certain client application → THEN require MFA.
· IF a user registers a new device → THEN require MFA.
Deciding supported authentication methods:
Method | Description |
Mobile App Verification code | A mobile authentication app such as the Microsoft Authenticator app can be used to retrieve an OATH verification code, which is then entered into the sign-in interface. This code is changed every 30 seconds and the app works even if connectivity is limited. This approach doesn't work in China on Android devices. |
Mobile app notification | Azure can send a push notification to a mobile authentication app such as Microsoft Authenticator. The user can select the push notification and verify the sign-in. |
Call to a phone | Azure can call a supplied phone number. The user then approves the authentication using the keypad. This method is preferred for backups. |
FIDO2 security key | FIDO2 security keys are an unphishable standards-based passwordless authentication method. These keys are typically USB devices, but could also use Bluetooth or NFC. |
Windows Hello for Business | Windows Hello for Business replaces passwords with strong two-factor authentication on devices. This authentication consists of a type of user credential that is tied to a device and uses a biometric or PIN. |
OATH tokens | OATH tokens can be software applications such as the Microsoft Authenticator app and other authenticator apps. They can also be hardware-based tokens that customers can purchase from different vendors. |
Administrators can turn on one or more authentication methods.
Then, users can choose which methods they want to use from the available options. This gives them flexibility and backup options in case their primary method isn’t available.
Selecting an authentication method:
Finally, decide how users will register their MFA methods:
1. Use Microsoft Entra Identity Protection – If your organization has a license, you can configure it to prompt users to register for MFA the next time they sign in.
2. Prompt on access – Users can be prompted to register when they try to use an app or service that requires MFA.
3. Enforce via Conditional Access – Apply a Conditional Access policy to an Azure group containing all users. This forces registration, but requires occasional manual review to remove users who have already registered.
Enable Microsoft Entra multifactor authentication
You can follow the basic steps to set up Microsoft Entra multifactor authentication (MFA) using Conditional Access policies.
⚠️ Important:
- A full deployment requires careful planning.
- Review the official documentation before enabling MFA in your environment to avoid issues.
Configure multifactor authentication options:
1. Sign in to the Azure portal using an Authentication Administrator account.
2. Search for Microsoft Entra ID and navigate to the Microsoft Entra ID dashboard.
3. Select Security in the left-hand menu.
4. Under the Manage menu, select Multifactor authentication. Here, you find options for multifactor authentication
5. Under Configure, select Additional cloud-based multifactor authentication settings. On the resulting page, you can see all the MFA options for Azure under Service Settings..
You can enable or disable app passwords here, which allow users to create unique account passwords for apps that don't support multifactor authentication. This feature lets the user authenticate with their Microsoft Entra identity, using a different password specific to that app.
Set up Conditional Access rules for MFA:
Next, let’s look at how to create Conditional Access policies that enforce MFA for guest users when they access specific apps on your network.
1. Switch back to the Azure portal and select Microsoft Entra ID > Security > Conditional Access.
2. Select Create new policy from the top menu.
· Name your policy, for example, All guests.
1. Under Users, select 0 users and groups selected.
a. Under Include, choose Select users and groups.
b. Select users and groups and then choose Select.
2. Under Target resources, select No target resources selected.
. Select Cloud apps.
a. Under Include, choose Select apps.
b. Under Select, choose None. Select apps from the options on the right and then choose Select.
3. Under Conditions, select 0 conditions selected.
. Under Locations, select Not configured.
a. Under Configure, select Yes, then select Any location.
4. Under Grant, select 0 controls selected.
. Make sure that Grant access is selected.
a. Select Require multifactor authentication and choose Select. This option enforces MFA.
5. Set Enable policy to On, and then Create.
6.
MFA is now enabled for your selected applications. The next time a user or guest tries to sign into that app, they're prompted to register for MFA.
Configure multifactor authentication methods
Enabling and Using Multifactor Authentication (MFA) in Microsoft Entra ID
-
Recommendation: Allow users to select multiple authentication methods in case their primary method is unavailable.
-
First-time sign-in:
-
When a user signs into an MFA-enabled service for the first time, they are prompted to register their preferred MFA method.
-
This could be Microsoft Authenticator, SMS, or other supported methods.
-
-
Subsequent sign-ins:
-
Users are prompted for MFA according to the Conditional Access policy you configured.
-
The system verifies their authentication method each time they access an MFA-protected app or service.
-
MFA ensures that even if credentials are compromised, unauthorized access is prevented through an additional verification step.
Azure Authentication Methods:
Administrators can set up multiple authentication methods for users.
Some of these methods also support Self-Service Password Reset (SSPR), allowing users to reset their passwords using a secondary form of authentication. By combining SSPR with Microsoft Entra MFA, you can reduce the workload on IT staff.
The following table shows the authentication methods and which services can use them:
Authentication method | Services |
Password | Microsoft Entra multifactor authentication and SSPR |
Security questions | SSPR |
Email address | SSPR |
Windows Hello for Business | Microsoft Entra multifactor authentication and SSPR |
FIDO2 Security Key | Microsoft Entra multifactor authentication and SSPR |
Microsoft Authenticator app | Microsoft Entra multifactor authentication and SSPR |
OATH hardware token | Microsoft Entra multifactor authentication and SSPR |
OATH software token | Microsoft Entra multifactor authentication and SSPR |
Text message | Microsoft Entra multifactor authentication and SSPR |
Voice call | Microsoft Entra multifactor authentication and SSPR |
App passwords | Microsoft Entra multifactor authentication in certain cases |
Password:
This method is the only one that you can't disable.
Security questions
This method is available only for non-administrative accounts that use Self-Service Password Reset.
- Azure stores security questions privately and in a security-enhanced manner on a user object in the directory. Only users can answer the questions, and only during registration. An administrator can't read or change a user's questions or answers.
- Azure provides 35 predefined questions, all translated and localized based on the browser locale.
- You can customize the questions by using the administrative interface. Azure displays them in the language entered. The maximum length is 200 characters.
Email address
This method is available only in SSPR. We recommend that you avoid the use of an email account that doesn't require the users Microsoft Entra password to access it.
Windows Hello for Business
Windows Hello for Business provides reliable, fully integrated biometric authentication based on facial recognition or fingerprint matching. Windows Hello for Business, FIDO2 security keys, and Microsoft Authenticator are passwordless solutions
FIDO2 Security Keys
FIDO2 security keys are a passwordless, unphishable, and standards-based authentication method. They can come in various forms, such as USB, Bluetooth, or NFC devices.
Key points:
- Users register a FIDO2 security key and select it at sign-in as their main authentication method.
- They can sign in to:
- Microsoft Entra ID accounts
- Microsoft Entra hybrid-joined Windows 10 devices
- Supported browsers
- FIDO2 keys enable single sign-on (SSO) to both cloud and on-premises resources.
Note: FIDO (Fast Identity Online) is an open standard for secure, passwordless authentication.
Microsoft Authenticator App
The Microsoft Authenticator app is available for Android and iOS. Users can register their app as a second form of authentication.
Key features:
- Push notifications: The app sends a notification to the user’s smartphone or tablet, allowing them to approve or deny sign-in requests and prevent unauthorized access.
- OATH verification codes: Users can generate a one-time code with the app (or a third-party app). After entering their username and password, they input this code for two-factor authentication.
- Flexible sign-in: Users can choose either the push notification or the verification code to complete MFA.
This method provides a secure and convenient way to protect accounts from unauthorized access.
OATH hardware tokens
OATH is an open standard that specifies how to generate one-time password codes. Microsoft Entra ID supports the use of OATH-TOTP SHA-1 tokens of the 30-second or 60-second variety. Customers can get these tokens from the vendor of their choice. Secret keys are limited to 128 characters, which might not be compatible with all tokens.
OATH software tokens
Software OATH tokens are typically applications such as the Microsoft Authenticator app and other authenticator apps. Microsoft Entra ID generates the secret key, or seed, that's input into the app and used to generate each OTP.
Text message
Azure sends a verification code to a mobile phone using SMS. The user must enter the code into the browser within a specific time period to continue.
Voice call
Azure uses an automated voice system to call the number and the owner uses the keypad to confirm the authentication. This option isn't available to the free/trial Microsoft Entra tier.
App password
Certain non-browser apps don't support Microsoft Entra multifactor authentication. If users are enabled for Microsoft Entra multifactor authentication and try to use nonbrowser apps, they're unable to authenticate. The app password allows users to continue to authenticate.
Monitoring adoption
Microsoft Entra ID provides a Usage & Insights view under Monitoring to track authentication method activity, including MFA and Self-Service Password Reset (SSPR).
Key Features:
-
View adoption rates: See how many users have registered for MFA or SSPR.
-
Success and failure tracking: Understand which authentication methods are easiest for users to register and which have issues.
-
30-day audit data: Insights are based on the last 30 days of combined security info and SSPR registration logs.
-
User-level drill-down: Click the charts to see the latest registration audit details for individual users.
This helps identify adoption gaps, troubleshoot registration issues, and improve overall security posture.
Module 2
Manage user authentication
One of the main features of an identity platform is to verify, or authenticate, credentials when a user signs in to a device, application, or service. In Microsoft Entra ID, authentication involves more than just verifying a username and password. To improve security and reduce the need for help desk assistance, Microsoft Entra authentication includes the following components:
*Self-service password reset
*Multifactor authentication
*Hybrid integration to write password changes back to on-premises environment
*Hybrid integration to enforce password protection policies for an on-premises environment
*Passwordless authentication
*Authentication to virtual machines
This module examines these components and explains how to plan, implement, and manage user authentication in Microsoft Entra ID.
Administer FIDO2 and passwordless authentication methods

Microsoft Entra ID Authentication Overview (Simplified):
-
Traditional sign-in: Uses only username and password — less secure.
-
Modern authentication: Adds stronger methods like:
-
Passwordless sign-in (e.g., Windows Hello, FIDO2 keys, Microsoft Authenticator).
-
Multifactor Authentication (MFA): Adds an extra verification step — push notification, code, or phone call.
-
-
Best practice:
-
Combine MFA and Self-Service Password Reset (SSPR) during registration.
-
Enable combined security info registration to make onboarding easier.
-
Require multiple authentication methods for backup — if one method fails, users can use another.
-
When you deploy features like multifactor authentication in your organization, review the available authentication methods. Choose the methods that meet or exceed your requirements in terms of security, usability, and availability. Where possible, use authentication methods with the highest level of security.
The following table outlines the security considerations for the available authentication methods. Availability is an indication of the user being able to use the authentication method, not of the service availability in Microsoft Entra ID:

| Authentication method | Security | Usability | Availability |
|---|---|---|---|
| Windows Hello for Business | High | High | High |
| Microsoft Authenticator app | High | High | High |
| FIDO2 security key | High | High | High |
| OATH hardware tokens (preview) | Medium | Medium | High |
| OATH software tokens | Medium | Medium | High |
| SMS | Medium | High | Medium |
| Voice | Medium | Medium | Medium |
| Password | Low | High | High |
Tip
For flexibility and usability, we recommend that you use the Microsoft Authenticator app. This authentication method provides the best user experience and multiple modes, such as passwordless, MFA push notifications, and OATH codes.
How each authentication method works
Some authentication methods can be used as the primary factor when you sign in to an application or device. A good example of primary authentication is to use a FIDO2 security key or a password. Other authentication methods are only available as a secondary factor. Examples are when you use multifactor authentication or SSPR.
The following table outlines when an authentication method can be used during a sign-in event:
| Method | Primary authentication | Secondary authentication |
|---|---|---|
| Windows Hello for Business | Yes | MFA |
| Microsoft Authenticator app | Yes (preview) | MFA and SSPR |
| FIDO2 security key | Yes | MFA |
| OATH hardware tokens (preview) | No | MFA and SSPR |
| OATH software tokens | No | MFA and SSPR |
| SMS | Yes (preview) | MFA and SSPR |
| Voice call | No | MFA and SSPR |
| Password | Yes |
All of these authentication methods can be configured in the Azure portal and increasingly using the Microsoft Graph REST API beta.
Note
In Microsoft Entra ID, a password is often one of the primary authentication methods. You can't disable the password authentication method. If you use a password as the primary authentication factor, increase the security of sign-in events using multifactor authentication.
The following verification methods can be used in certain scenarios:
- App passwords - used for old applications that don't support modern authentication and can be configured for per-user multifactor authentication.
- Security questions - only used for SSPR.
- Email address - only used for SSPR.
What is FIDO2
FIDO2 is an open standard for passwordless authentication, developed by the FIDO Alliance and the World Wide Web Consortium (W3C). It helps users sign in securely without needing a password — instead, they use a security key (like a USB, NFC, or Bluetooth device) or a built-in platform key (like Windows Hello).
🔐 How FIDO2 Works
-
Registration:
-
The user registers their FIDO2 security key with their Microsoft Entra account.
-
A public–private key pair is created:
-
Private key → stays securely on the user’s device.
-
Public key → stored in Microsoft Entra ID.
-
-
-
Authentication:
-
When signing in, Microsoft Entra sends a challenge to the user’s device.
-
The device uses the private key to sign this challenge, proving the user’s identity.
-
No password is sent or stored anywhere.
-
💡 Key Benefits
-
Passwordless: No need to remember or type a password.
-
Unphishable: Since there’s no password, attackers can’t steal it.
-
Strong Security: Uses public-key cryptography — much safer than traditional passwords.
-
Fast and User-Friendly: Works quickly using hardware or built-in device authentication (like Windows Hello).
🧠 Common Use Cases
-
Signing in to Microsoft Entra ID or hybrid-joined Windows 10/11 devices.
-
Accessing cloud and on-premises resources with single sign-on (SSO).
-
Secure authentication in supported browsers (like Edge, Chrome, Firefox).
-
Ideal for high-security organizations or users who can’t use mobile MFA.
Enable FIDO2 security key method
Sign into the Microsoft Entra admin center.
Browse to Protection - Authentication methods - Authentication method policy.
Under the method FIDO2 Security Key, choose the following options:
- Enable - Yes or No
- Target - All users or Select users
Save the configuration.
Manage user registration and FIDO2 security keys
- Browse to https://myprofile.microsoft.com.
- Sign in if you haven't already.
- Select Security Info.
- If the user already has at least one multifactor authentication method registered, they can immediately register a FIDO2 security key.
- If they don't have at least one multifactor authentication method registered, they must add one.
- Add a FIDO2 security key by selecting Add method and choosing Security key.
- Choose USB device or NFC device.
- Have your key ready and choose Next.
- A box will appear and ask the user to create/enter a PIN for your security key and then perform the required gesture for the key, either biometric or touch.
- The user will be returned to the combined registration experience and asked to provide a meaningful name for the key so the user can identify which one if they have multiple. Select Next.
- Select Done to complete the process.
Sign in with passwordless credential
In the example below a user has already provisioned their FIDO2 security key. The user can choose to sign in on the web with their FIDO2 security key inside of a supported browser on Windows 10 version 1903 or higher or Windows 11.

Explore Authenticator app and OATH tokens
Microsoft Authenticator App & OATH Tokens
📱 Microsoft Authenticator App
A mobile app (for Android & iOS) that adds an extra layer of security to Microsoft Entra ID accounts.
It supports both passwordless sign-in and multi-factor authentication (MFA).
🔐 How It Works
-
When a user signs in:
-
They receive a push notification — tap Approve or Deny.
-
OR they can open the app to generate a time-based code (OATH code) and enter it to verify.
-
Can also be used for self-service password reset (SSPR).
When a user signs in:
-
They receive a push notification — tap Approve or Deny.
-
OR they can open the app to generate a time-based code (OATH code) and enter it to verify.
Can also be used for self-service password reset (SSPR).
🔢 OATH Tokens
*OATH = Open Authentication standard for generating one-time passwords (OTP).
*Works like the Authenticator app’s code — can be software tokens (in apps) or hardware tokens (physical devices).
*Each code is valid for a short time (30 seconds).
💡 In Short
Authenticator app = fast, secure, easy (Approve/Deny or code).
OATH tokens = standard one-time code method, can be hardware or software.
Both help ensure that only the right user can sign in securely.
Microsoft Authenticator app
The Authenticator app gives strong security and lets users sign in without a password.
-
It helps block unauthorized access and stop fake sign-ins or transactions.
🔔 How It Works
-
A push notification is sent to your phone or tablet.
-
Tap Verify if it’s you.
-
Tap Deny if it’s suspicious.
-
🔢 As a Software Token
-
The app can also show a one-time OATH code.
-
After entering your username and password, you type this code for extra verification (MFA).
⚙️ Key Point
-
A user can have up to five OATH tokens or authenticator apps linked at the same time for flexibility and backup.
Open Authentication (OATH) tokens
OATH TOTP is an open standard for generating temporary one-time passcodes (OTPs).
-
These codes can be created using software apps (like Microsoft Authenticator) or hardware tokens.
-
⚠️ Microsoft Entra ID supports only OATH TOTP, not OATH HOTP.
🔐 How it works
-
Microsoft Entra ID creates a secret key (seed) → added to the app.
-
The app then generates time-based codes that change every 30 seconds.
📱 Key Benefits
-
Works offline — the Authenticator app can generate backup codes even without internet.
-
Compatible with third-party apps that support OATH TOTP.

Implement an authentication solution based on Windows Hello for Business
In Windows 10, Windows Hello for Business replaces passwords with strong two-factor authentication on PCs and mobile devices. This authentication consists of a new type of user credential that is tied to a device and uses a biometric or PIN. Windows Hello for Business lets user authenticate to an Active Directory or Microsoft Entra account.
Windows Hello addresses the following problems with passwords:
- Strong passwords can be difficult to remember, and users often reuse passwords on multiple sites.
- Server breaches can expose symmetric network credentials (passwords).
- Passwords are subject to replay attacks.
- Users can inadvertently expose their passwords due to phishing attacks.

Uses key pair or certificate-based credentials — tied to the device.
-
🧠 Identity provider (like Microsoft Entra ID, AD, or Microsoft account) verifies the user and links the public key to their account.
-
💾 Keys stored securely:
-
Created in TPM (Trusted Platform Module) hardware for best security.
-
Private key never leaves the device.
-
-
👀 Two-factor authentication:
-
Combines something you have (device/key) + something you know/are (PIN or biometrics).
-
-
🔐 PIN & biometrics stay local — never sent to servers and don’t roam between devices.
-
📤 Authentication process:
-
PIN or biometric triggers Windows to sign a request with the private key.
-
The identity provider validates the signed data and authenticates the user.
-
-
🧩 Personal and work accounts use one secure container, but each provider’s keys stay separate for privacy.
Creating security groups
Windows Hello for Business uses several security groups to simplify the deployment and management.
If your environment has one or more Windows Server 2016 domain controllers in the domain to which you are deploying Windows Hello for Business, then skip the Create the KeyCredentials Admins Security Group. Domains that include Windows Server 2016 domain controllers use the KeyAdmins group, which is created during the installation of the first Windows Server 2016 domain controller.
Create the KeyCredential Admins security group
Microsoft Entra Connect syncs users’ Windows Hello public keys between AD and Entra ID. You must give it read/write permissions on the key attribute so it can add or remove keys during sync.
1)Sign in a domain controller or management workstation with Domain Admin equivalent credentials.
2)Open Active Directory Users and Computers.
3)Select View and select Advance Features.
4)Expand the domain node from the navigation pane.
5)Right-select the Users container. Select New. Select Group.
6)Type KeyCredential Admins in the Group Name text box.
7)Select OK.
Create the Windows Hello for Business Users security group
The Windows Hello for Business Users group makes phased deployment easier. By adding users to this group and assigning Group Policy and certificate template permissions, users get the necessary permissions to configure Windows Hello for Business and enroll in its authentication certificate.
- Sign in a domain controller or management workstation with Domain Admin equivalent credentials.
- Open Active Directory Users and Computers.
- Select View and select Advanced Features.
- Expand the domain node from the navigation pane.
- Right-select the Users container. Select New. Select Group.
- Type Windows Hello for Business Users in the Group Name text box.
- Select OK.
Microsoft Pluton Security Processor
TPM Today: Most PCs use a TPM chip to securely store keys and verify system integrity. TPM powers Windows Hello, BitLocker, and other critical security features.
-
TPM Risks: Attackers with physical access can target the bus between CPU and TPM to steal or modify data.
🔒 Pluton Architecture
-
Built into the CPU — removes the vulnerable CPU–TPM communication channel.
-
Emulates TPM — compatible with existing TPM specifications and APIs.
-
Protects: Credentials, identities, encryption keys, and personal data.
-
Resistant to attacks even if malware is installed or the PC is physically stolen.
⚡ Key Features
-
Developed with AMD, Intel, Qualcomm, and others.
-
Uses Security Hardware Cryptographic Key (SHACK) technology.
-
Inspired by Azure Sphere and Xbox security.
-
Acts as a replacement/upgrade for traditional TPM chips.
Benefit: Pluton provides stronger hardware security for Windows features like BitLocker and System Guard, keeping sensitive data safe from sophisticated attacks.
Exercise configure and deploy self-service password reset
What it is: Lets users reset or change their passwords without helpdesk support.
Benefits:
* Users can unlock their accounts or recover passwords on their own.
* Reduces helpdesk calls.
* Minimizes downtime and productivity loss.
Key Outcome: Users regain access quickly and securely, keeping workflows uninterrupted.
Benefits of self-service password reset
For Users
-
Reset their own passwords → no productivity loss
-
Unlock accounts without waiting for IT support
✅ For IT/Organization
-
Reduces helpdesk workload
-
Allows IT to focus on higher-priority tasks
💳 Licensing Requirements
-
Cloud accounts: Microsoft Entra ID Premium P1/P2 or Microsoft 365 Business Standard
-
On-premises accounts: Microsoft Entra ID Premium P1/P2 or Microsoft 365 Business Premium
Enable self-service password reset

Basic steps to enable self-service password reset:
- Sign in to the Azure portal using an account with global administrator permissions.
- Search for and select Microsoft Entra ID, then select Password reset from the menu on the left side.
- From the Properties page, under the option Self-service password reset, select Select group
- Browse for and select your Microsoft Entra group, like SSPR-Test-Group, then choose Select.
- To enable SSPR for the chosen group, select Save.
Add a new user
Create a user account that will be added to a security group.
In the Microsoft Entra organization you created, under Manage, select Users then select New User.
The User pane now appears. Enter the following values:
- User name: MonicaT
- Name: Monica Thompson
Select Show Password and then copy it somewhere to reference it later.
Select Create.
Create a group
You want to roll out SSPR to a limited set of users first to make sure your SSPR configuration works as expected. Let's create a security group for the limited rollout and add a user to the group.
Sign in to the Microsoft Entra admin center using a Global administrator account.
Open the portal menu and then select Identity.
On the Identity menu, select Groups, then select + New Group.
Create a new group using the following information:
Setting Value Group type Security Group name SSPRTesters Group description Testers of SSPR rollout Membership type Assigned Members Monica Thompson Select Create.

Enable self-service password reset
Enable SSPR for the group.
Browse back to the Microsoft Entra admin center screen.
Under Protection, select Password reset.
Important
If the Password reset page still displays the message Get a free Premium trial to use this feature, wait for a few minutes and then refresh the page.
On the Password reset dialog Properties page, under Self-service password reset enabled, select Selected.
Select Select group.
In the Default password reset policy pane, select the SSPRTesters group.
On the Password reset dialog, Properties page, select Save.

Under Manage, select and review the default values for the Authentication methods, Registration, Notifications, and Customization settings.
Register for self-service password reset
Now that the SSPR configuration is complete, register a mobile phone number for the user you created.
Open a different browser or open an InPrivate or Incognito browser session and then browse to https://aka.ms/ssprsetup. This is to ensure you'll be prompted for user authentication.
Sign in as
MonicaT@organization-domain-name.onmicrosoft.comwith the password that you noted earlier. Replace the organization-domain-name with your domain name.When prompted to update your password, enter a new password of your choice. Be sure to record the new password.
In the More information required dialog box, select Next.
On the Keep your account-secure page, user the Phone option or select the I want to set up a different method link.

In this example, you'll use the Phone option. Enter your mobile phone details.
Select Text me a code.
When you receive the code on your mobile phone, enter the code in the text box and then select Next.
After your phone has been registered, select Next and then select Done.
Close the browser. You don't need to complete the sign-in process.
Test self-service password reset
Now let's test whether the user can reset their password.
Open a different browser or open an InPrivate or Incognito browser session and then browse to https://aka.ms/sspr. This is to ensure you well be prompted for user authentication.
In the Email, phone, or Skype box, enter
MonicaT@organization-domain-name.onmicrosoft.comand then select Next. Replace the organization-domain-name with your domain name.On the Enter password page, select Forgot my password.
On the Get back into your account page, complete the requested information and then select Next.

In the verification step 1 task, select Text my mobile phone or Call my mobile phone, enter your phone number and then select Text.

Enter your verification code and then select Next.
Choose a new password step, enter a password and then confirm your new password.
When complete, select Finish.
Sign in as Monica with the new password you created.
Enter your verification code and then verify you can complete the sign-in process.
When finished, close your browser.
Deploy and manage password protection
Purpose
-
Prevents users from using weak or easily guessable passwords (like names of schools, teams, or famous people).
-
Uses global and custom banned password lists — password changes fail if a password matches a banned entry.
⚙️ Key Principles
-
No internet communication needed for domain controllers (DCs).
-
No new network ports or AD schema changes required.
-
Works with existing AD DS objects (serviceConnectionPoint).
-
No minimum domain or forest functional level needed.
-
User passwords never leave the DC — fully secure during validation.
-
Independent of other Microsoft Entra features (like Password Hash Sync).
-
Incremental deployment allowed — policy enforced only where DC Agent is installed.
Benefit: Strengthens password security without impacting AD infrastructure or network security.
Create an Azure account and add Microsoft Entra ID Premium P2 trial licenses
- In a web browser, go to the Azure portal.
- Scroll down through the page to learn more about the benefits and free services available.
- Select Start free.
- Use the wizard to sign up for your Azure trial subscription.
- You'll need to a Microsoft Entra P2 license to complete some of the exercises. In the organization you created, search for and then select Microsoft Entra ID.
- In the left navigation menu, select Getting started.
- Under Getting started with Microsoft Entra, select Get a free trial for Microsoft Entra Premium.
- In the Activate pane, under Microsoft Entra Premium P2, select Free trial and then select Activate.
- In the navigation menu on the left, select Overview.
- Refresh the browser until you see Microsoft Entra Premium P2 under the organization name. It might take a couple of minutes.
- You might need to sign out and sign back into Microsoft Azure if you encounter any problems with expected features not being available.
How Microsoft Entra Password Protection works
Components
-
Proxy Service – acts as a bridge between Microsoft Entra (cloud) and your on-premises DCs.
-
DC Agent Service – runs on domain controllers, enforces password policies locally.
🔹 Workflow
-
Proxy Service advertises itself in AD via serviceConnectionPoint (SCP) objects.
-
DC Agent also creates an SCP object for reporting and diagnostics.
-
DC Agent queries the forest to find an available proxy service.
-
Proxy Service requests the latest password policy from Microsoft Entra and sends it to the DC Agent.
-
DC Agent stores the policy in the domain sysvol folder and monitors it for updates.
-
Policy refresh:
-
At service startup → always requests new policy.
-
Every hour → checks policy age; if older than 1 hour, requests update via proxy.
-
-
Password change events: DC Agent uses the cached policy to accept or reject passwords.
1. Start in Audit Mode (Default)
-
Passwords can still be set even if they’re weak.
-
Passwords that would be blocked are logged in the event log.
-
Purpose: Monitor impact before enforcing stricter policies.
🔹 During Audit Stage
-
Organizations may notice:
-
Existing processes need stronger passwords.
-
Users often use weak passwords.
-
Need to inform users about upcoming changes.
-
-
Recommended: Test DC promotions and demotions to identify potential issues with weak passwords.
🔹 2. Switch to Enforce Mode
-
After sufficient monitoring in audit mode, enable Enforce to block weak passwords.
-
Continue monitoring during enforcement for issues.
⚠️ Important Notes
-
Only password changes or resets are validated.
-
Existing passwords remain valid until changed.
-
Accounts with “password never expires” are exempt.
Benefit: Ensures smooth transition to stronger password policies while avoiding disruption.
Multiple forest considerations
No extra requirements for deploying across multiple forests.
-
Each forest is independent:
-
Proxy services only support DCs in their own forest.
-
Password Protection in one forest does not know about deployments in other forests, even if there’s an AD trust.
-
Key point: Deployment and policies are forest-specific.
Read-only domain controller considerations
Password changes/resets on RODCs are forwarded to writable DCs.
-
No DC Agent installation needed on RODCs.
-
Proxy service cannot run on RODCs — only on writable DCs.
Key point: RODCs rely on writable DCs for password protection enforcement; they don’t handle it themselves.
High availability considerations
Proxy Server Availability
-
DC agents use a round-robin algorithm to contact proxy servers.
-
Unresponsive proxies are skipped.
-
Recommendation: At least 2 proxy servers per forest for timely policy downloads.
-
You can deploy additional proxies if desired.
-
DC agents use a round-robin algorithm to contact proxy servers.
-
Unresponsive proxies are skipped.
-
Recommendation: At least 2 proxy servers per forest for timely policy downloads.
-
You can deploy additional proxies if desired.
🔹 DC Agent Resilience
-
Maintains a local cache of the latest password policy.
-
Even if all proxies are down, DC agents continue to enforce the cached policy.
-
Maintains a local cache of the latest password policy.
-
Even if all proxies are down, DC agents continue to enforce the cached policy.
🔹 Policy Update Frequency
-
Policies usually update every few days.
-
Short proxy outages do not impact enforcement.
Key point: Microsoft Entra Password Protection is resilient to proxy outages and ensures continuous policy enforcement.
-
Policies usually update every few days.
-
Short proxy outages do not impact enforcement.
Key point: Microsoft Entra Password Protection is resilient to proxy outages and ensures continuous policy enforcement.
Deployment requirements
Licensing requirements for AD Password Protection are as follows:
Users Microsoft Entra Password Protection with global banned password list Microsoft Entra Password Protection with custom banned password list Cloud-only users Microsoft Entra Free Microsoft Entra Premium P1 or P2 Users synchronized from on-premises AD DS Microsoft Entra Premium P1 or P2 Microsoft Entra Premium P1 or P2
Administrator Account
-
Must have AD domain administrator privileges in the forest root domain to register the AD forest with Microsoft Entra.
-
Key Distribution Service (KDS)
-
Must be enabled on all DCs running Windows Server 2012.
-
Default startup type: manual trigger start.
-
Network Connectivity
-
Each DC must connect to at least one proxy server.
-
Required ports:
-
RPC endpoint mapper → port 135
-
RPC server port → dynamic by default (can be static)
-
Proxy Server Requirements
-
All machines hosting the proxy service must have network access to necessary endpoints (Azure/Microsoft Entra services).
Key point: Proper admin rights, service configuration, and network connectivity are mandatory for successful deployment.
Endpoint Purpose https://login.microsoftonline.comAuthentication requests https://enterpriseregistration.windows.netMicrosoft Entra Password Protection functionality
Microsoft Entra Password Protection DC agent
Licensing requirements for AD Password Protection are as follows:
| Users | Microsoft Entra Password Protection with global banned password list | Microsoft Entra Password Protection with custom banned password list |
|---|---|---|
| Cloud-only users | Microsoft Entra Free | Microsoft Entra Premium P1 or P2 |
| Users synchronized from on-premises AD DS | Microsoft Entra Premium P1 or P2 | Microsoft Entra Premium P1 or P2 |
Administrator Account
-
Must have AD domain administrator privileges in the forest root domain to register the AD forest with Microsoft Entra.
-
-
Key Distribution Service (KDS)
-
Must be enabled on all DCs running Windows Server 2012.
-
Default startup type: manual trigger start.
-
-
Network Connectivity
-
Each DC must connect to at least one proxy server.
-
Required ports:
-
RPC endpoint mapper → port 135
-
RPC server port → dynamic by default (can be static)
-
-
-
Proxy Server Requirements
-
All machines hosting the proxy service must have network access to necessary endpoints (Azure/Microsoft Entra services).
-
Key point: Proper admin rights, service configuration, and network connectivity are mandatory for successful deployment.
| Endpoint | Purpose |
|---|---|
https://login.microsoftonline.com | Authentication requests |
https://enterpriseregistration.windows.net | Microsoft Entra Password Protection functionality |
Microsoft Entra Password Protection DC agent
Supported OS
-
Machines must run Windows Server 2012 or later.
-
Domain/Forest Functional Level
-
No minimum DFL or FFL required.
-
Software Prerequisite
-
.NET Framework 4.5 must be installed on all DC agent machines.
-
SYSVOL Replication
-
Must use DFS Replication (DFSR) for SYSVOL.
Key point: DC agents are flexible with domain levels but require proper OS, .NET, and DFSR setup.
Microsoft Entra Password Protection proxy service
-
Supported OS
-
Must run Windows Server 2012 R2 or later.
-
.NET Requirement
-
Must have .NET Framework 4.7 installed.
-
Domain Controller Access
-
Grant DCs “Access this computer from the network” privilege.
-
Network/Protocol
-
Allow outbound TLS 1.2 HTTP traffic.
-
Ensure access to required ports and URLs.
-
Account Requirements
-
Security Administrator account needed to register proxy and forest with Microsoft Entra.
-
Mandatory Deployment
-
Proxy service is required, even if DCs have direct internet access.
-
Compatibility Warning
-
Do not install Microsoft Entra Password Protection proxy on the same machine as Microsoft Entra Application Proxy.
-
Different versions of the Connect Agent Updater conflict and prevent updates.
Key point: Proxy servers are essential, require proper OS, .NET, network configuration, and cannot share a machine with Application Proxy.
Supported OS
-
Machines must run Windows Server 2012 or later.
-
-
Domain/Forest Functional Level
-
No minimum DFL or FFL required.
-
-
Software Prerequisite
-
.NET Framework 4.5 must be installed on all DC agent machines.
-
-
SYSVOL Replication
-
Must use DFS Replication (DFSR) for SYSVOL.
-
Key point: DC agents are flexible with domain levels but require proper OS, .NET, and DFSR setup.
Microsoft Entra Password Protection proxy service
-
Supported OS
-
Must run Windows Server 2012 R2 or later.
-
-
.NET Requirement
-
Must have .NET Framework 4.7 installed.
-
-
Domain Controller Access
-
Grant DCs “Access this computer from the network” privilege.
-
-
Network/Protocol
-
Allow outbound TLS 1.2 HTTP traffic.
-
Ensure access to required ports and URLs.
-
-
Account Requirements
-
Security Administrator account needed to register proxy and forest with Microsoft Entra.
-
-
Mandatory Deployment
-
Proxy service is required, even if DCs have direct internet access.
-
-
Compatibility Warning
-
Do not install Microsoft Entra Password Protection proxy on the same machine as Microsoft Entra Application Proxy.
-
Different versions of the Connect Agent Updater conflict and prevent updates.
-
Key point: Proxy servers are essential, require proper OS, .NET, network configuration, and cannot share a machine with Application Proxy.
Download required software
Two installers are required for an on-premises Microsoft Entra Password Protection deployment:
- Microsoft Entra Password Protection DC agent (AzureADPasswordProtectionDCAgentSetup.msi)
- Microsoft Entra Password Protection proxy (AzureADPasswordProtectionProxySetup.exe)
Two installers are required for an on-premises Microsoft Entra Password Protection deployment:
- Microsoft Entra Password Protection DC agent (AzureADPasswordProtectionDCAgentSetup.msi)
- Microsoft Entra Password Protection proxy (AzureADPasswordProtectionProxySetup.exe)
Install and configure the proxy service
The Microsoft Entra Password Protection proxy-service is typically on a member server in your on-premises AD DS environment. Once installed, the Microsoft Entra Password Protection proxy-service communicates with Microsoft Entra to maintain a copy of the global and customer banned password lists for your Microsoft Entra tenant.
Install the DC agent service
Run Installer
-
Use the MSI package:
msiexec.exe /i AzureADPasswordProtectionDCAgentSetup.msi /quiet /qn /norestart
-
/norestart can be omitted if you want an automatic reboot.
-
Restart Required
-
Installation/uninstallation requires a restart because password filter DLLs load/unload only at reboot.
-
Installation Complete
-
Once installed on a domain controller and rebooted, the DC agent enforces banned password policies automatically.
-
Optional Pre-DC Installation
-
You can install on a non-DC machine; the service remains inactive until the machine is promoted to a domain controller.
Key point: Installing and rebooting the DC agent is sufficient; no additional configuration is needed.
Upgrading the proxy service
Automatic Upgrade
-
The proxy service can automatically upgrade itself using the Microsoft Entra Connect Agent Updater.
-
Automatic upgrade is enabled by default.
-
Managing Upgrade Settings
-
To enable/disable automatic upgrade:
Set-AzureADPasswordProtectionProxyConfiguration
-
To check current settings:
Get-AzureADPasswordProtectionProxyConfiguration
-
Check Installed Versions
-
To see the versions of all proxy servers in a forest:
Get-AzureADPasswordProtectionProxy
Recommendation: Keep automatic upgrade enabled to ensure all proxy servers are up-to-date.
Manual upgrade process
Download Installer
-
Get the latest AzureADPasswordProtectionProxySetup.exe from the Microsoft Download Center.
-
Run Installer
-
Simply run the installer; it performs an in-place upgrade—no need to uninstall the old version.
-
Optional Automation
-
You can automate the upgrade using:
AzureADPasswordProtectionProxySetup.exe /quiet
-
No Reboot Required
-
Unlike the DC agent, the proxy service typically does not require a restart
Upgrading the DC agentDownload Installer
-
Get the latest AzureADPasswordProtectionDCAgentSetup.msi from the Microsoft Download Center.
-
Run Installer
-
Run the installer to perform an in-place upgrade.
-
Uninstallation of the old version is not required.
-
Reboot Requirement
-
A restart is always required after upgrading the DC agent due to Windows behavior.
-
Automated Upgrade
-
You can automate the process using:
msiexec.exe /i AzureADPasswordProtectionDCAgentSetup.msi /quiet /qn /norestart
-
Omit /norestart if you want the installer to reboot automatically.
-
Check Version
-
Use PowerShell to query installed versions:
Get-AzureADPasswordProtectionDCAgent
The Microsoft Entra Password Protection proxy-service is typically on a member server in your on-premises AD DS environment. Once installed, the Microsoft Entra Password Protection proxy-service communicates with Microsoft Entra to maintain a copy of the global and customer banned password lists for your Microsoft Entra tenant.
Install the DC agent service
Run Installer
-
Use the MSI package:
msiexec.exe /i AzureADPasswordProtectionDCAgentSetup.msi /quiet /qn /norestart -
/norestartcan be omitted if you want an automatic reboot.
-
-
Restart Required
-
Installation/uninstallation requires a restart because password filter DLLs load/unload only at reboot.
-
-
Installation Complete
-
Once installed on a domain controller and rebooted, the DC agent enforces banned password policies automatically.
-
-
Optional Pre-DC Installation
-
You can install on a non-DC machine; the service remains inactive until the machine is promoted to a domain controller.
-
Key point: Installing and rebooting the DC agent is sufficient; no additional configuration is needed.
Upgrading the proxy service
Automatic Upgrade
-
The proxy service can automatically upgrade itself using the Microsoft Entra Connect Agent Updater.
-
Automatic upgrade is enabled by default.
-
-
Managing Upgrade Settings
-
To enable/disable automatic upgrade:
Set-AzureADPasswordProtectionProxyConfiguration -
To check current settings:
Get-AzureADPasswordProtectionProxyConfiguration
-
-
Check Installed Versions
-
To see the versions of all proxy servers in a forest:
Get-AzureADPasswordProtectionProxy
-
Recommendation: Keep automatic upgrade enabled to ensure all proxy servers are up-to-date.
Manual upgrade process
Download Installer
-
Get the latest
AzureADPasswordProtectionProxySetup.exefrom the Microsoft Download Center.
-
-
Run Installer
-
Simply run the installer; it performs an in-place upgrade—no need to uninstall the old version.
-
-
Optional Automation
-
You can automate the upgrade using:
AzureADPasswordProtectionProxySetup.exe /quiet
-
-
No Reboot Required
-
Unlike the DC agent, the proxy service typically does not require a restart
Download Installer
-
Get the latest
AzureADPasswordProtectionDCAgentSetup.msifrom the Microsoft Download Center.
-
-
Run Installer
-
Run the installer to perform an in-place upgrade.
-
Uninstallation of the old version is not required.
-
-
Reboot Requirement
-
A restart is always required after upgrading the DC agent due to Windows behavior.
-
-
Automated Upgrade
-
You can automate the process using:
msiexec.exe /i AzureADPasswordProtectionDCAgentSetup.msi /quiet /qn /norestart -
Omit
/norestartif you want the installer to reboot automatically.
-
-
Check Version
-
Use PowerShell to query installed versions:
Get-AzureADPasswordProtectionDCAgent
Configure smart lockout thresholds
Purpose: Protects user accounts from password-guessing and brute-force attacks.
-
How it works:
-
Detects whether a sign-in attempt is from a legitimate user or a potential attacker.
-
Attackers: Accounts are temporarily locked after repeated failed attempts.
-
Legitimate users: Can continue signing in without unnecessary lockouts.
-
-
Benefit: Balances security (blocking attacks) and productivity (avoiding locking out real users).
It’s essentially a smarter, more targeted account lockout mechanism.
How smart lockout works
Lockout duration: 1 minute after 10 failed sign-in attempts.
-
Subsequent failures: Each additional failed attempt increases the lockout duration (exact growth rate not disclosed).
-
Duplicate bad passwords: Smart lockout tracks the last 3 bad-password hashes, so repeated attempts with the same wrong password don’t increment the lockout counter.
Integration with Federated Environments
-
AD FS 2016/2019: Can use Extranet Lockout and Extranet Smart Lockout to achieve similar protection.
Always-On Default
-
Enabled for all Microsoft Entra ID tenants.
-
Customization requires Microsoft Entra ID Premium P1 or higher.
-
Lockouts aim to block attackers while minimizing impact on genuine users.
Operational Considerations
-
Data centers: Each tracks lockouts independently. Effective allowed attempts =
threshold_limit × datacenter_count. -
Location differentiation: Separate lockout counters for familiar vs. unfamiliar locations.
-
Hybrid deployments:
-
Protects on-premises AD accounts via password hash sync or pass-through authentication.
-
Smart lockout filters attacks before they hit AD DS.
-
Pass-through Authentication Recommendations
-
Lockout threshold: Entra ID threshold < AD DS threshold (e.g., Entra 5 vs. AD 10).
-
Lockout duration: Entra ID duration > AD DS duration (e.g., Entra 2 min vs. AD 1 min).
-
Purpose: Prevents attackers from locking out on-prem AD accounts through attacks on Entra accounts.
✅ Key takeaway: Smart Lockout intelligently distinguishes between attackers and real users, protecting accounts while minimizing false lockouts, and it can be tuned for hybrid environments to safeguard on-prem AD accounts.
Exercise - Manage Microsoft Entra smart lockout values
Manage Microsoft Entra smart lockout values
Based on your organizational requirements, you can customize the Microsoft Entra smart lockout values. Customization of the smart lockout settings, with values specific to your organization, requires Microsoft Entra ID Premium P1 or higher licenses for your users.
Sign in to the Microsoft Entra admin center using a Global administrator account.
Open the portal menu and then select Protection.
On the Protection menu, select Authentication Methods.
On Authentications methods menu, select Password protection.
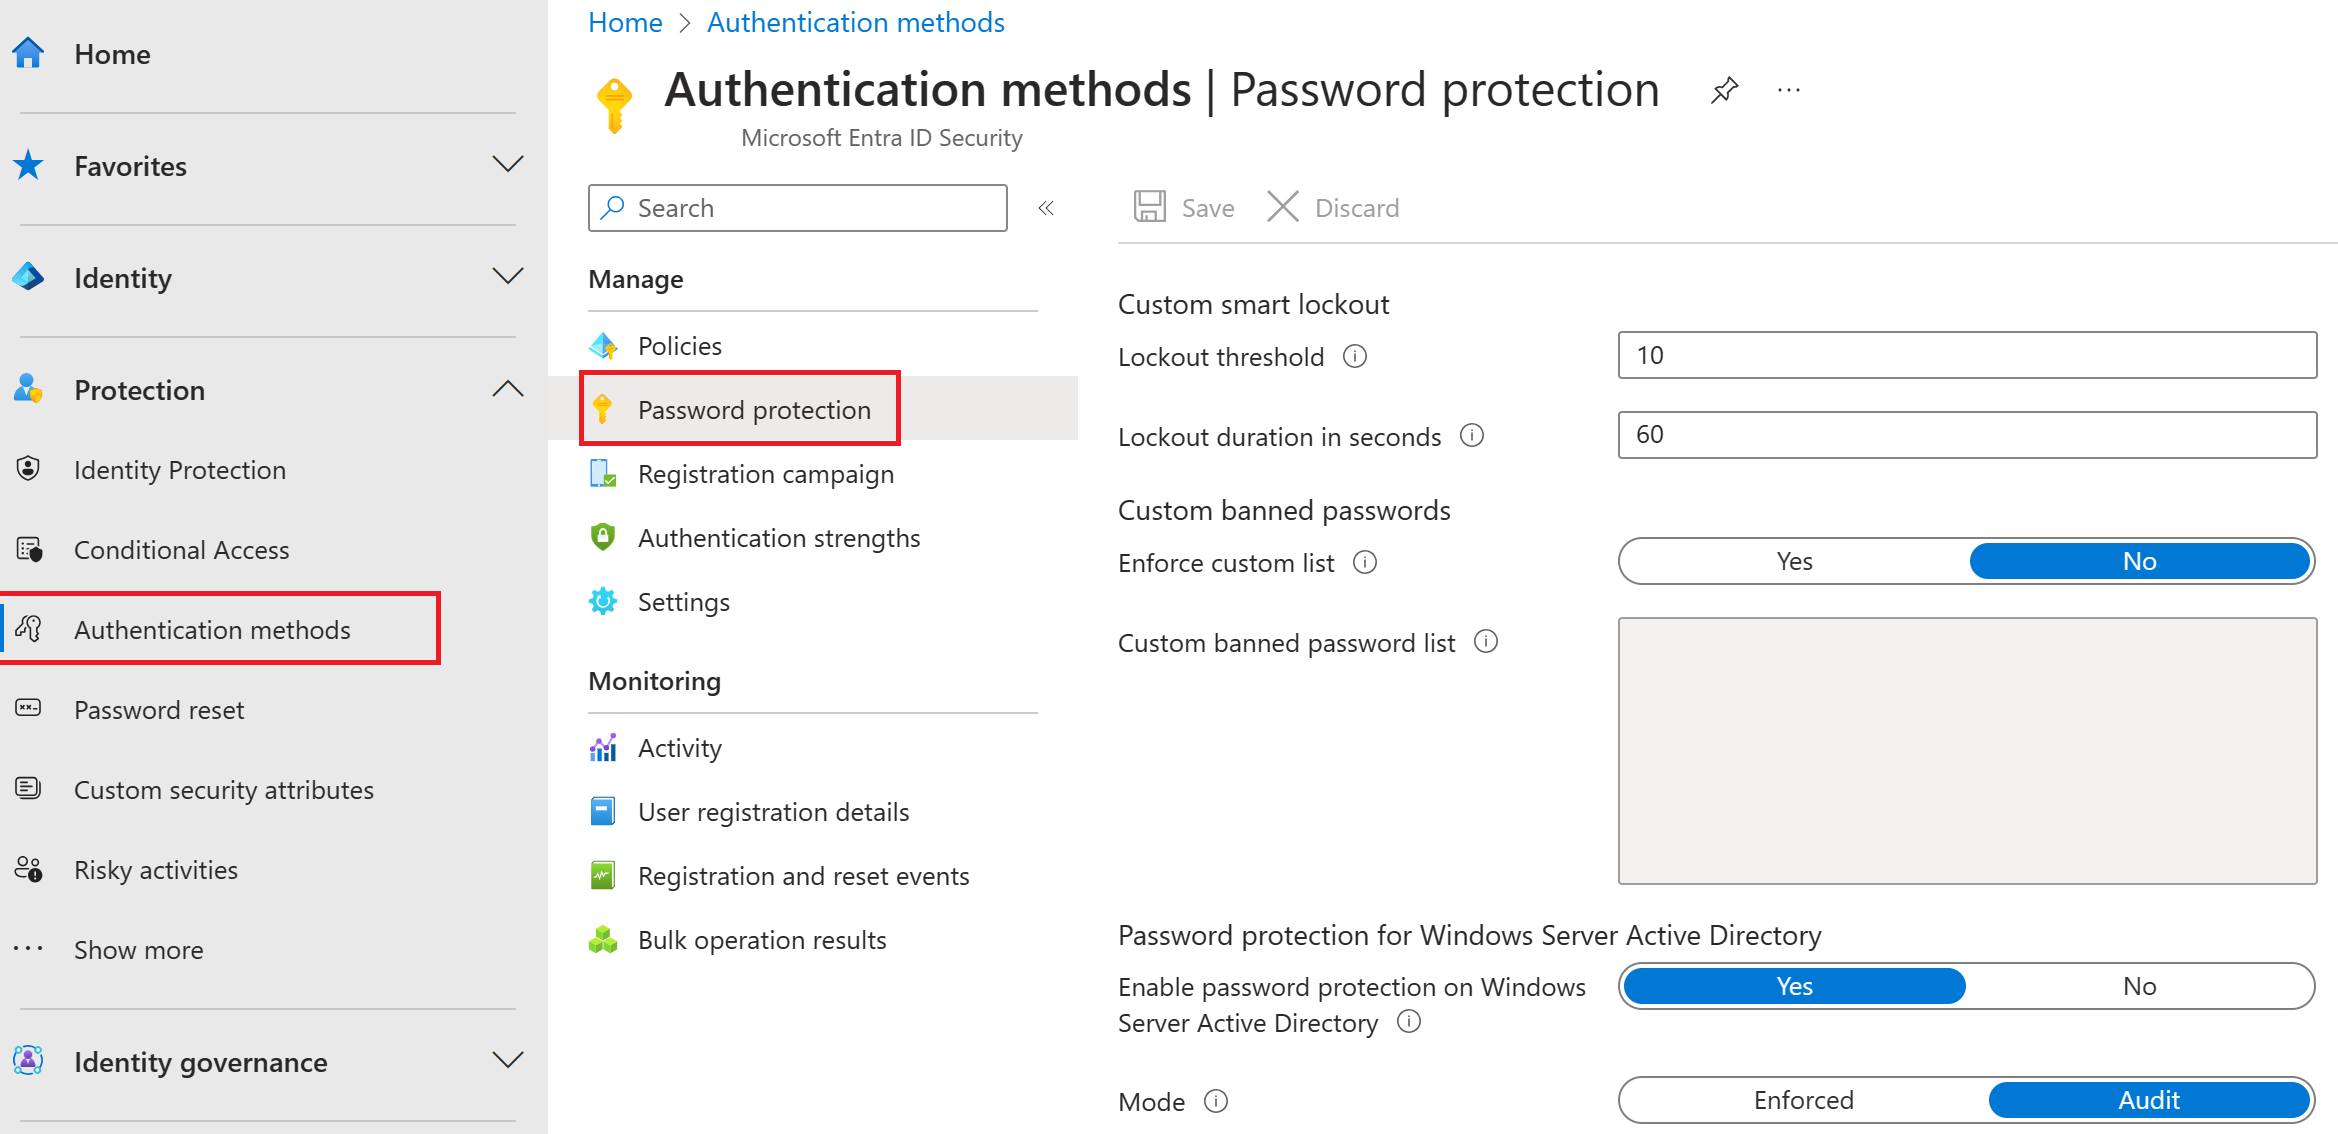
In the Password protection settings, in the Lockout duration in seconds box, set the value to 120.
Next to Mode, select Enforced.
Save your changes.
Note
When the smart lockout threshold is triggered, you will get the following message while the account is locked:
Your account is temporarily locked to prevent unauthorized use. Try again later, and if you still have trouble, contact your admin.
Implement Kerberos and certificate-based authentication in Microsoft Entra ID
Scenario
-
You have on-premises applications that use Integrated Windows Authentication (IWA).
-
These apps expect a Kerberos ticket to authenticate users.
How Application Proxy Enables SSO
-
Application Proxy Connector
-
Installed in your on-premises network.
-
Acts as a bridge between Azure AD and your on-premises apps.
-
-
Kerberos Constrained Delegation (KCD)
-
The connector uses KCD to request Kerberos tickets on behalf of the user.
-
This allows the user to access the on-premises app without re-entering credentials.
-
-
Permissions in Active Directory
-
You grant the connector permission to impersonate users in AD.
-
This is required so the connector can request and send Kerberos tickets for each user.
-
Outcome
-
Users sign in once to Azure AD.
-
They can access supported on-premises apps seamlessly, with the connector handling Kerberos authentication behind the scenes.
Kerberos authentication process flow
. User Access
-
The user opens a browser and enters the URL for an on-premises application published through Application Proxy.
2. Preauthentication by Microsoft Entra ID
-
Application Proxy redirects the user to Microsoft Entra ID.
-
Entra ID checks policies (like MFA, Conditional Access).
-
If the user is successfully validated, Entra ID issues a token to the user.
3. Token Presentation
-
The user presents the token to Application Proxy.
4. Token Validation & UPN Retrieval
-
Application Proxy validates the token.
-
The Connector retrieves the User Principal Name (UPN) and Service Principal Name (SPN) via a secure channel.
5. Kerberos Constrained Delegation (KCD)
-
The Connector performs KCD negotiation with the on-premises Active Directory.
-
The Connector impersonates the user to request a Kerberos token for the target application.
6. Kerberos Token Issued
-
Active Directory returns the Kerberos token for the application to the Connector.
7. Access Application
-
The Connector sends the user’s original request to the application server, using the Kerberos token.
8. Response Back to User
-
The application responds to the Connector.
-
The Connector passes the response to Application Proxy, which then sends it back to the user.
Summary Flow
User → Application Proxy → Microsoft Entra ID → Token → Connector → AD (KCD) → Application → Response → User
Ensure your environment is ready
Before you get started with single sign-on for integrated windows authentication applications, make sure your environment is ready with the following settings and configurations:
- Your apps, like SharePoint Web apps, are set to use integrated Windows authentication.
- All your apps have Service Principal names.
- The server running the Connector and the server running the app are domain joined.
- The server running the Connector has access to read the TokenGroupsGlobalAndUniversal attribute for users.
Configure Microsoft Entra user authentication for virtual machines
Organizations can now improve the security of Windows and Linux virtual machines (VMs) in Azure by integrating with Microsoft Entra authentication. You can now use Microsoft Entra ID as a core authentication platform to connect to:
- Windows Server 2019 Datacenter edition and later.
- Windows 10 1809 and later.
- Windows 11.
- Linux virtual machine.
You can then centrally control and enforce role-based-access and Conditional Access policies that allow or deny access to the VMs.
Benefits
- Use Microsoft Entra credentials to sign into Windows VMs in Azure.
- Reduce reliance on local administrator accounts.
- Password complexity and password lifetime policies configured for your Microsoft Entra ID.
- Configure Conditional Access policies to require multifactor authentication and other signals such as risky-user or sign-in risk.
Configure Microsoft Entra sign-in for Windows VMs
To use Microsoft Entra sign-in for Windows VM in Azure, you must:
- First enable the Microsoft Entra sign-in option for your Windows VM.
- Then configure Azure role assignments for users who are authorized to sign into the VM.

Configure Microsoft Entra sign-in for Linux VMs
You can enable Microsoft Entra sign-in for any of the supported Linux distributions mentioned using the Azure portal. As an example, to create an Ubuntu Server 18.04 Long Term Support (LTS) VM in Azure with Microsoft Entra ID authentication:
- Sign into the Azure portal, with an account that has access to create VMs, and select + Create a resource.
- Select Create under Ubuntu Server 18.04 LTS in the Popular view.
- On the Management tab, Check the box to enable
Login with Microsoft Entra ID. - Ensure System assigned managed identity is checked.
- Complete the Linux virtual machine setup
Plan, implement, and administer Conditional Access
Plan security defaults
Managing security can be difficult with common identity-related attacks like password spray, replay, and phishing becoming more and more popular. Security defaults provide secure default settings that Microsoft manages on behalf of organizations to keep customers safe until organizations are ready to manage their own identity security story. Security defaults provide preconfigured security settings, such as:
Requiring all users to register for multifactor authentication.
Requiring administrators to perform multifactor authentication.
Blocking legacy authentication protocols.
Requiring users to perform multifactor authentication when necessary.
Protecting privileged activities like access to the Azure portal.
Availability of Security Defaults
-
Microsoft Security Defaults are available to all organizations at no additional cost.
-
The goal is to ensure every tenant has a basic level of identity security enabled automatically.
-
You can turn on Security Defaults from the Azure (Microsoft Entra) portal.
-
For tenants created on or after October 22, 2019, Security Defaults are often enabled by default.
-
Microsoft is gradually rolling out this feature to all new tenants to protect users from common attacks such as password spray, phishing, and replay attacks.
Who's it for?
| Who should use security defaults? | Who shouldn't use security defaults? |
|---|---|
| Organizations that want to increase their security posture but don't know how or where to start | Organizations currently using Conditional Access policies to bring signals together, make decisions, and enforce organizational policies |
| Organizations utilizing the free tier of Microsoft Entra ID Licensing | Organizations with Microsoft Entra ID Premium licenses |
| Organizations with complex security requirements that warrant using Conditional Access |
Policies enforced
Unified multifactor authentication registration
All users in your tenant must register for multifactor authentication (MFA) in the form of the Multifactor Authentication. Users have 14 days to register for multifactor authentication within Microsoft Entra ID by using the Microsoft Authenticator app.
After the 14 days have passed, the user won't be able to sign in until registration is completed. A user's 14-day period begins after their first successful interactive sign-in after enabling security defaults.
Protecting administrators
Privileged accounts (such as Global Administrators, Privileged Role Administrators, or Security Administrators) have elevated permissions that can make a significant impact on your organization’s environment.
*Because of their high-level access, these accounts are prime targets for attackers.
*To reduce risk, administrators must use stronger sign-in verification methods.
*In Microsoft Entra ID, this is achieved by requiring multifactor authentication (MFA) for all users with administrative roles.
*MFA ensures that even if a password is compromised, an attacker cannot gain access without the additional authentication factor (such as a phone, app, or hardware token).
After registration with Multifactor Authentication is finished, the following nine Microsoft Entra administrator roles will be required to perform additional authentication every time they sign in:
- Global Administrator
- SharePoint Administrator
- Exchange Administrator
- Conditional Access Administrator
- Security Administrator
- Helpdesk Administrator
- Billing Administrator
- User Administrator
- Authentication Administrator
Protecting all users
*Purpose: Provide built-in protection against common identity attacks (like phishing and password spray) at no extra cost.
*Availability: Enabled for all tenants; new tenants (after Oct 22 2019) often have it on by default.
*Protecting Administrators: MFA is required for admin accounts to secure privileged access.
*Protecting All Users: MFA is enforced for all users to prevent attackers from misusing compromised accounts.
Key Benefits:
-
Enforces multifactor authentication.
-
Blocks legacy authentication.
-
Protects access to Azure and other Microsoft Entra–connected apps.
Blocking legacy authentication
Legacy authentication comes from:
Older clients like Office 2010
Mail protocols such as IMAP, SMTP, POP3
Risk: Legacy authentication cannot use MFA, so attackers can bypass security even if MFA is enabled.
Solution: Enabling Security Defaults blocks all legacy authentication requests, including Exchange ActiveSync basic authentication, ensuring only secure modern sign-ins are allowed.
Exercise - Work with security defaults
In this exercise, try enabling security defaults.
Note
Security Defaults are enabled on new subscriptions, so you can review the process of enabling and disabling.
To enable security defaults in your directory:
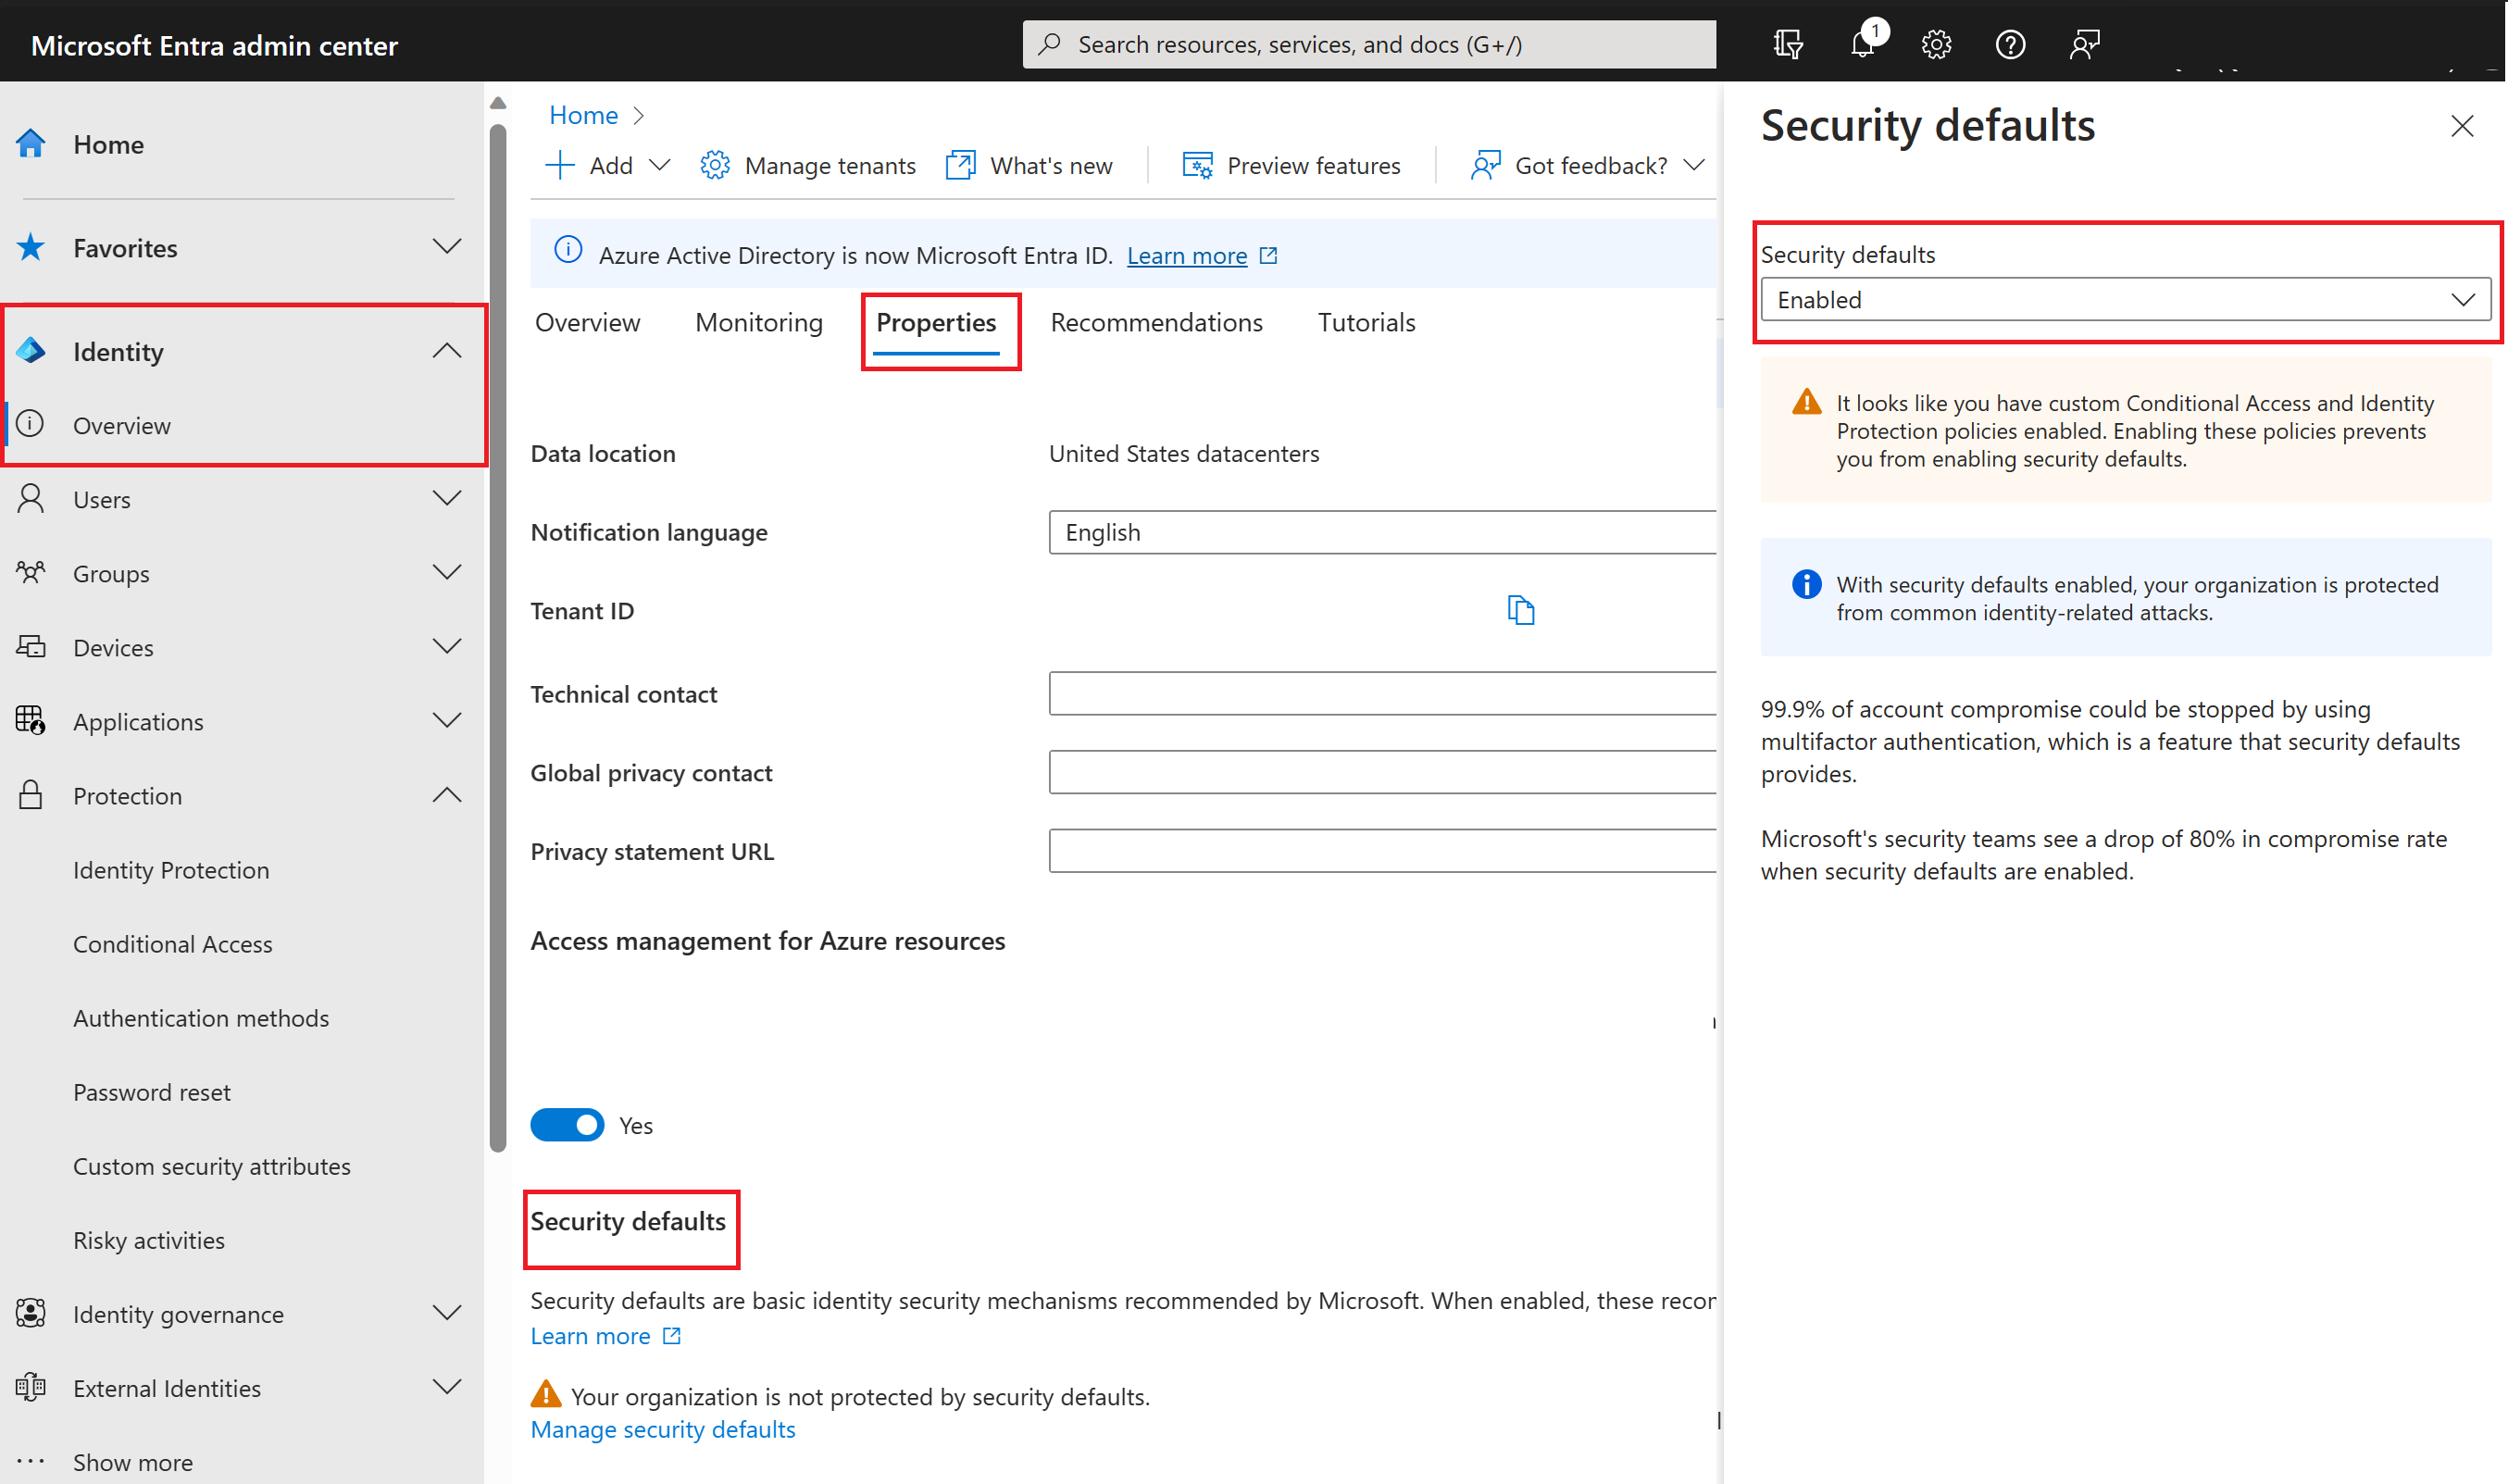
Browse to the Microsoft Entra admin center and sign in as a Security administrator, or a Conditional Access administrator.
Select the Show portal menu hamburger icon and then select Identity - Overview.
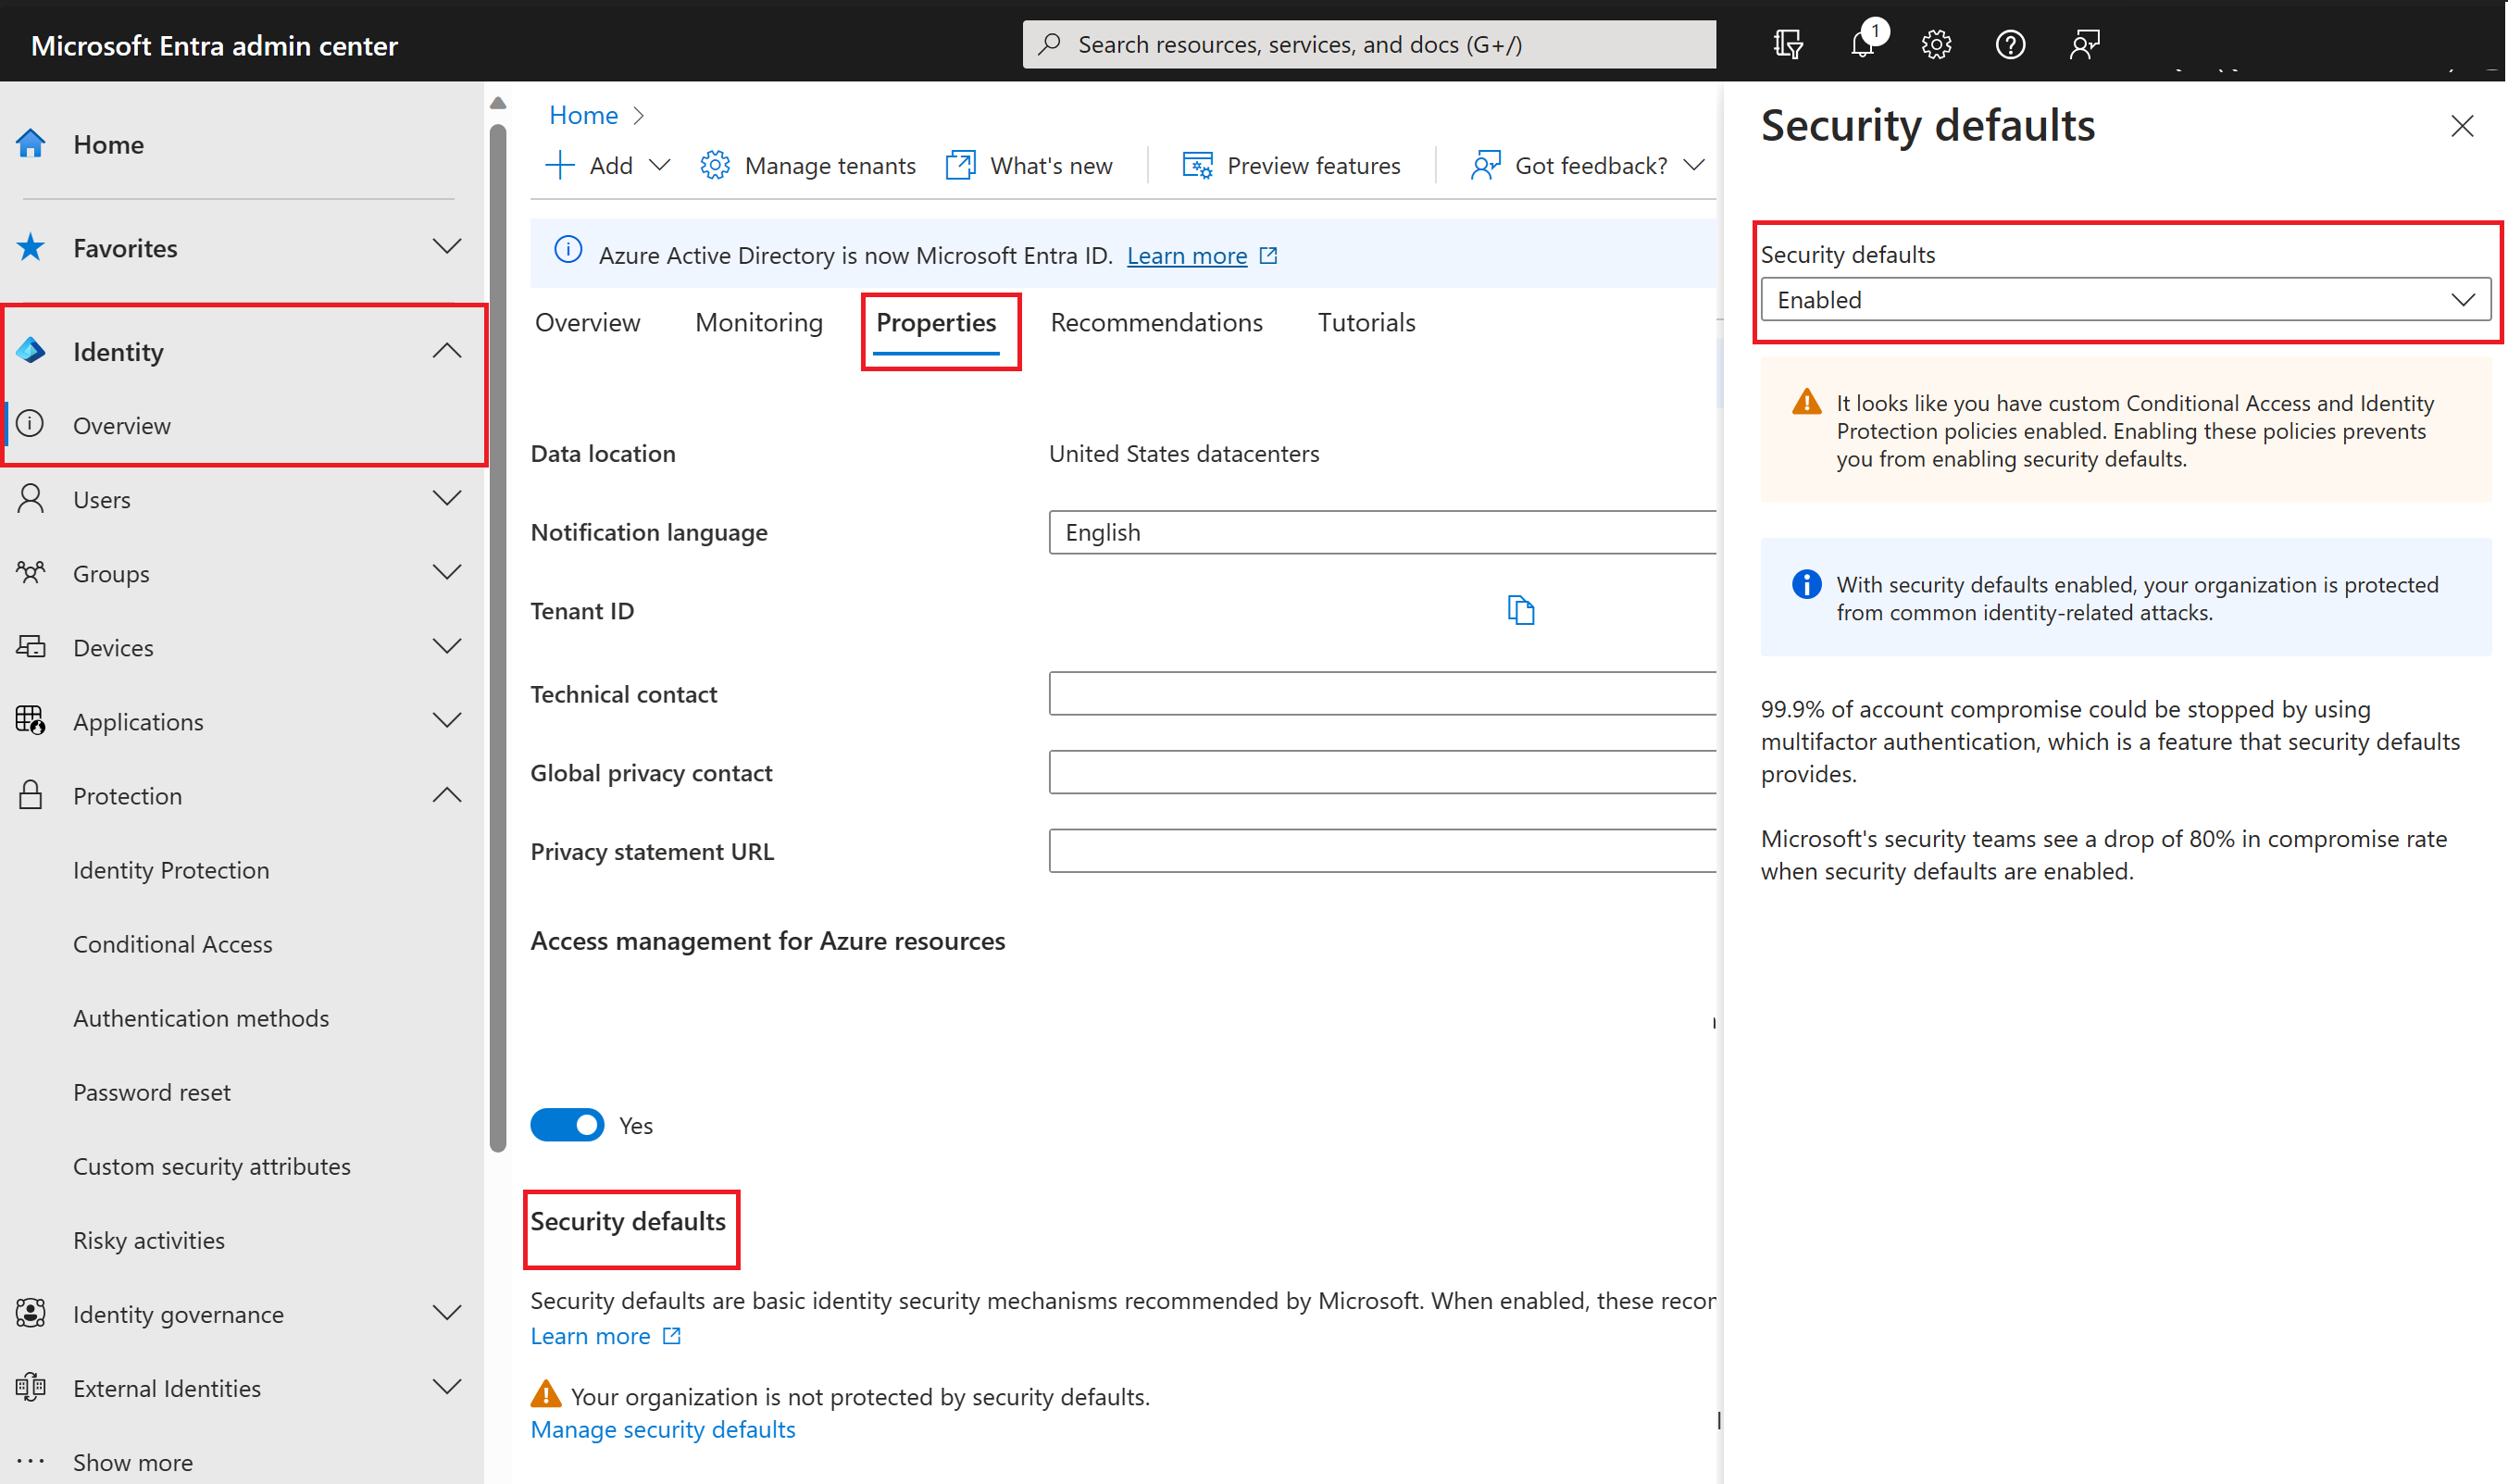
In the left navigation, in the Manage section, select Properties.
At the bottom of the Properties dialog, select Manage Security defaults.
Set the Enable Security defaults toggle to Yes.
Select Save.
Disabling security defaults
Organizations that choose to implement Conditional Access policies that replace security defaults must disable security defaults.
To disable security defaults in your directory:
Browse to the Azure portal and sign in using an Administrator account for the directory.
Select the Show portal menu hamburger icon and then select Microsoft Entra ID.
At the bottom of the Properties dialog, select Manage Security defaults.
Set the Enable security defaults toggle to No.
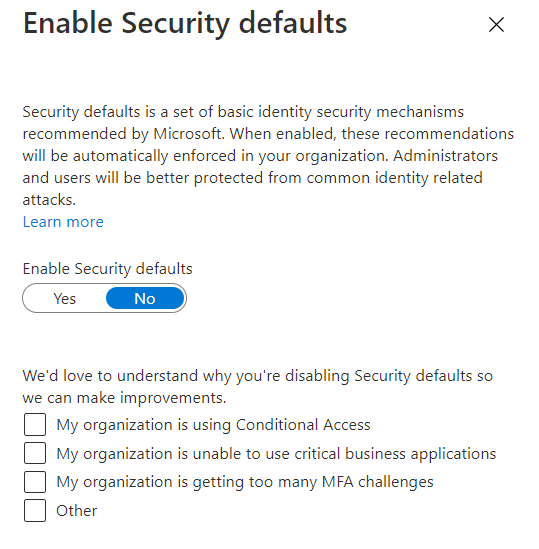
Select Save.
Plan Conditional Access policies
Purpose: Control access to apps and resources based on who, where, what device, and which resource is being used.
How it works: CA analyzes signals like user, device, location to automatically enforce access policies.
Access controls: Can require MFA when needed and stay unobtrusive when not needed.
Flexibility: Security Defaults provide basic protection, but CA allows custom, granular policies tailored to your organization’s needs.
Benefits of Conditional Access:
-
Increase Productivity – Prompt users for MFA or block access only when needed; allow trusted devices seamless access.
-
Manage Risk – Automatically detect and block risky sign-ins; integrates with Identity Protection to respond to suspicious activity.
-
Compliance & Governance – Audit access, enforce terms of use, and restrict based on compliance policies.
-
Cost Management – Reduce reliance on custom or on-premises solutions, lowering infrastructure costs.
-
Support Zero Trust – Helps implement a Zero Trust security model by enforcing access based on conditions.
Conditional Access Policy = If–Then Statement
-
If assignments (conditions) are met → Then apply access controls.
Components:
-
Assignments (Conditions) – Define who, what, and where the policy applies:
-
Users & Groups: Which users, groups, directory roles, or external users are included/excluded?
-
Cloud Apps or Actions: Which apps or user actions are affected?
-
Conditions: Device platforms, locations, or trusted networks.
-
-
Access Controls – Grant or block access, or enforce requirements like:
-
MFA
-
Compliant devices
-
Hybrid Azure AD joined devices
-
-
Session Controls – Manage access within apps, such as:
-
App-enforced permissions
-
Conditional Access App Control
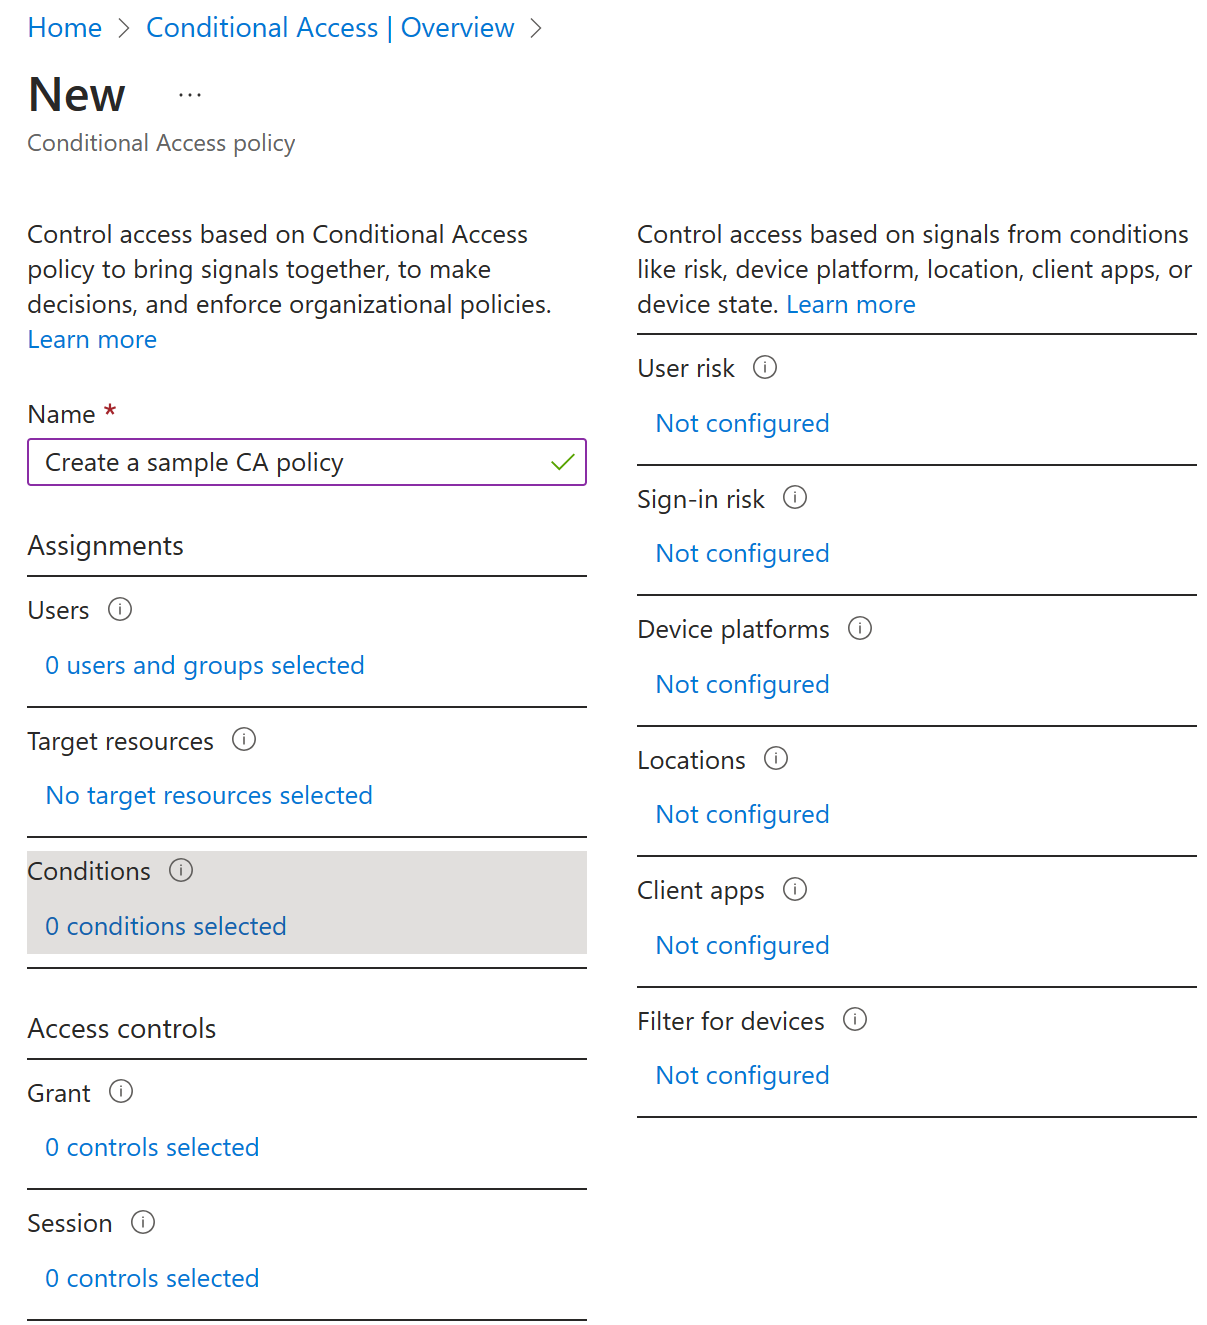
Access token issuance
Allow clients to securely call protected web APIs.
-
Used by APIs for authentication and authorization.
-
Format: Opaque strings (GUIDs, encrypted blobs, etc.), depending on the identity provider.
Example with Conditional Access:
-
IF user is in Group 1 → force MFA to access App 1.
-
IF user is not in Group 1 → the “if” condition is met, and a token is issued.
-
Blocking users outside Group 1 requires a separate policy.
Follow best practices
The CA framework is highly flexible, but this requires careful review of each policy before deployment to avoid unintended consequences.
Set up emergency access accounts
Misconfigured Conditional Access policies can lock admins out of the Azure portal.
Mitigation: Create two or more emergency access accounts to ensure access in emergencies.
Set up report-only mode
It can be difficult to predict the number and names of users affected by common deployment initiatives such as:
- Blocking legacy authentication.
- Requiring MFA.
- Implementing sign-in risk policies.
Report-only mode allows administrators to evaluate the CA policies before enabling them in their environment.
Exclude countries from which you never expect a sign-in
Create named locations for countries where sign-ins are never expected.
Policy: Block access from these locations for all apps.
Exemption: Always exclude administrators to prevent lockout.
Common policies
Require MFA – For admins, specific apps, all users, or untrusted locations.
Respond to Compromised Accounts – Default policies:
-
Require all users to register for MFA
-
Require password changes for high-risk users
-
Require MFA for medium/high sign-in risk
Require Managed Devices – Ensure sensitive resources are accessed only from managed, compliant devices.
Require Approved Client Apps – Protect corporate data in BYOD scenarios by allowing only approved cloud apps.
Block Access – Override other policies to block users, apps, or locations; always exclude emergency access accounts and admins to prevent lockout.
Build & Test CA Policies:
-
Deploy in phases – Start small and verify policy behavior.
-
Communicate changes – Inform end users about new policies.
-
Exclude administrators – Always keep at least one admin account unaffected.
-
Expand gradually – Apply to more users only after successful testing.
-
Full deployment – Apply to all users only when thoroughly validated.
Create test users
Make test users that mirror your production users to verify policies before impacting real users.
Some organizations use test tenants, but reproducing all conditions and apps exactly can be challenging.
Create a test plan
Define expected results before testing policies.
-
Compare expected vs. actual outcomes to ensure policies behave correctly.
-
Use a table of test cases and adjust scenarios based on your CA policy configurations.
| Name of policy | Scenario | Expected result |
|---|---|---|
| Require MFA when working | Authorized user signs into app while on a trusted location / work | User isn't prompted to MFA. User is authorized for access. User is connecting from a trusted location. You could choose to require MFA in this case. |
| Require MFA when working | Authorized user signs into app while not on a trusted location / work | User is prompted to MFA and can sign in successfully |
| Require MFA (for admin) | Global Admin signs into app | Admin is prompted to MFA |
| Risky sign-ins | User signs into app using an unapproved browser | User is prompted to MFA |
| Device management | Authorized user attempts to sign in from an authorized device | Access granted |
| Device management | Authorized user attempts to sign in from an unauthorized device | Access blocked |
| Password change for risky users | Authorized user attempts to sign in with compromised credentials (high risk sign-in) | User is prompted to change password or access is blocked based on your policy |
License requirements
- Free Microsoft Entra ID - No Conditional Access
- Free Office 365 subscription - No Conditional Access
- Microsoft Entra ID Premium 1 (or Microsoft 365 E3 and up) - Conditional access work based on standard rules
- Microsoft Entra ID Premium 2 - Conditional Access, and you get the ability to use Risky sign-in, Risky Users, and risk-based sign-in options as well (from Identity Protection)
Implement Conditional Access policy controls and assignments
Implementing CA Policy Controls & Assignments:
-
Conditional Access in Microsoft Entra ID lets you control who can access resources.
-
Policies can restrict access based on user/group, device type, location, or role.
-
Helps protect applications by applying precise access controls.
Setting up Conditional Access
This is an abbreviated guide to setting up Conditional Access
In the Azure portal, open your Active Directory tenant, then open the Security settings, and select Conditional Access.
In Conditional Access settings, select New policy to create a policy.
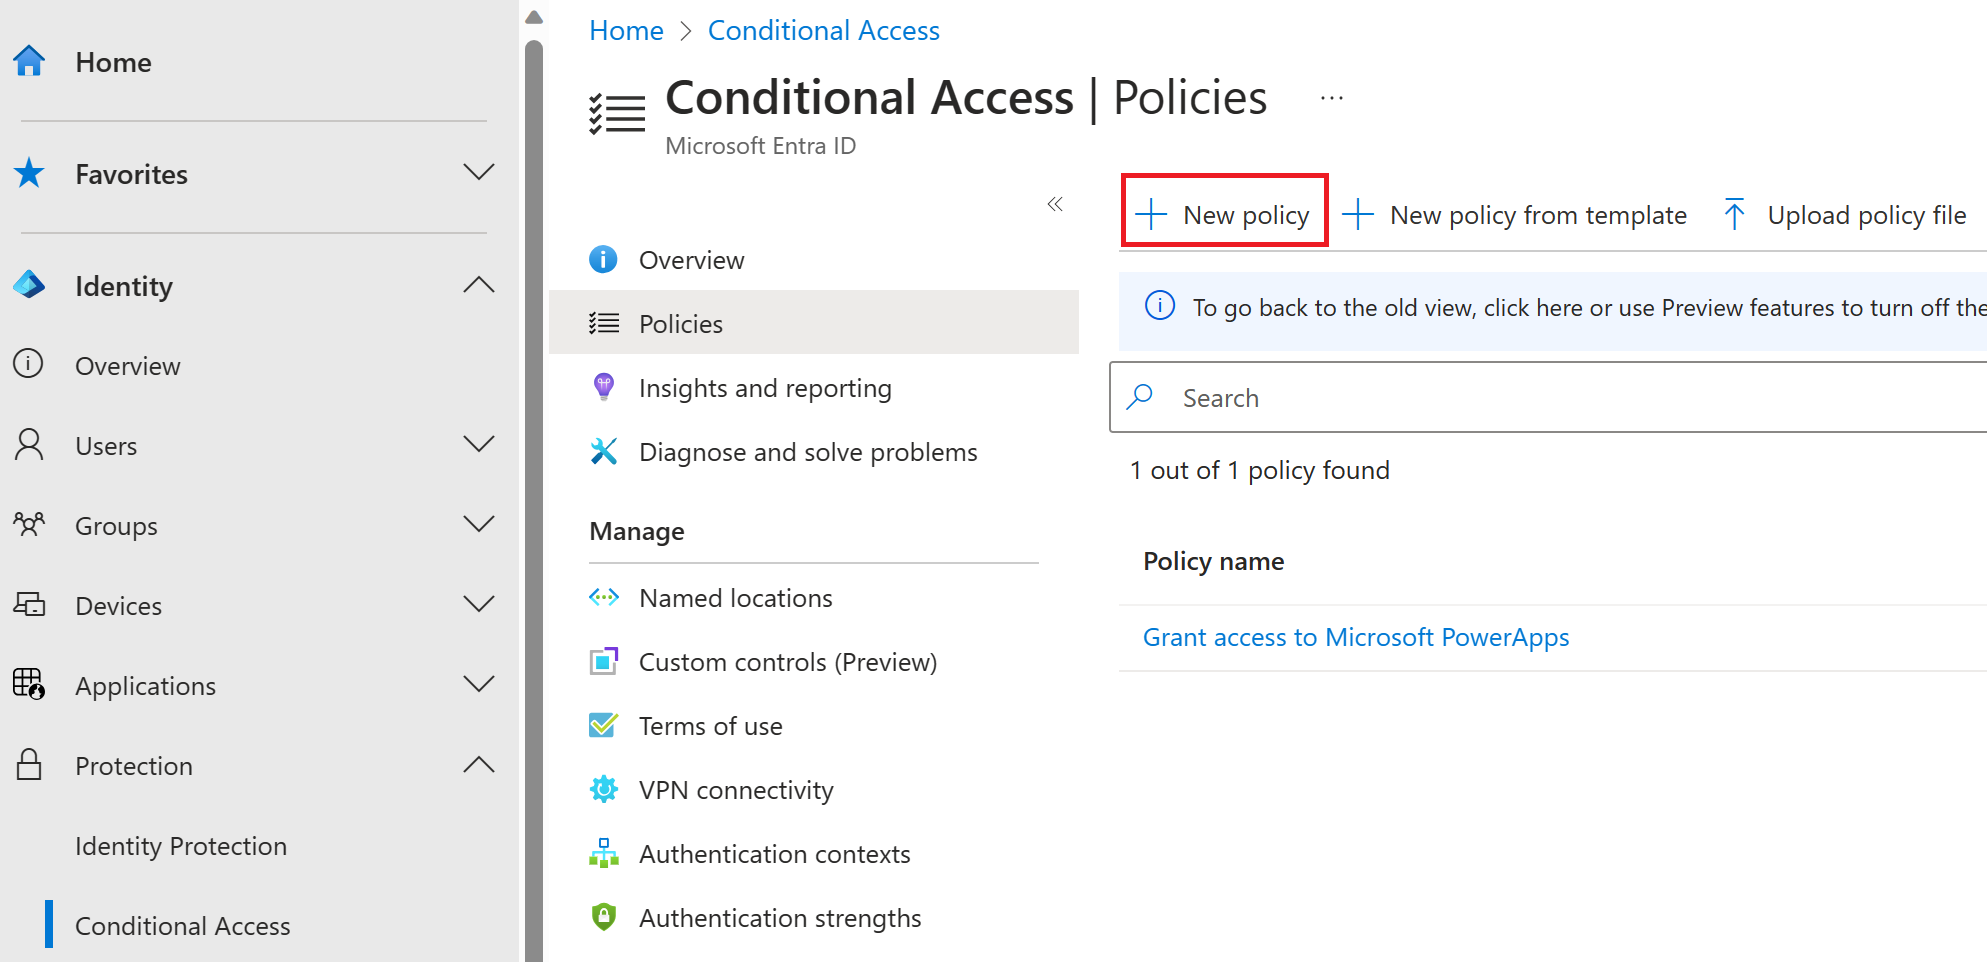
In New policy settings, select Cloud apps or actions and select Visual Studio App Center as the target of the policy. Then select the other conditions that you want to apply, enable the policy, and select Create to save it.
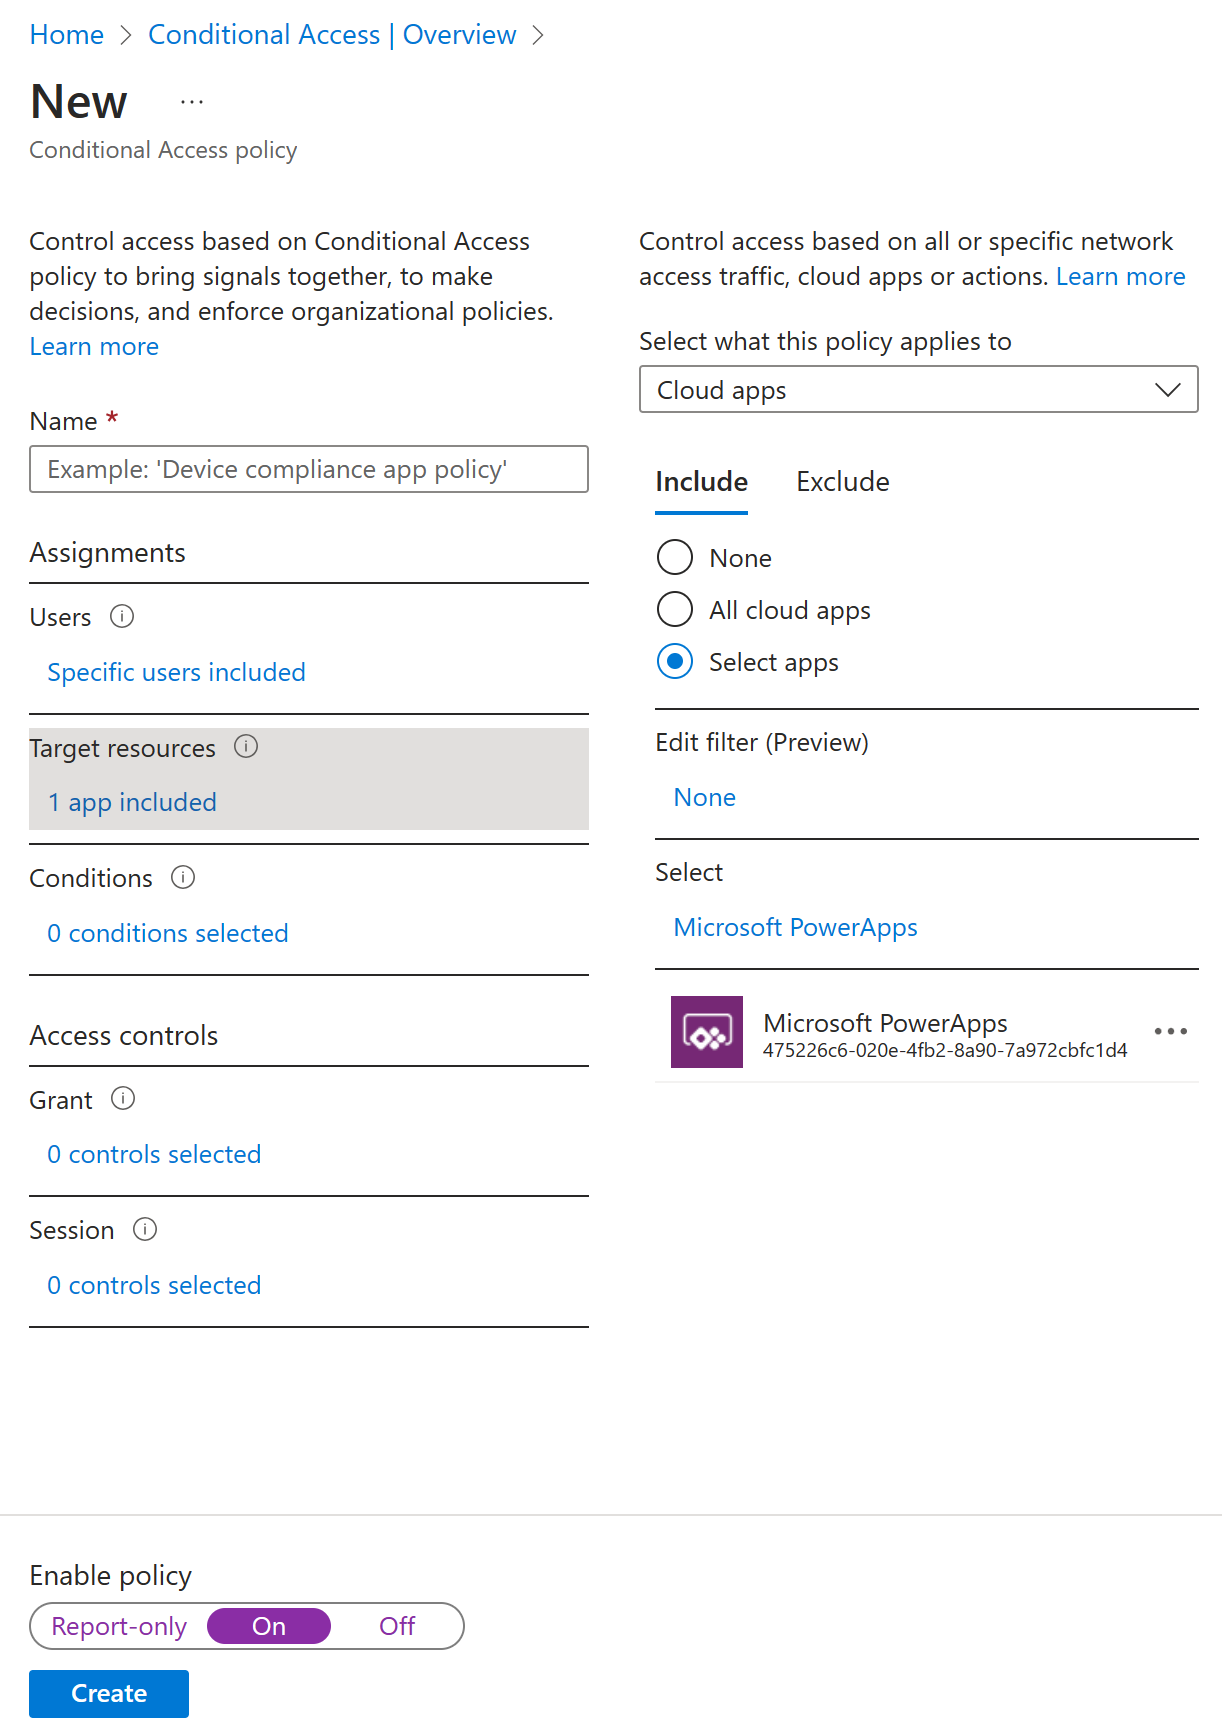
Sign-in risk-based Conditional Access
Tracks users’ normal behavior; deviations indicate potential risk.
High-risk sign-ins can trigger:
-
Block access
-
Require MFA to verify identity
A sign-in risk is the probability that the authentication attempt is not authorized by the identity owner.
Requires Microsoft Entra ID Premium P2 to create policies using Identity Protection.
Policies can be applied via Conditional Access or Identity Protection, e.g., requiring a secure password change for risky sign-ins.
User risk-based Conditional Access
Detects compromised accounts using leaked username/password data collected by Microsoft and trusted sources.
Requires Microsoft Entra ID Premium P2 to create policies using Identity Protection.
Can be applied via Conditional Access or Identity Protection, similar to sign-in risk policies.
Securing security info registration
Controls when and how users register for MFA and self-service password reset (SSPR).
Available as a preview feature in organizations using the combined registration preview.
Allows Conditional Access policies to restrict registration based on conditions, e.g., trusted network location.
Create a policy to require registration from a trusted location
The following policy applies to all selected users who attempt to register using the combined registration experience, and it blocks access unless they are connecting from a location marked as a trusted network.
In the Microsoft Entra admin center, browse to Identity, then Protection, and then Conditional Access.
Select + Create new policy.
In Name, Enter a Name for this policy. For example, Combined Security Info Registration on Trusted Networks.
Under Assignments, select Users and groups, and select the users and groups you want this policy to apply to.
- Under Exclude, select Users and groups and choose your organization's emergency access or break-glass accounts.
- Select Done.
Under Cloud apps or actions, select User actions, check Register security information.
Under Conditions, select Locations.
Configure Yes.
Include Any location.
Exclude All trusted locations.
Select Done on the Locations screen.
Select Done on the Conditions screen.
Under Conditions, in Client apps (Preview), set Configure to Yes, and select Done.
Under Access controls, select Grant.
- Select Block access.
- Then use the Select option.
Set Enable policy to On.
Then select Save.
At step 6 in this policy, organizations have choices they can make. The policy above requires registration from a trusted network location. Organizations can choose to utilize any available conditions in place of Locations. Remember that this policy is a block policy, so anything included is blocked.
You can choose to use device state instead of location in step 6 above:
- Under Conditions, select Device state (Preview).
- Configure Yes.
- Include All device state.
- Exclude Device Hybrid Microsoft Entra joined and/or Device marked as compliant.
- Select Done on the Locations screen.
- Select Done on the Conditions screen.
Block access by location
Use location conditions in Conditional Access to control access based on a user’s network location.
Commonly used to block access from countries or regions where your organization doesn’t expect traffic.
Define locations
Sign in to the Microsoft Entra admin portal as a Security Administrator, or Conditional Access Administrator.
Browse to Identity, then Protection, then Conditional Access, and then Named locations.
Choose New location.
Give your location a name.
Choose IP ranges if you know the specific externally accessible IPv4 address ranges that make up that location or Countries/Regions.
- Provide the IP ranges or select the Countries/Regions for the location you are specifying.
- If you choose Countries/Regions, you can optionally choose to include unknown areas.
Choose Save.
Create a Conditional Access policy
Sign in to the Microsoft Entra admin center as a Security Administrator, or Conditional Access Administrator.
Browse to Identity, then Protection, and then Conditional Access.
Select + Create new policy.
Give your policy a name. We recommend that organizations create a meaningful standard for the names of their policies.
Under Assignments, select Users and groups.
- Under Include, select All users.
- Under Exclude, select Users and groups and choose your organization's emergency access or break-glass accounts.
- Select Done.
Under Cloud apps or actions, then Include, and select All cloud apps.
Under Conditions, then Location.
- Set Configure to Yes.
- Under Include, select Selected locations.
- Select the blocked location you created for your organization.
- Choose Select.
Under Access controls, then select Block Access, and select Select.
Confirm your settings and set Enable policy to On.
Select Create to create Conditional Access Policy.
Require compliant devices
Organizations that have deployed Microsoft Intune can use the information returned from their devices to identify devices that meet compliance requirements, such as:
- Requiring a PIN to unlock.
- Requiring device encryption.
- Requiring a minimum or maximum operating system version.
- Requiring a device is not jailbroken or rooted.
This policy compliance information is forwarded to Microsoft Entra ID where Conditional Access can make decisions to grant or block access to resources.
Create a Conditional Access policy
The following steps will help create a Conditional Access policy to require devices accessing resources be marked as compliant with your organization's Intune compliance policies.
Sign in to the Microsoft Entra admin center as a Security Administrator, or Conditional Access Administrator.
Browse to Identity, then Protection, and then Conditional Access.
Select + Create new policy.
Give your policy a name. We recommend that organizations create a meaningful standard for the names of their policies.
Under Assignments, select Users and groups.
- Under Include, select All users.
- Under Exclude, select Users and groups and choose your organization's emergency access or break-glass accounts.
- Select Done.
Under Cloud apps or actions, then Include, and select All cloud apps.
- If you must exclude specific applications from your policy, you can choose them from the Exclude tab under Select excluded cloud apps and choose Select.
- Select Done.
Under Conditions, then Client apps (Preview), then Select the client apps this policy will apply to, leave all defaults selected and select Done.
Under Access controls, then Grant, select Require device to be marked as compliant.
Select Select.
Confirm your settings and set Enable policy to On.
Select Create to create to enable your policy.
Note
You can enroll your new devices to Intune even if you select Require device to be marked as compliant for All users and All cloud apps using the steps above. Require device to be marked as compliant control does not block Intune enrollment.
Known behavior
Device Identification in Entra ID:
-
On Windows 7, iOS, Android, macOS, and some browsers, devices are identified via a client certificate provisioned during device registration.
-
First sign-in: User is prompted to select the certificate before accessing resources through the browser.
Block access
Purpose: Used to block all access, often in conservative cloud migration scenarios.
Warning: Misconfiguration can lock admins out of the Azure portal.
Best Practices:
Thorough testing and validation before enabling
Use CA report-only mode and What If tool to evaluate effects
User exclusions
Emergency access / break-glass accounts: Prevent tenant-wide lockout; always keep these accounts unaffected.
Service accounts & service principals: Non-interactive accounts (e.g., Entra Connect Sync) cannot perform MFA; exclude them from policies.
Recommendation: Consider replacing service accounts with managed identities; temporary exclusions are allowed if needed.
Conditional Access Terms of Use (TOU)
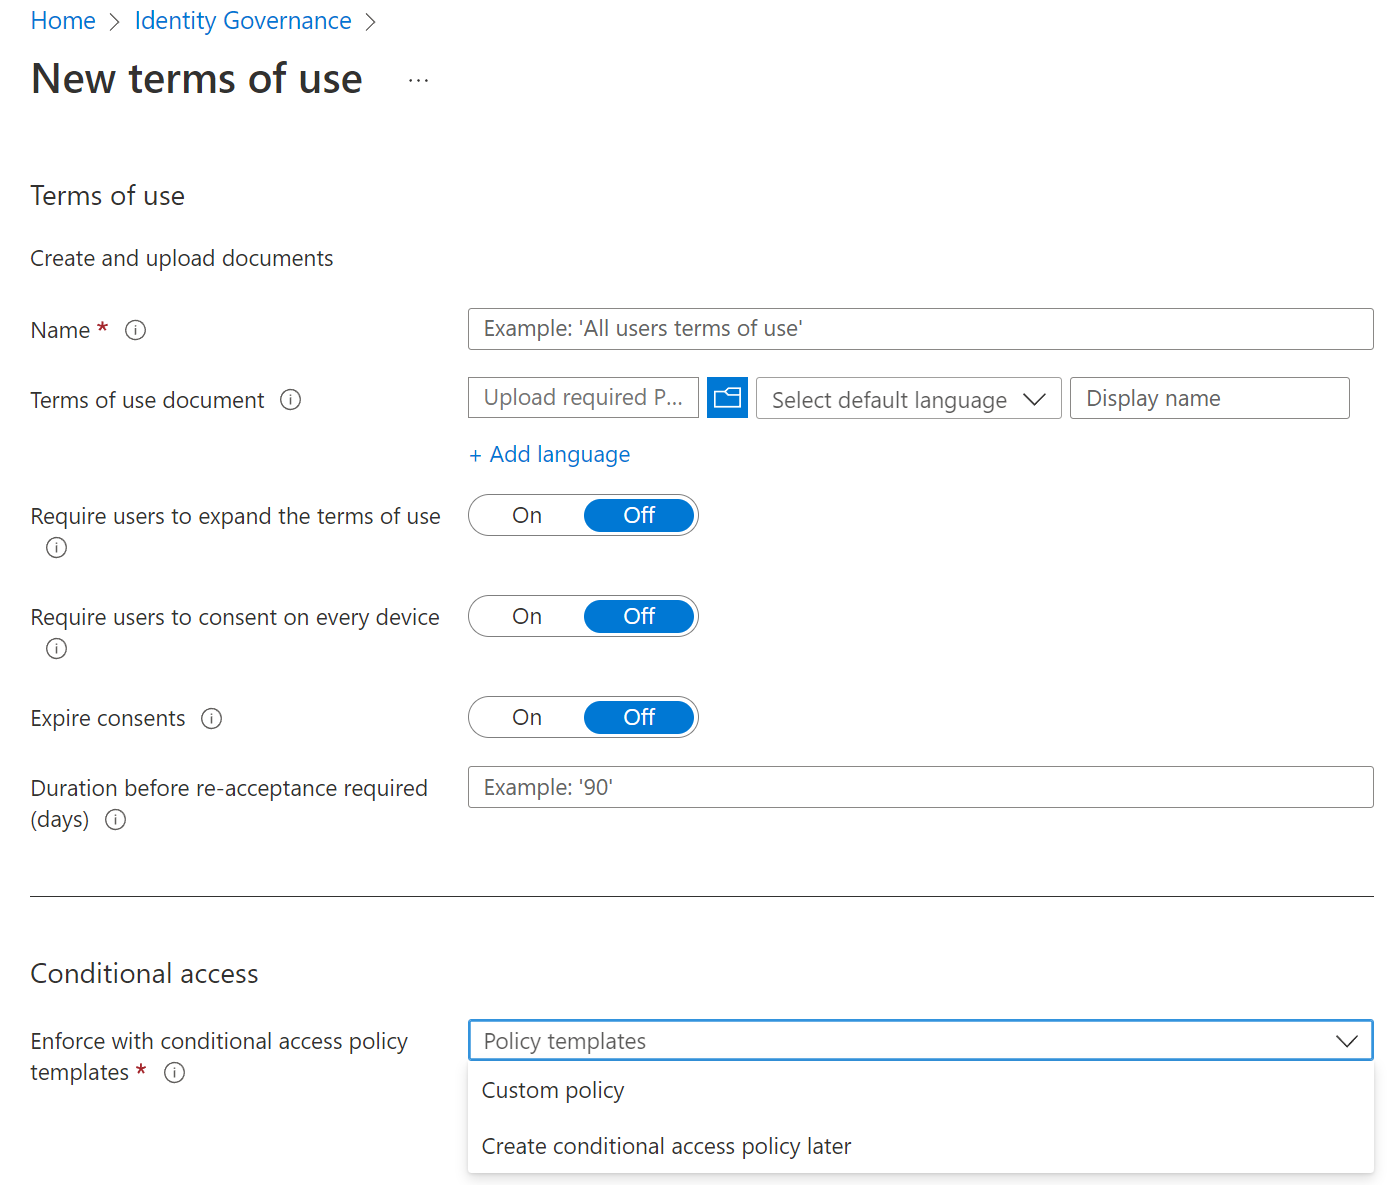
Create TOU in Identity Governance by uploading a PDF of your terms.
Configure rules like expiration and mandatory opening before acceptance.
TOU can be applied via custom conditional rules or Conditional Access policies in Entra ID.
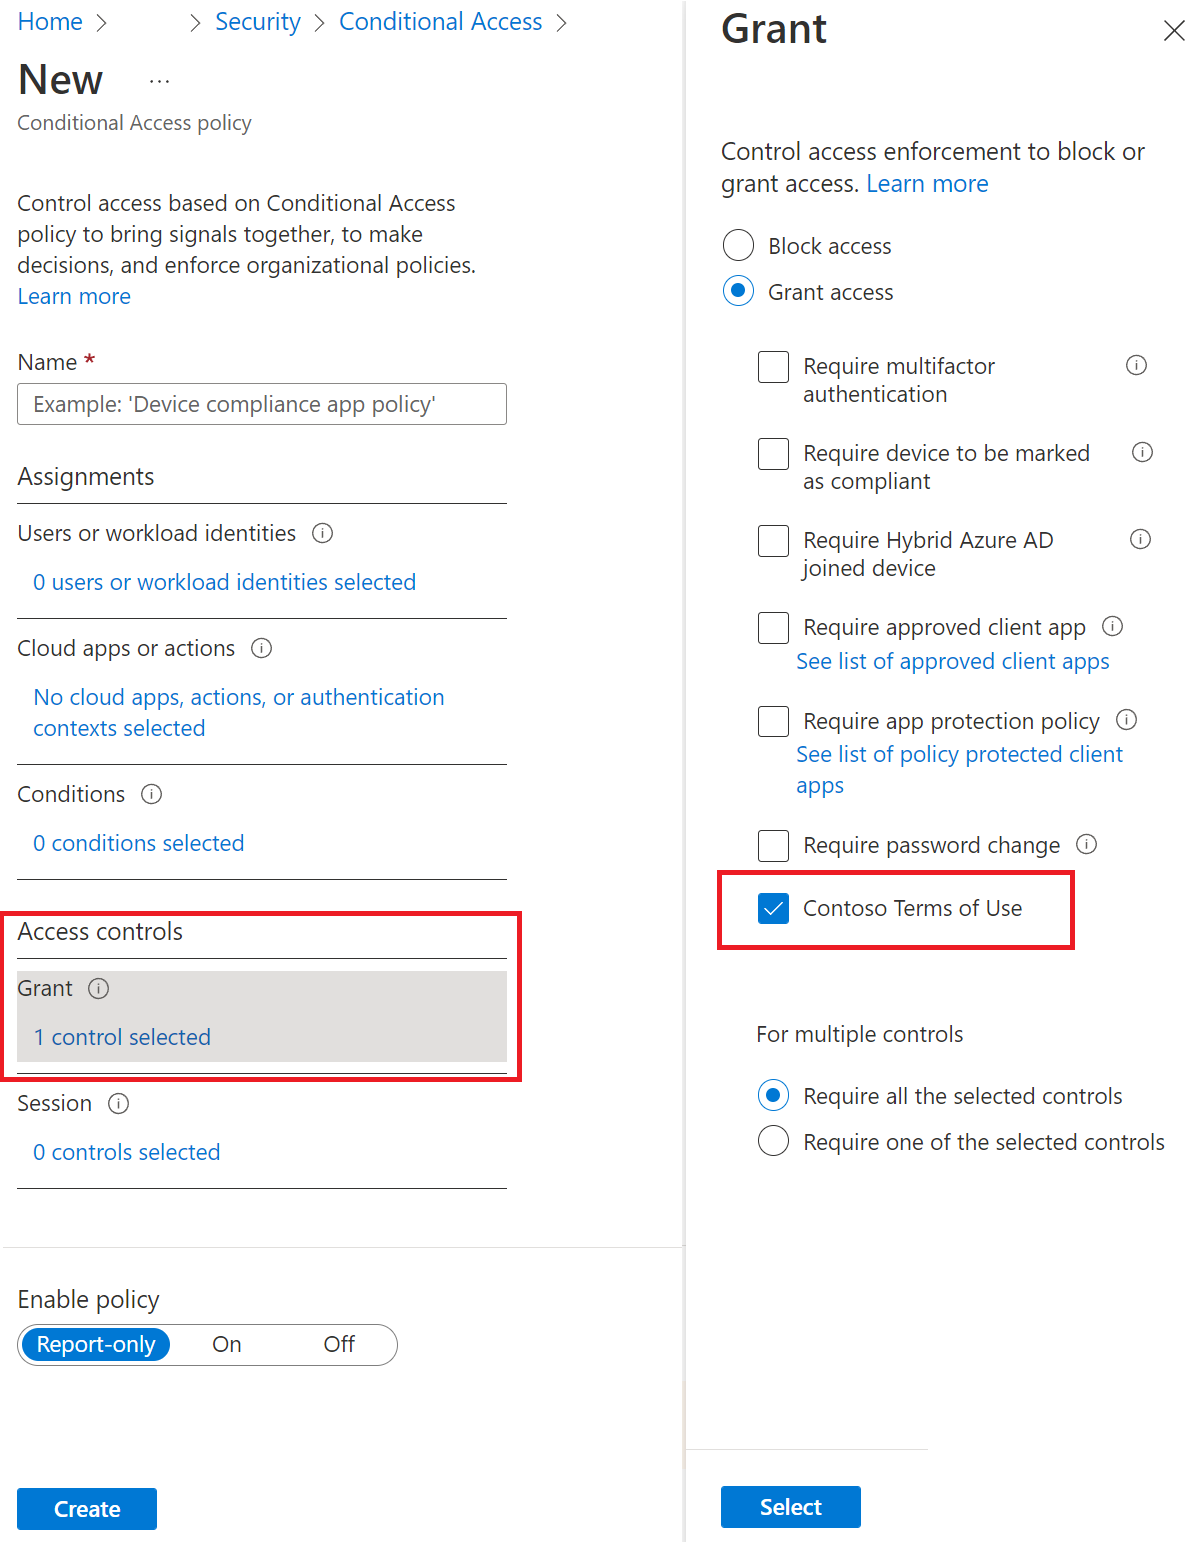
Terms of Use & Conditional Access:
-
Organizations can require users to accept TOU before accessing certain cloud apps.
-
TOU consent can be expired or updated, prompting users to re-attest.
-
Entra Conditional Access allows:
-
Easy TOU configuration
-
Enforcing TOU acceptance via CA policies
Exercise - Implement Conditional Access policies roles and assignments
Sign in to the Microsoft Entra admin center using a Global administrator account.
Open the portal menu and then select Identity.
Then select Protection.
On the Security blade, in the left navigation, select Conditional access.
On the top menu, select + Create new policy.
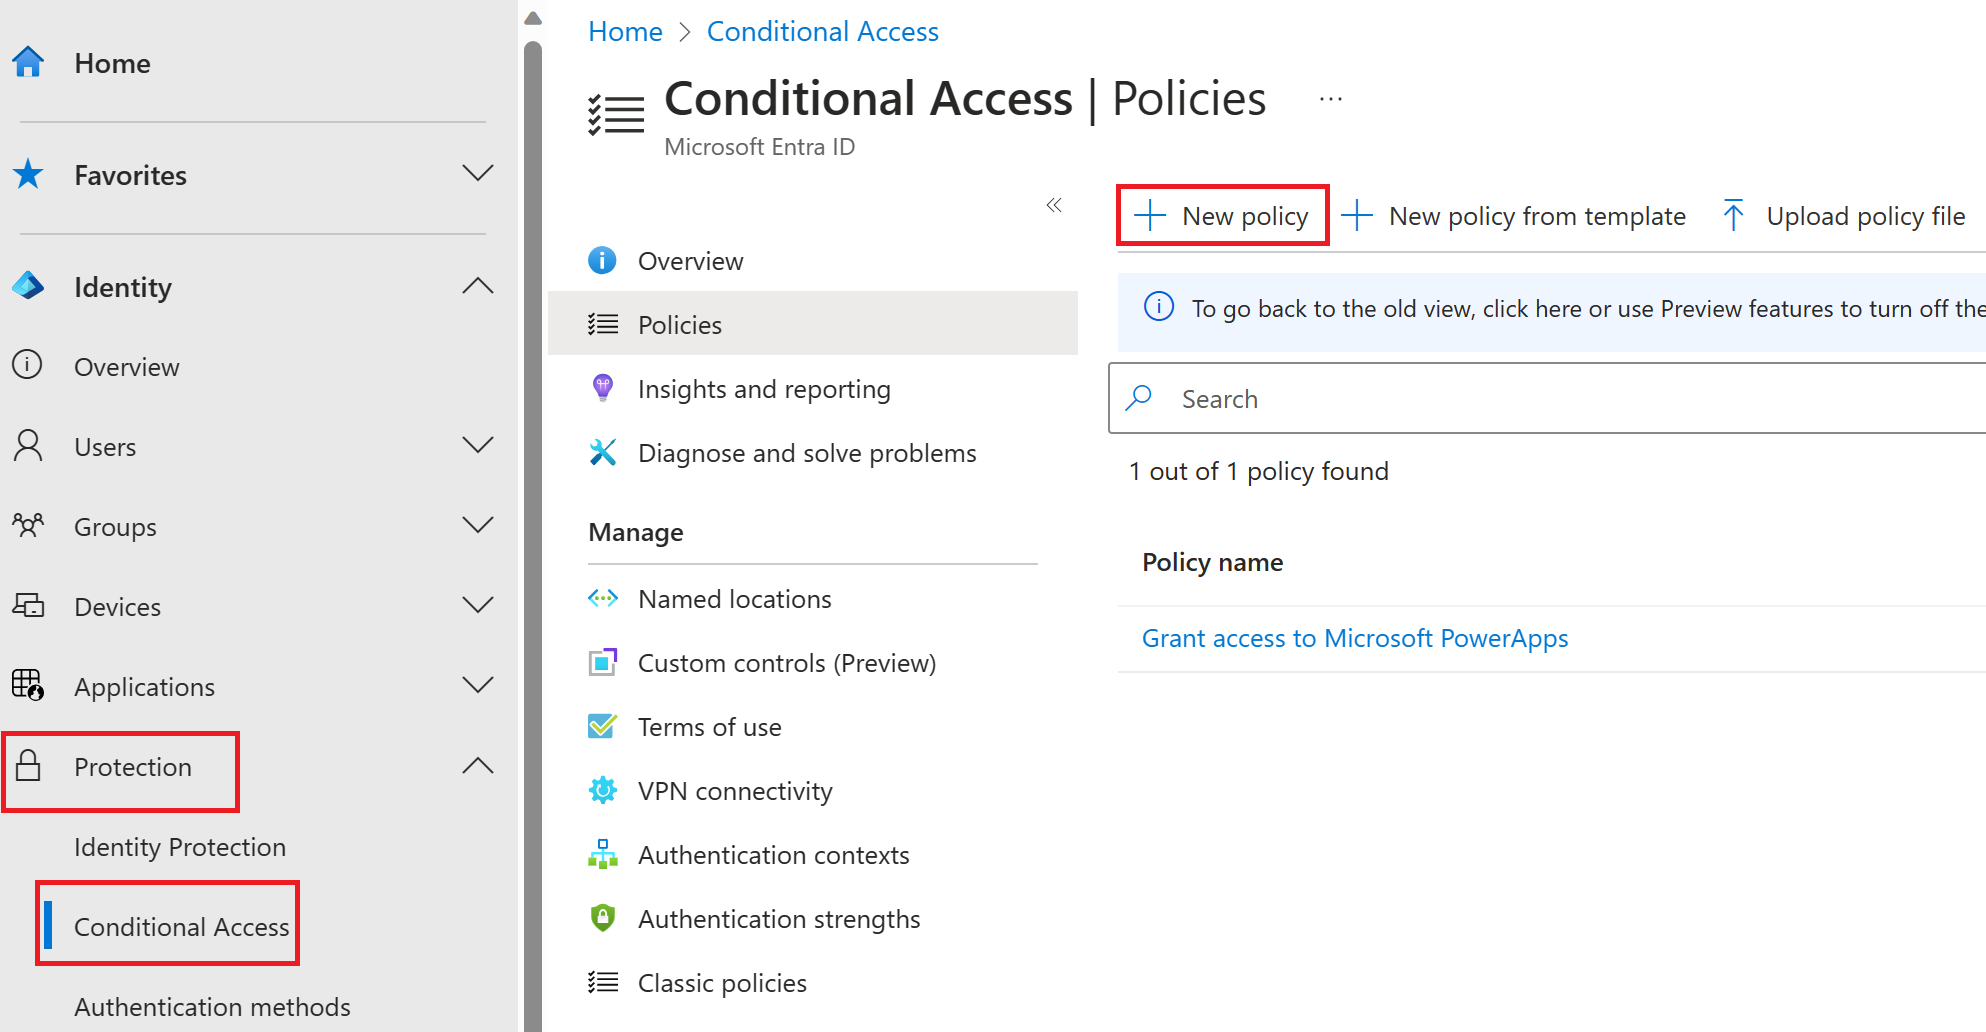
In the Name box, enter Test app conditional access. This is the name being using for this exercise, you can choose another name if you wish.
Under Assignments, select Users and groups.
On the Include tab, select the Users and groups check box.
In the Select pane, select your administrator account and then select Select.
Select Cloud apps or actions.
Verify Cloud apps is selected and then select Select apps.
In the Select pane, select My apps and then select Select.
Select Conditions and then select Locations.
Under Configure, select Yes and then select Any location.
Under Access controls, select Grant.
In the Grant pane, select Block access and then select Select.
Important
This policy is being configured for the exercise only and is being used to quickly demonstrate a conditional access policy.
- Under Enable policy, select On, and then select Create.
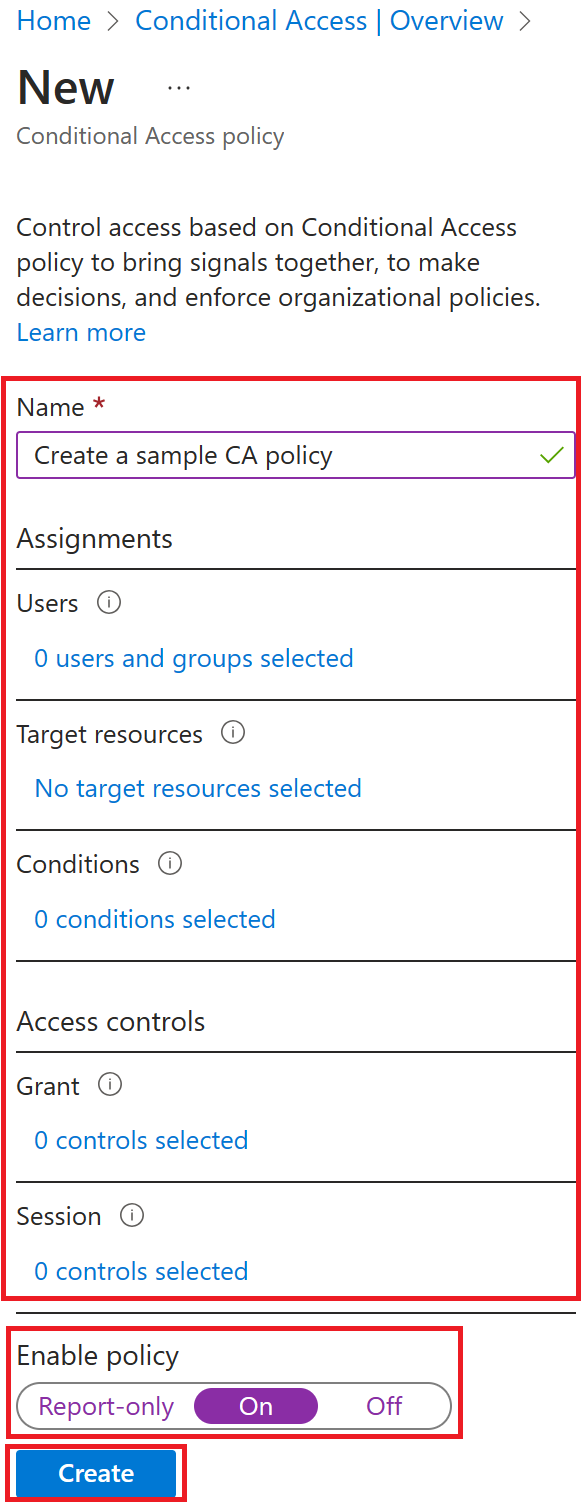
Test the conditional access policy
You should test your conditional access policies to ensure they working as expected.
Open a new browser tab and then browse to https://myapps.microsoft.com.
Your credentials should be passed through.
Verify you are prevented from successfully accessing your My Apps page.
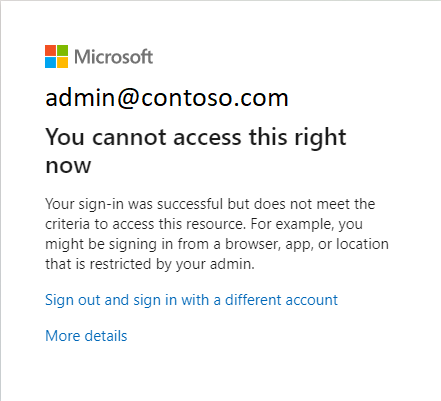
Note
If you are signed in, close the tab, wait 1-2 minutes, and then retry.
Close the tab and return to the Conditional Access blade.
Select the Test app conditional access policy.
Under Enable policy, select Off and then select Save.
Conditional Access sign-in interrupt
The first way is to review the error message that appears. For problems signing in when using a web browser, the error page itself has detailed information. This information alone describes what the problem is and suggests a solution.
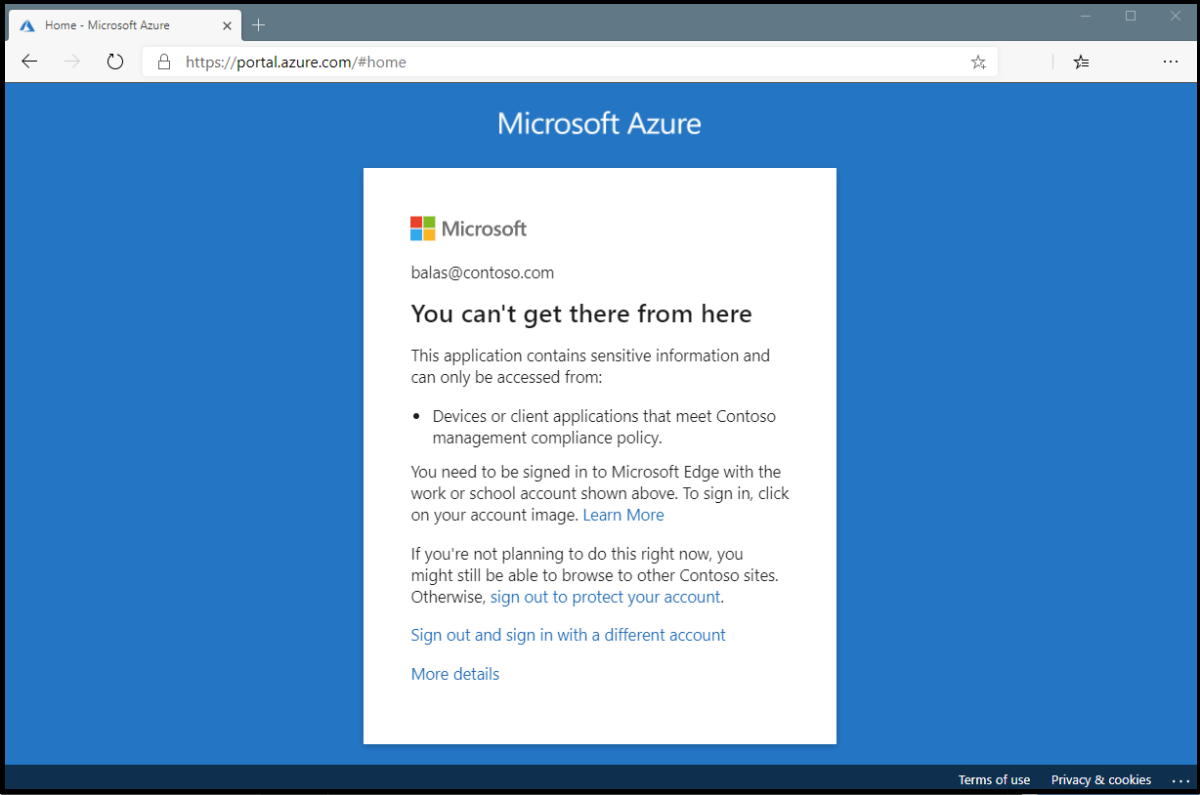
In the above error, the message states that the application can only be accessed from devices or client applications that meet the company's mobile device management policy. In this case, the application and device don't meet that policy.
Microsoft Entra sign-in events
Microsoft Entra sign-in events provide detailed insights into sign-in issues by showing which Conditional Access policies were applied and why. You can click “More Details” on the error page to view troubleshooting information, which helps identify the specific failure event or assist in resolving the issue with Microsoft support.
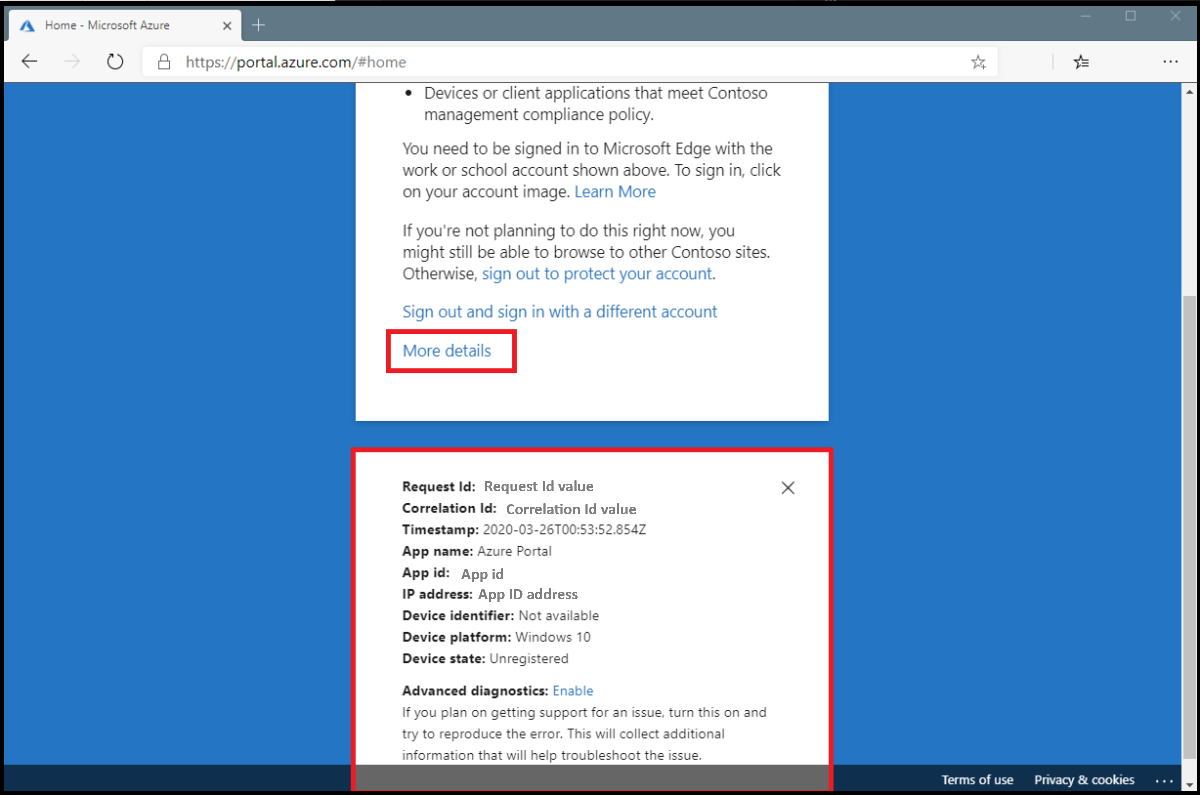
To find out which Conditional Access policy or policies applied and why, do the following steps:
Sign into the Microsoft Entra admin center as a Security Administrator, or Global Reader.
Browse to Identity - Monitoring and Health, then Sign-ins.
Find the event for the sign-in to review. Add or remove filters and columns to filter out unnecessary information.
Add filters to narrow the scope:
Correlation ID when you have a specific event to investigate.
Conditional access to see policy failure and success. Scope your filter to show only failures to limit results.
Username to see information related to specific users.
Date scoped to the time frame in question.
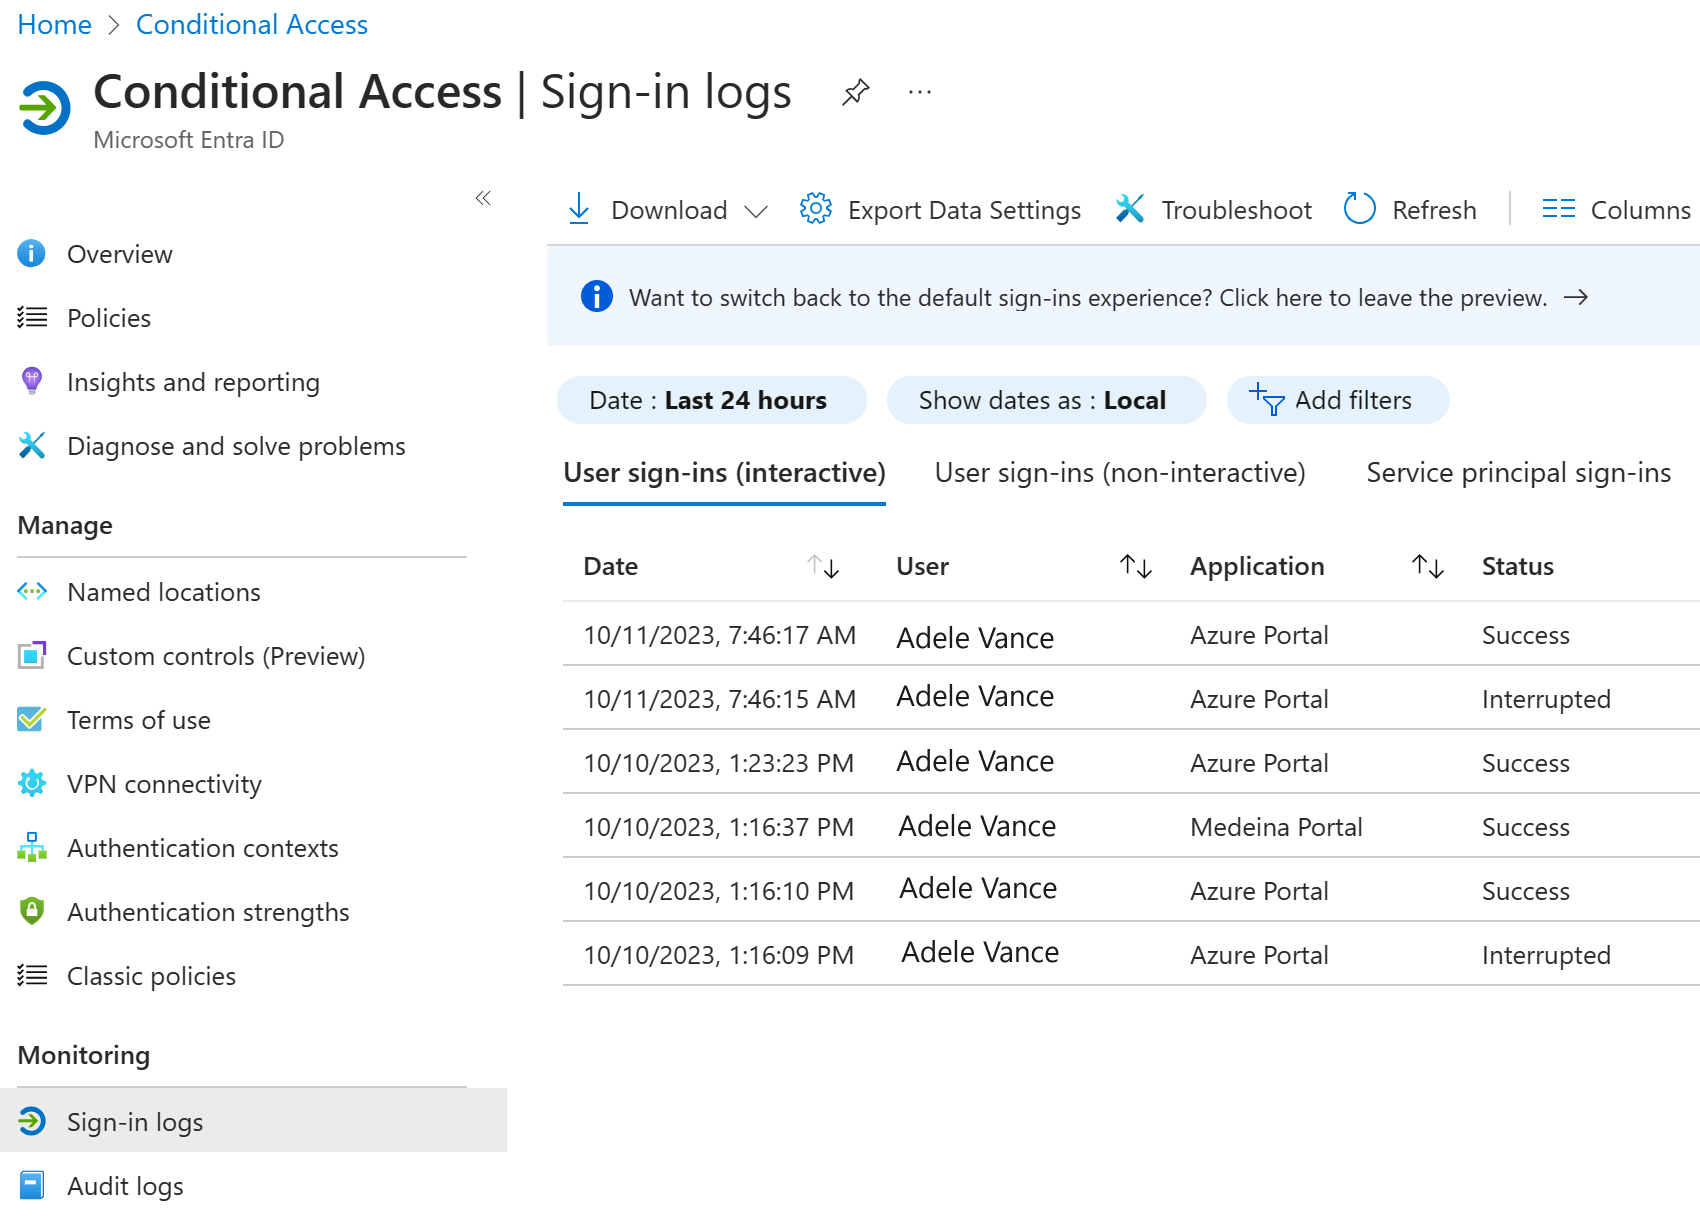
Once the sign-in event that corresponds to the user's sign-in failure has been found select the Conditional Access tab, the tab will show the specific policy or policies that resulted in the sign-in interruption.
- Information in the Troubleshooting and support tab provides a clear reason as to why a sign-in failed, such as a device that didn't meet compliance requirements.
- To investigate further, drill down into the configuration of the policies by clicking on the Policy Name. Clicking the Policy Name will show the policy configuration user interface for the selected policy for review and editing.
- The client user and device details that were used for the Conditional Access policy assessment are also available in the Basic Info, Location, Device Info, Authentication Details, and Additional Details tabs of the sign-in event.
Policy details
Selecting the ellipsis on the right side of the policy in a sign-in event brings up policy details. This gives administrators additional information about why a policy was successfully applied or not.
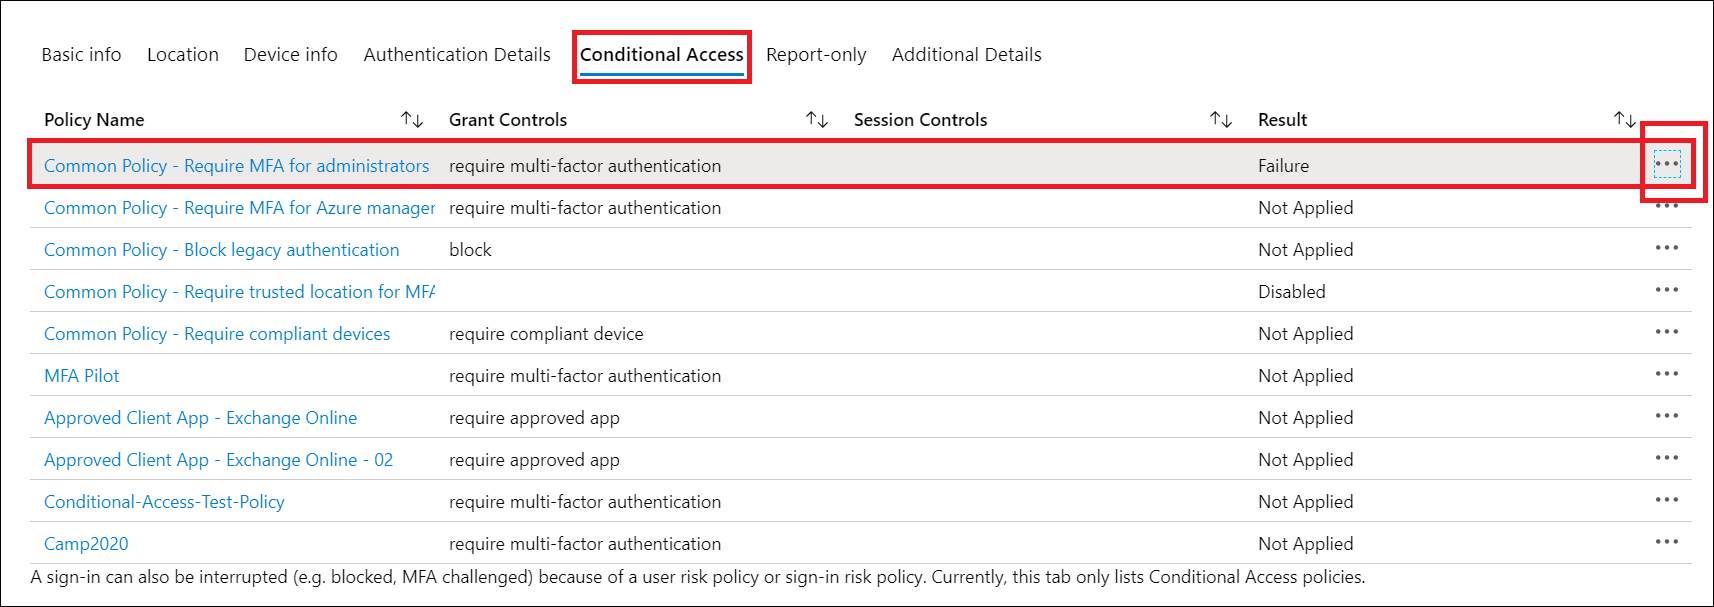
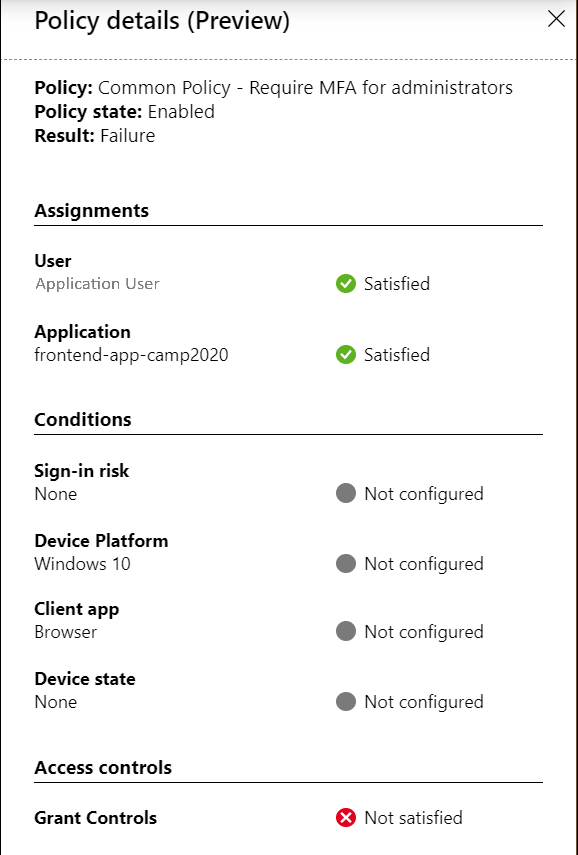
The left side provides details collected at sign-in, and the right side provides details of whether those details satisfy the requirements of the applied Conditional Access policies. Conditional Access policies only apply when all conditions are satisfied or not configured.
If the information in the event isn't enough to understand the sign-in results or adjust the policy to get desired results, then a support incident can be opened. Navigate to that sign-in event's Troubleshooting and support tab and select Create a new support request.
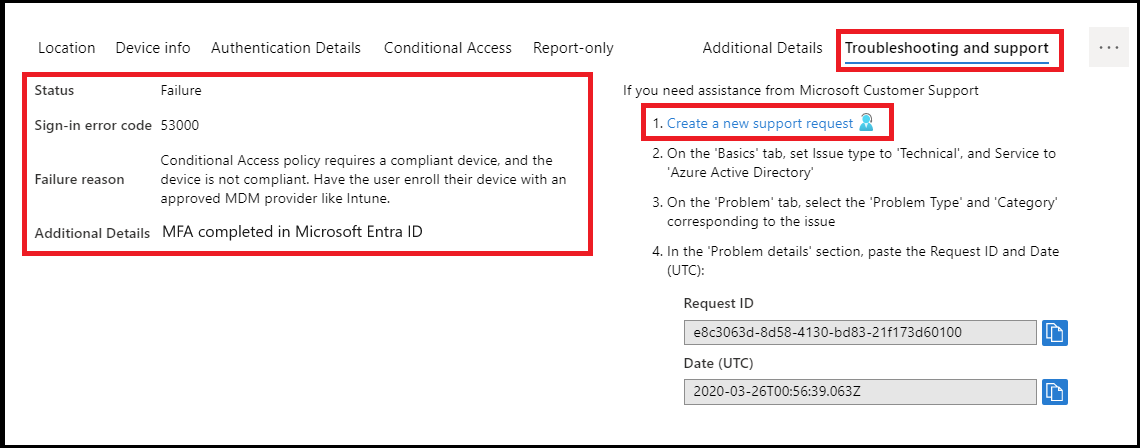
When submitting the incident, provide the request ID and time and date from the sign-in event in the incident submission details. This information will allow Microsoft support to find the event you're concerned about.
Implement application controls
Conditional Access App Control enables user app access and sessions to be monitored and controlled in real time based on access and session policies. Access and session policies are used within the Microsoft Defender for Cloud Apps portal to further refine filters and set actions to be taken on a user.
Conditional Access App Control
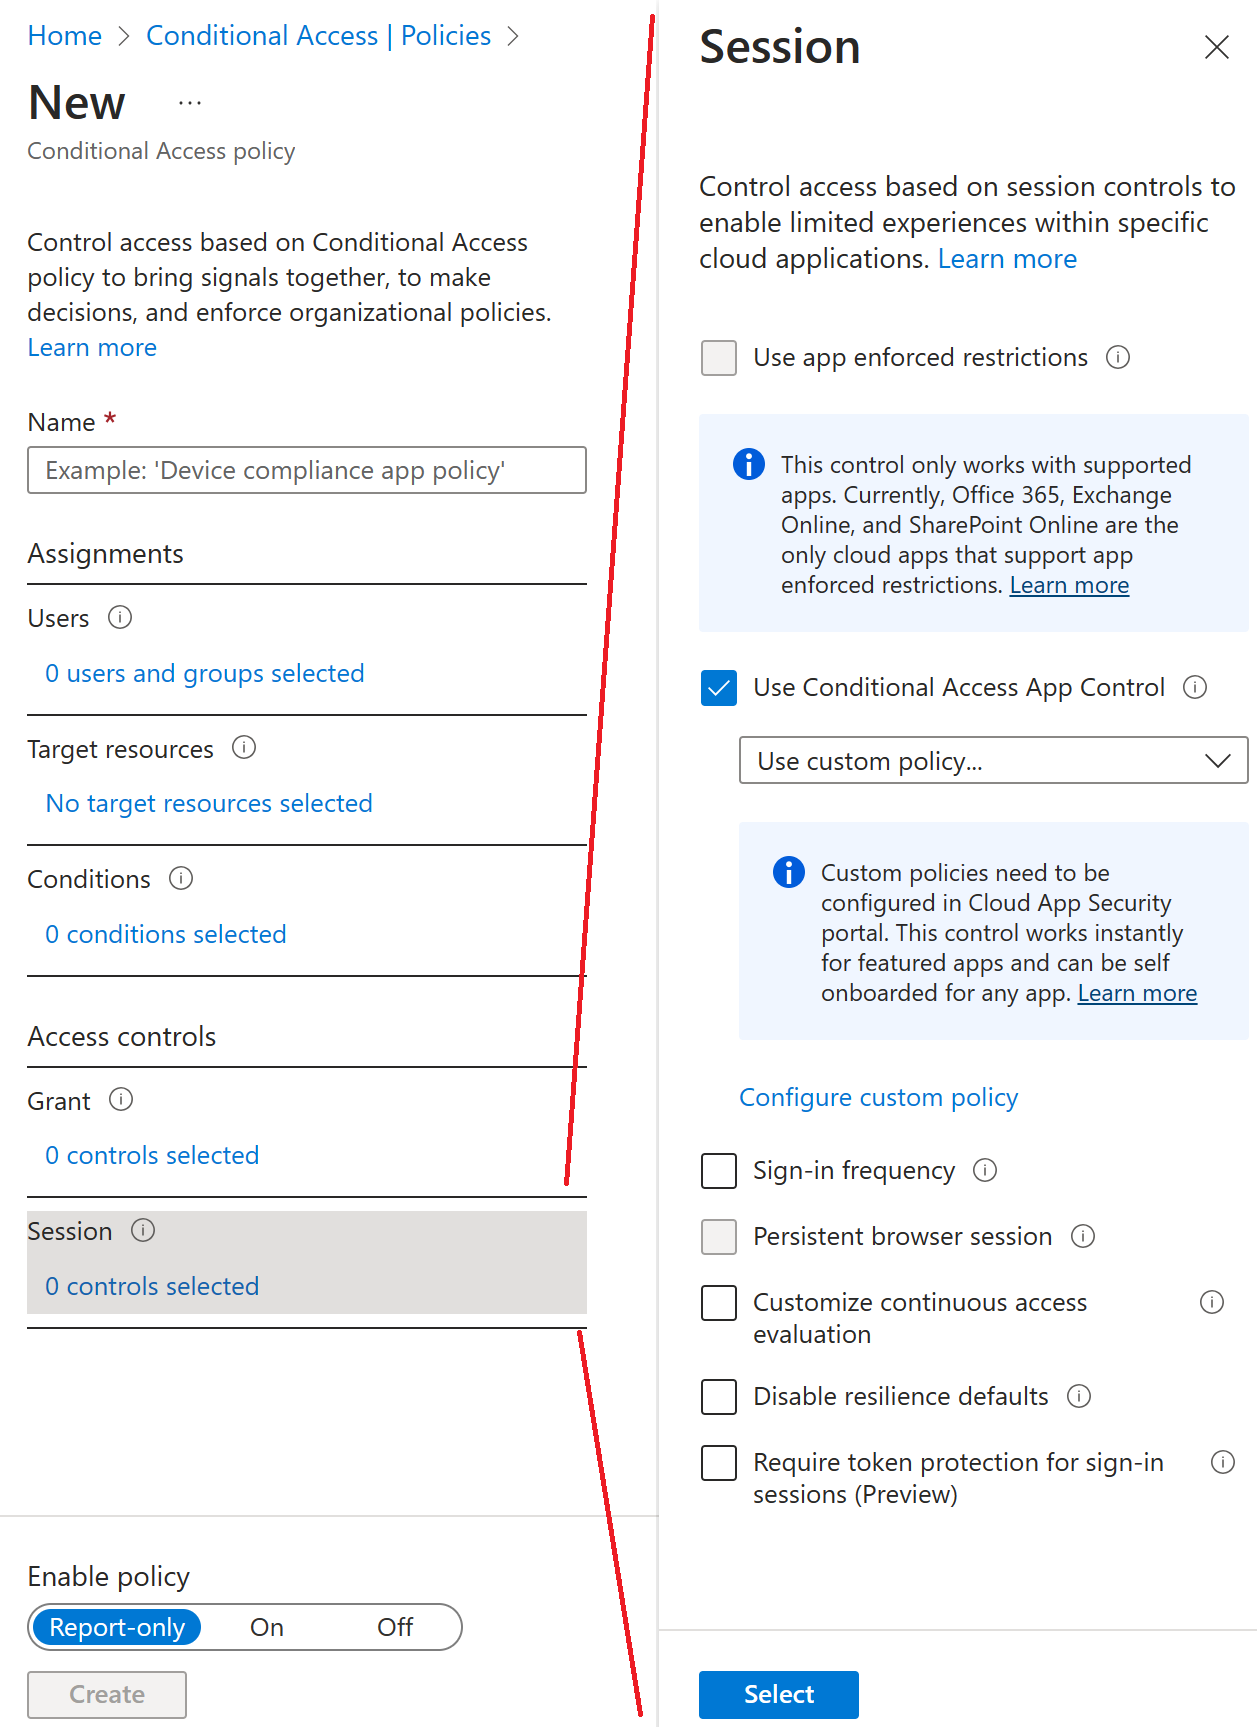
Conditional Access App Control, integrated with Microsoft Entra Conditional Access and Microsoft Defender for Cloud Apps, uses a reverse proxy architecture to enforce real-time access and session controls on cloud apps. It helps protect sensitive data by applying policies that:
-
Prevent data exfiltration by blocking downloads, copy, or print actions on unmanaged devices.
-
Protect on download by labeling and securing files with Azure Information Protection.
-
Prevent upload of unlabeled files to ensure sensitive data is properly classified before sharing.
-
Monitor user sessions to detect and analyze risky behaviors.
-
Block access or custom activities based on user risk, app type, or sensitive content.
This approach enhances data protection, compliance, and security during user sessions in cloud applications.
How to: Require app protection policy and an approved client app for cloud app access with Conditional Access
People regularly use their mobile devices for both personal and work tasks. While making sure staff can be productive, organizations also want to prevent data loss from potentially unsecure applications. With Conditional Access, organizations can restrict access to approved (modern authentication-capable) client apps.
This section presents two scenarios to configure Conditional Access policies for resources like Microsoft 365, Exchange Online, and SharePoint Online.
Note
In order to require approved client apps for iOS and Android devices, these devices must first register in Microsoft Entra ID.
Scenario 1: Microsoft 365 apps require an approved client app
In this scenario, Contoso has decided that users using mobile devices can access all Microsoft 365 services as long as they use approved client apps, like Outlook mobile, OneDrive, and Microsoft Teams. All of their users already sign in with Microsoft Entra credentials and have licenses assigned to them that include Microsoft Entra ID Premium P1 or P2 and Microsoft Intune.
Organizations must complete the following three steps in order to require the use of an approved client app on mobile devices.
Step 1: Policy for Android and iOS based modern authentication clients requiring the use of an approved client application when accessing Exchange Online.
Sign in to the Microsoft Entra admin center as a Security Administrator, or Conditional Access Administrator.
Browse to Identity, then Protection, and then Conditional Access.
Select +Create new policy.
Give your policy a name. We recommend that organizations create a meaningful standard for the names of their policies.
Under Assignments, select Users and groups.
- Under Include, select All users or the specific Users and groups you wish to apply this policy to.
- Select Done.
Under Cloud apps or actions, then Include, select Office 365.
Under Conditions, select Device platforms.
- Set Configure to Yes.
- Include Android and iOS.
Under Conditions, select Client apps (preview).
Set Configure to Yes.
Select Mobile apps and desktop clients and Modern authentication clients.
Under Access controls, then Grant, select Grant access, Require approved client app, and select Select.
Confirm your settings and set Enable policy to On.
Select Create to create and enable your policy.
Step 2: Configure an Microsoft Entra Conditional Access policy for Exchange Online with ActiveSync (EAS).
Browse to Identity, then Protection, and then Conditional Access.
Select +Create new policy.
Give your policy a name. We recommend that organizations create a meaningful standard for the names of their policies.
Under Assignments, select Users and groups.
- Under Include, select All users or the specific Users and groups you wish to apply this policy to.
- Select Done.
Under Cloud apps or actions, then Include, select Office 365 Exchange Online.
Under Conditions:
Client apps (preview):
- Set Configure to Yes.
- Select Mobile apps and desktop clients and Exchange ActiveSync clients.
Under Access controls, then Grant, select Grant access, Require approved client app, and select Select.
Confirm your settings and set Enable policy to On.
Select Create to create and enable your policy.
Step 3: Configure Intune app protection policy for iOS and Android client applications.
Review the article How to create and assign app protection policies for steps to create app protection policies for Android and iOS.
Scenario 2: Exchange Online and SharePoint Online require an approved client app
In this scenario, Contoso has decided that users can only access email and SharePoint data on mobile devices as long as they use an approved client app like Outlook mobile. All of their users already sign in with Microsoft Entra credentials and have licenses assigned to them that include Microsoft Entra ID Premium P1 or P2 and Microsoft Intune.
Organizations must complete the following three steps in order to require the use of an approved client app on mobile devices and Exchange ActiveSync clients.
Step 1: Policy for Android and iOS based modern authentication clients requiring the use of an approved client application when accessing Exchange Online and SharePoint Online.
Sign in to the Microsoft Entra admin center as a Security Administrator, or Conditional Access Administrator.
Browse to Identity, then Protection, and then Conditional Access.
Select New policy.
Give your policy a name. We recommend that organizations create a meaningful standard for the names of their policies.
Under Assignments, select Users and groups.
- Under Include, select All users or the specific Users and groups you wish to apply this policy to.
- Select Done.
Under Cloud apps or actions, then Include, select Office 365 Exchange Online and Office 365 SharePoint Online.
Under Conditions, select Device platforms.
- Set Configure to Yes.
- Include Android and iOS.
Under Conditions, select Client apps (preview).
- Set Configure to Yes.
- Select Mobile apps and desktop clients and Modern authentication clients.
Under Access controls, then Grant, select Grant access, Require approved client app, and select Select.
Confirm your settings and set Enable policy to On.
Select Create to create and enable your policy.
Step 2: Policy for Exchange ActiveSync clients requiring the use of an approved client app.
Browse to Identity, then Protection, and then Conditional Access.
Select New policy.
Give your policy a name. We recommend that organizations create a meaningful standard for the names of their policies.
Under Assignments, select Users and groups.
- Under Include, select All users or the specific Users and groups you wish to apply this policy to.
- Select Done.
Under Cloud apps or actions, then Include, select Office 365 Exchange Online.
Under Conditions:
Client apps (preview):
- Set Configure to Yes.
- Select Mobile apps and desktop clients and Exchange ActiveSync clients.
Under Access controls, then Grant, select Grant access, Require approved client app, and select Select.
Confirm your settings and set Enable policy to On.
Select Create to create and enable your policy.
Step 3: Configure Intune app protection policy for iOS and Android client applications.
Review the article How to create and assign app protection policies for steps to create app protection policies for Android and iOS.
App protection policies overview
App Protection Policies (APP) are rules that keep an organization’s data secure within managed applications. These policies control how users access, share, or handle corporate data inside apps. Managed through Intune, they can enforce restrictions or monitor actions.
Using Mobile Application Management (MAM) — including MAM without enrollment (MAM-WE) — organizations can protect sensitive data in apps even on personal (BYOD) devices. Common apps like Microsoft Office can be managed this way to ensure data remains protected across different devices.
How you can protect app data
You can protect app data by using Intune App Protection Policies (APP), which safeguard company data on both managed and unmanaged devices. These policies work independently of mobile device management (MDM), allowing organizations to prevent data loss while ensuring employee productivity. By applying app-level restrictions, IT can control access to corporate resources and keep sensitive data secure, even on personal (BYOD) devices.
App protection policies on devices
App protection policies (APP) can be applied to apps on devices that are:
-
Enrolled in Microsoft Intune (corporate-owned),
-
Enrolled in third-party MDM solutions (corporate-owned), or
-
Not enrolled in any MDM (typically employee-owned BYOD devices).
These policies help protect company data across different device types.
-
They should not be combined with third-party mobile app management or secure container solutions.
-
You can apply APPs to Office mobile apps accessing Microsoft 365 or Exchange on-premises (via hybrid Modern Authentication).
-
However, APPs aren’t supported for apps connecting to on-premises Exchange or SharePoint directly.
Benefits of using app protection policies
App Protection Policies (APP) offer several key benefits for securing company data while maintaining user productivity:
-
App-level data protection: Safeguards corporate data within apps on both managed and unmanaged devices, without requiring full device management.
-
User-focused management: Policies are based on user identity, allowing data protection without affecting personal apps or data.
-
Work-only enforcement: Policies apply only in the work context, ensuring personal use remains unaffected.
-
Enhanced app-layer security: Options include requiring a PIN to access apps, controlling data sharing between apps, and preventing data from being saved to personal storage.
-
Flexible deployment with MDM: Combining Mobile Device Management (MDM) and Mobile Application Management (MAM) strengthens security—allowing different policy levels for company and personal devices.
-
Granular policy control: Organizations can apply stricter policies to non-managed (BYOD) devices and more relaxed ones to Intune-managed devices, depending on security needs.
Implement session management and continuous access evaluation
In complex deployments, organizations might have a need to restrict authentication sessions. Some scenarios might include:
- Resource access from an unmanaged or shared device.
- Access to sensitive information from an external network.
- High priority or executive users.
- Critical business applications.
Conditional Access controls allow you to create policies that target specific use cases within your organization without affecting all users.
Before diving into details on how to configure the policy, let’s examine the default configuration.
User sign-in frequency
User sign-in frequency determines how often a user must re-authenticate when accessing a resource. By default, Microsoft Entra ID uses a 90-day rolling window, meaning users aren’t repeatedly asked to sign in unless a security event occurs (e.g., password change, non-compliant device, or account disable). This reduces the risk of credential fatigue and accidental exposure.
The setting works with apps using OAuth2, OIDC, and many SAML-based apps that rely on Microsoft Entra ID for authentication, including:
-
Office Online apps (Word, Excel, PowerPoint, OneNote)
-
Office.com & Microsoft 365 Admin portal
-
Exchange Online, SharePoint, OneDrive
-
Teams web client, Dynamics CRM Online
-
Azure portal
User sign-in frequency and multifactor authentication
For Microsoft Entra joined, Hybrid Entra joined, or Entra-registered devices, interactive sign-ins or device unlocks count toward the sign-in frequency policy.
-
Example 1: If sign-in frequency is set to 1 hour, continuous work on a device triggers a prompt after 1 hour.
-
Example 2: If the user locks and then unlocks the device, the policy resets based on the last interactive sign-in (unlock), prompting re-authentication 1 hour later.
This ensures that the policy adapts to both active use and device unlock events.
Persistence of browsing sessions
Persistent browser sessions let users stay signed in after closing and reopening their browser. By default, Microsoft Entra ID prompts users on personal devices with a “Stay signed in?” option after authentication, letting them choose whether to maintain the session.
Validation
Use the What-If tool to simulate a sign-in from the user to the target application and other conditions based on how you configured your policy. The authentication session management controls show up in the result of the tool.
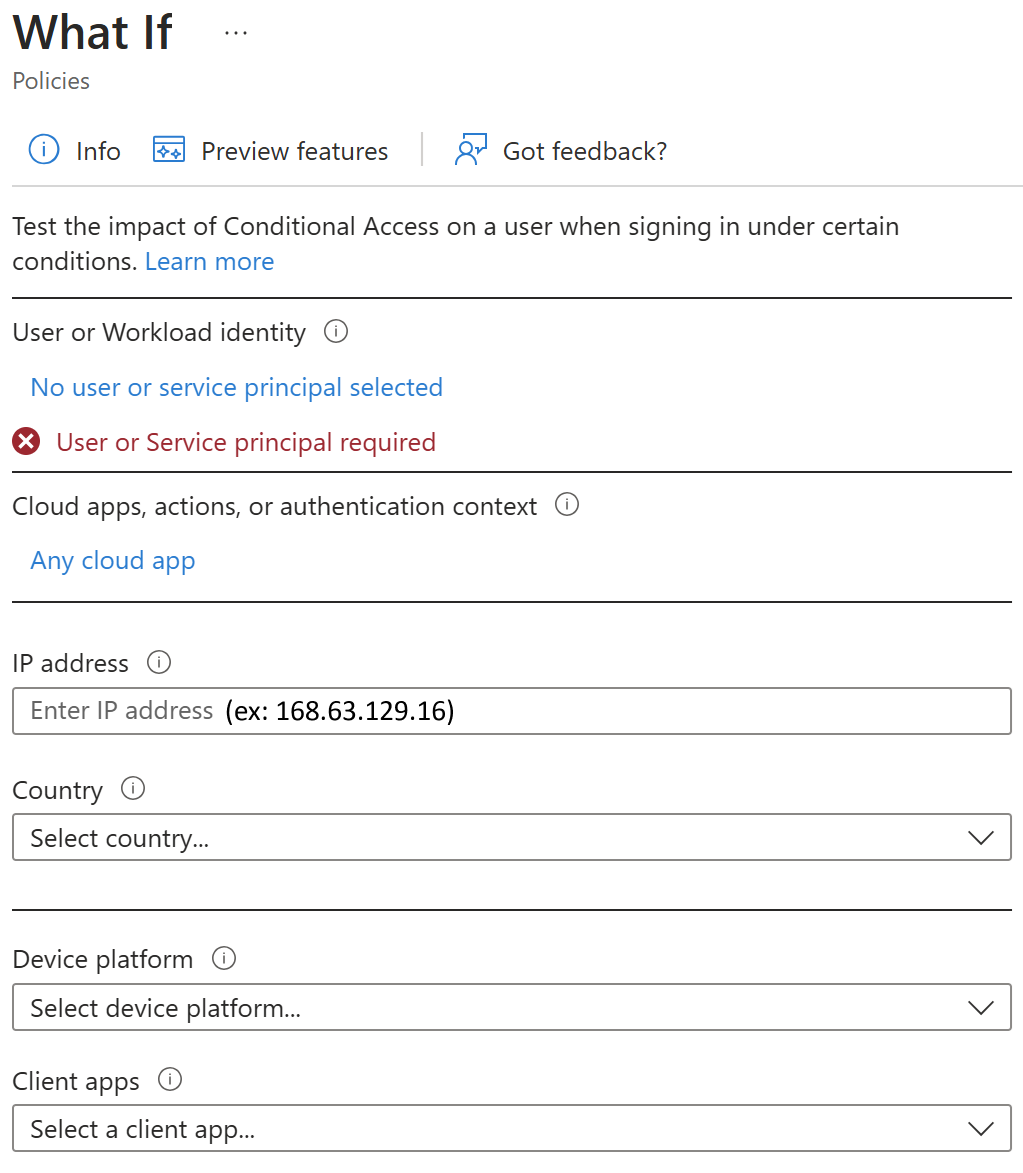
Policy deployment
To make sure that your policy works as expected, the recommended best practice is to test it before rolling it out into production. Ideally, use a test tenant to verify whether your new policy works as intended.
Continuous Access Evaluation (CAE)
Continuous Access Evaluation (CAE) enhances security by allowing real-time enforcement of Conditional Access policies. Unlike standard token refresh cycles (typically one hour), CAE enables a “conversation” between the token issuer (Microsoft Entra ID) and the client app (e.g., Outlook) to immediately respond to security changes, such as account disablement, compromise, or policy violations.
This ensures timely revocation or adjustment of access without waiting for the standard token expiration.
Benefits
There are several key benefits to continuous access evaluation.
User termination or password change/reset: User session revocation will be enforced in near real time.
Network location change: Conditional Access location policies will be enforced in near real time.
Token export to a machine outside of a trusted network can be prevented with Conditional Access location policies.
Evaluation and revocation process flow
Continuous Access Evaluation (CAE) – Token Revocation Flow:
-
A CAE-capable client requests an access token from Microsoft Entra ID using credentials or a refresh token.
-
Microsoft Entra ID returns the access token and related artifacts.
-
An administrator revokes all refresh tokens for the user; Microsoft Entra ID notifies the resource provider.
-
The client presents the access token to the resource provider, which checks for revocation events and token validity.
-
If the token is invalid, the resource provider responds with a 401 + claim challenge.
-
The CAE-capable client interprets the challenge, bypasses caches, and sends the refresh token plus challenge back to Microsoft Entra ID.
-
Microsoft Entra ID reevaluates all conditions and prompts the user to reauthenticate if required.
This flow ensures immediate enforcement of access changes without waiting for standard token expiration.
Exercise - Configure authentication session controls
- 10 minutes
In this exercise you will configure sign in frequency controls using a conditional access policy.
- Sign in to the Microsoft Entra admin center using an Administrator account.
- Open the portal menu and then select Identity.
- On the Identity menu, then select Protection.
- On the Protection menu, select Conditional access.
- On the top menu, select New policy.
- In the Name box, enter Sign in frequency.
- Under Assignments, select Users and groups.
- On the Include tab, select the Users and groups check box.
- In the Select pane, select your administrator account and then select Select.
- Select Cloud apps or actions.
- Verify Cloud apps is selected and then select Select apps.
- In the Select pane, select Office 365 and then select Select.
- Under Access controls, select Session.
- In the Session pane, select Sign-in frequency.
- In the value box, enter 30.
- Select the units menu, select Days, and then select Select.
- Under Enable policy, select Report-only, and then select Create.
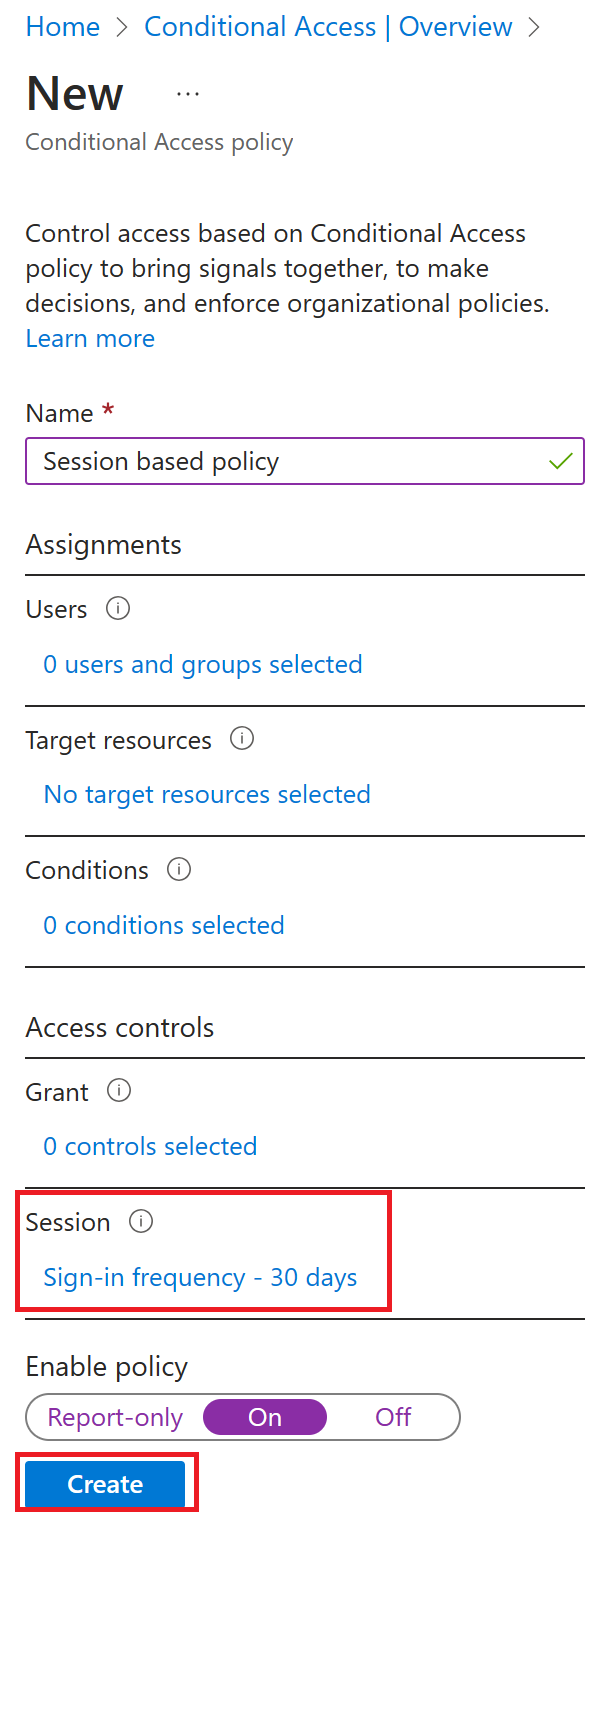
Microsoft Entra Conditional Access Optimization agent
It helps improve Conditional Access policies by analyzing existing ones and recommending changes based on Zero Trust best practices. The agent ensures MFA, enforces device-based controls, blocks legacy authentication, and consolidates similar policies to enhance security and simplify management.
Requirement to use the Conditional Access optimization agent
- You must have at least the Microsoft Entra ID P1 license.
- You must have available Security Compute Units (SCU).
- To activate the agent the first time, you need the Security Administrator or higher role.
- You can assign Conditional Access Administrators with Security Copilot access.
- For more information, see Assign Security Copilot access
- Device-based controls require Microsoft Intune licenses.
Conditional Access optimization agent key features
The Conditional Access optimization agent scans your tenant for new users and applications and determines if Conditional Access policies are applicable. The key features include:
| Feature | Description |
|---|---|
| Require MFA | The agent identifies users who aren't covered by a Conditional Access policy that requires MFA and can update the policy. |
| Require device-based controls | The agent can enforce device-based controls, such as device compliance, app protection policies, and domain-joined devices. |
| Block legacy authentication | User accounts with legacy authentication are blocked from signing in. |
| Policy consolidation | The agent scans your policy and identifies overlapping settings. For example, if you have more than one policy that has the same grant controls, the agent suggests consolidating those policies into one. |
| Block device code flow | The agent looks for a policy blocking device code flow authentication. |
| One-click remediation | When the agent identifies a suggestion, you can select Apply suggestion to have the agent update the associated policy with one press of a button. |
Give the Conditional Access optimization agent a try
In this exercise, you explore key capabilities in the Security Copilot Conditional Access optimization agent embedded in Microsoft Entra.
As you explore, keep in mind that unless otherwise stated, the information displayed and the configuration settings are for the currently logged in Security Administrator.
Note
The environment for this exercise is a simulation generated from the product. As a limited simulation, not all links on a page are enabled and text-based inputs that fall outside of the specified script aren't supported. A pop-up stating, "This feature isn't available within the simulation" message displays. When you receive this message, select OK and continue the exercise steps.
Exercise
This exercise should take approximately 10 minutes to complete.
Note
When a lab instruction calls for opening a link to the simulated environment, it's recommended that you open the link in a new browser window so that you can simultaneously view the instructions and the exercise environment. To do so, select the right mouse key and select the option.
- Open https://Entra.Microsoft.com (simulation) with at least the Security Administrator role.
There are two ways to launch the Security Copilot Agents screen:
- Option-1: Select the Try Security Copilot agents free for 60 days
- Option-2: Open Conditional Access from the menu on the left. Then select the Conditional Access Optimization agent.
Please feel free to use either option to launch the agent, but remember that both options are available.
Option-1:
- Select the "free 60 day trial" button.
- Select View Details on the page:
Option-2:
- Open the Conditional Access item in the left-side menu.
- On the Overview tab, select Conditional Access Optimization Agent.
Exploring the Conditional Access Agent
- Review the Overview tab.
- Agent is active – Note the last time the agent ran and the upcoming schedule.
- Performance highlights – Review the cost in Security Compute Units (SCUs) for the agent. See how many unprotected users the agent found to protect.
- About this agent – Quick description of the agent and how it works.
- Recent suggestions – Review of all existing Conditional Access policies and suggestions on how they could be merged, updated, removed, or enhanced.
- Recent Activity – Status on the last few attempts of the Conditional Access Optimization Agent to run, and the results.
Select the View run link within the Agent is active box.
Review the process flow of the agent and see what new information was detected since the last completion.
- Take note that is search for three common access rights optimizations:
- App / Application drift – new applications were deployed and need to be protected.
- User drift – new users were found, or user rights changed that leave them unprotected by policy.
- Policy merge – places where 2 or more policies could be merged to provide the same result, with easier management.
Select the breadcrumb Conditional Access Optimization Agent to return to the Overview page.
Select the Activities tab in the top menu. Review the history of when the Conditional Access Optimization agent ran and the results.
Select several different View activity buttons to see the progression of the Conditional Access Optimization agent as it runs each 24-hour period.
Open the second item on the list. Notice, four new applications were found, and recommended policy changes over time.
Use the breadcrumbs to return to the Overview page.
Select the Suggestions from the tab menu.
Explore the suggestion history. You have one item for each day the agent ran.
Select the Review suggestion button for the first item.
Notice, the policy wants to add 2 users to an existing Conditional Access policy. The goal is to add users to CA99 – Mitigate Risk Users with Password Reset policy.
Select the Policy impact tab at the top of the page to see a graph of this policy change over time.
Switch back to the Policy details tab, then select the Review policy changes to see the proposed changes and the JSON update to be made.
Use the browser Back button to return to the Overview page.
Select Suggestions from the menu.
Select the X in the upper right of the screen to close the dialog.
Explore Conditional Access Optimization Agents in CA-Policies
Open Conditional Access from the menu on the left.
Select Policies from the Conditional Access menu.
Review the list of policies, you should see three types:
- Microsoft – global policies sent out by Microsoft, like require MFA.
- User – conditional access policies created by an authorized user in your organization.
- Conditional Access Optimization Agent – Report Only policies created by the agent for your review. You can choose to apply them depending on business and security goals.
Scroll down the list to find the CA99 policy we reviewed earlier.
Select the New agent suggestion item.
On four occasions the Conditional Access Optimization agent found new user, and has an Apply suggestion for each.
Read over the description of what the suggestion is going to do.
Select the Apply suggestion button.
Result – The agent, monitors your users each day and found users that weren't protected by Risky User policies. It suggested you update your policy to include the new users, and provided you with a button to make the change. In one button you added protection for the users.
- Exit Microsoft Entra to finish the simulation.
Manage Microsoft Entra Identity Protection
Review identity protection basics
It helps organizations detect, investigate, and remediate identity-based risks automatically. It:
-
Detects and responds to risky sign-ins or users.
-
Allows investigation through the portal.
-
Exports risk data to SIEM or other tools for deeper analysis.
It requires a Microsoft Entra ID Premium P2 license and uses Microsoft’s analysis of 6.5 trillion signals daily to identify threats. The data can also integrate with Conditional Access to make smarter access decisions.
Risk detection and remediation
Identity Protection identifies risks in the following classifications:
| Risk detection type | Description |
|---|---|
| Anonymous IP address | Sign in from an anonymous IP address (for example: Tor browser, anonymizer VPNs). |
| Atypical travel | Sign in from an atypical location based on the user's recent sign ins. |
| Malware-linked IP address | Sign in from a malware-linked IP address. |
| Unfamiliar sign in properties | Sign in with properties we've not seen recently for the given user. |
| Leaked credentials | Indicates that the user's valid credentials have been leaked. |
| Password spray | Indicates that multiple usernames are being attacked using common passwords in a unified brute-force manner. |
| Microsoft Entra threat intelligence | Microsoft's internal and external threat intelligence sources have identified a known attack pattern. |
| New country | This detection is discovered by Microsoft Defender for Cloud Apps (MDCA). |
| Activity from anonymous IP address | This detection is discovered by MDCA. |
| Suspicious inbox forwarding | This detection is discovered by MDCA. |
Permissions
Identity Protection requires users be a Security Reader, Security Operator, Security Administrator, Global Reader Administrator in order to access.
| Role | Can do | Can't do |
|---|---|---|
| Security Administrator | Full access to Identity Protection | Reset password for a user |
| Security Operator | View all Identity Protection reports and Overview screen, Dismiss user risk, confirm safe sign-in, confirm compromise | Configure or change policies, Reset password for a user, Configure alerts |
| Security Reader | View all Identity Protection reports and Overview screen | Configure or change policies, Reset password for a user, Configure alerts, Give feedback on detections |
Currently, the Security Operator role cannot access the Risky sign ins report. Conditional Access Administrators can also create policies that factor in sign-in risk as a condition.
License requirements
Using this feature requires a Microsoft Entra ID Premium P2 license.
| Capability | Details | Microsoft Entra ID Free / Microsoft 365 Apps | Microsoft Entra ID Premium P1 | Microsoft Entra ID Premium P2 |
|---|---|---|---|---|
| Risk policies | User risk policy (via Identity Protection) | No | No | Yes |
| Risk policies | Sign-in risk policy (via Identity Protection or Conditional Access) | No | No | Yes |
| Security reports | Overview | No | No | Yes |
| Security reports | Risky users | Limited information. Only users with medium and high risk are shown. No details drawer or risk history. | Limited information. Only users with medium and high risk are shown. No details drawer or risk history. | Full access |
| Security reports | Risky sign ins | Limited information. No risk detail or risk level is shown. | Limited information. No risk detail or risk level is shown. | Full access |
| Security reports | Risk detections | No | Limited information. No details drawer. | Full access |
| Notifications | Users at risk detected alerts | No | No | Yes |
| Notifications | Weekly digest | No | No | Yes |
| MFA registration policy | No | No | Yes |
Implement and manage user risk policy
There are two risk policies that can be enabled in the directory:
Sign-in risk policy: The sign-in risk policy detects suspicious actions that come along with the sign-in. It's focused on the sign-in activity itself and analyzes the probability that the sign-in was performed by some other than the user.

User risk policy: The user risk policy detects the probability that a user account has been compromised by detecting risk events that are atypical of a user's behavior.
Both policies work to automate the response to risk detections in your environment and allow users to self-remediate when risk is detected.
Watch the video
In this video, learn how to deploy Microsoft Entra Identity Protection by configuring risk-based policies (user risk and sign-in risk) in your organization. You also learn best practices on how to gradually roll out these policies and MFA registration in your organization.
Prerequisites
To let users self-remediate identity risks, they must be registered for both:
-
Self-Service Password Reset (SSPR)
-
Multifactor Authentication (MFA)
✅ It’s recommended to use the combined security info registration experience.
This allows users to resolve risks on their own quickly, reducing downtime and admin workload, while admins can still review and investigate those events later.
Choosing acceptable risk levels
Organizations must balance security and user experience when setting risk thresholds.
-
Microsoft recommends:
-
User risk policy: High
-
Sign-in risk policy: Medium and above
-
-
High threshold: Fewer interruptions for users but may miss some risks.
-
Low threshold: More user prompts and interruptions but stronger protection against attacks.
Exclusions
You can exclude certain accounts (like emergency access or break-glass admin accounts) from Identity Protection or Conditional Access policies.
Exclusions should be reviewed regularly to ensure they’re still necessary.
Trusted network locations help Identity Protection reduce false positives in risk detection by recognizing safe, known networks.
Exercise enable sign-in risk policy
Enable user risk policy
Sign in to the Microsoft Entra admin center using a Global administrator account.
Open the portal menu and then select Identity.
On the Identity menu, select Protection.
On the Security blade, in the left navigation, select Identity protection.
In the Identity protection blade, in the left navigation, select User risk policy.
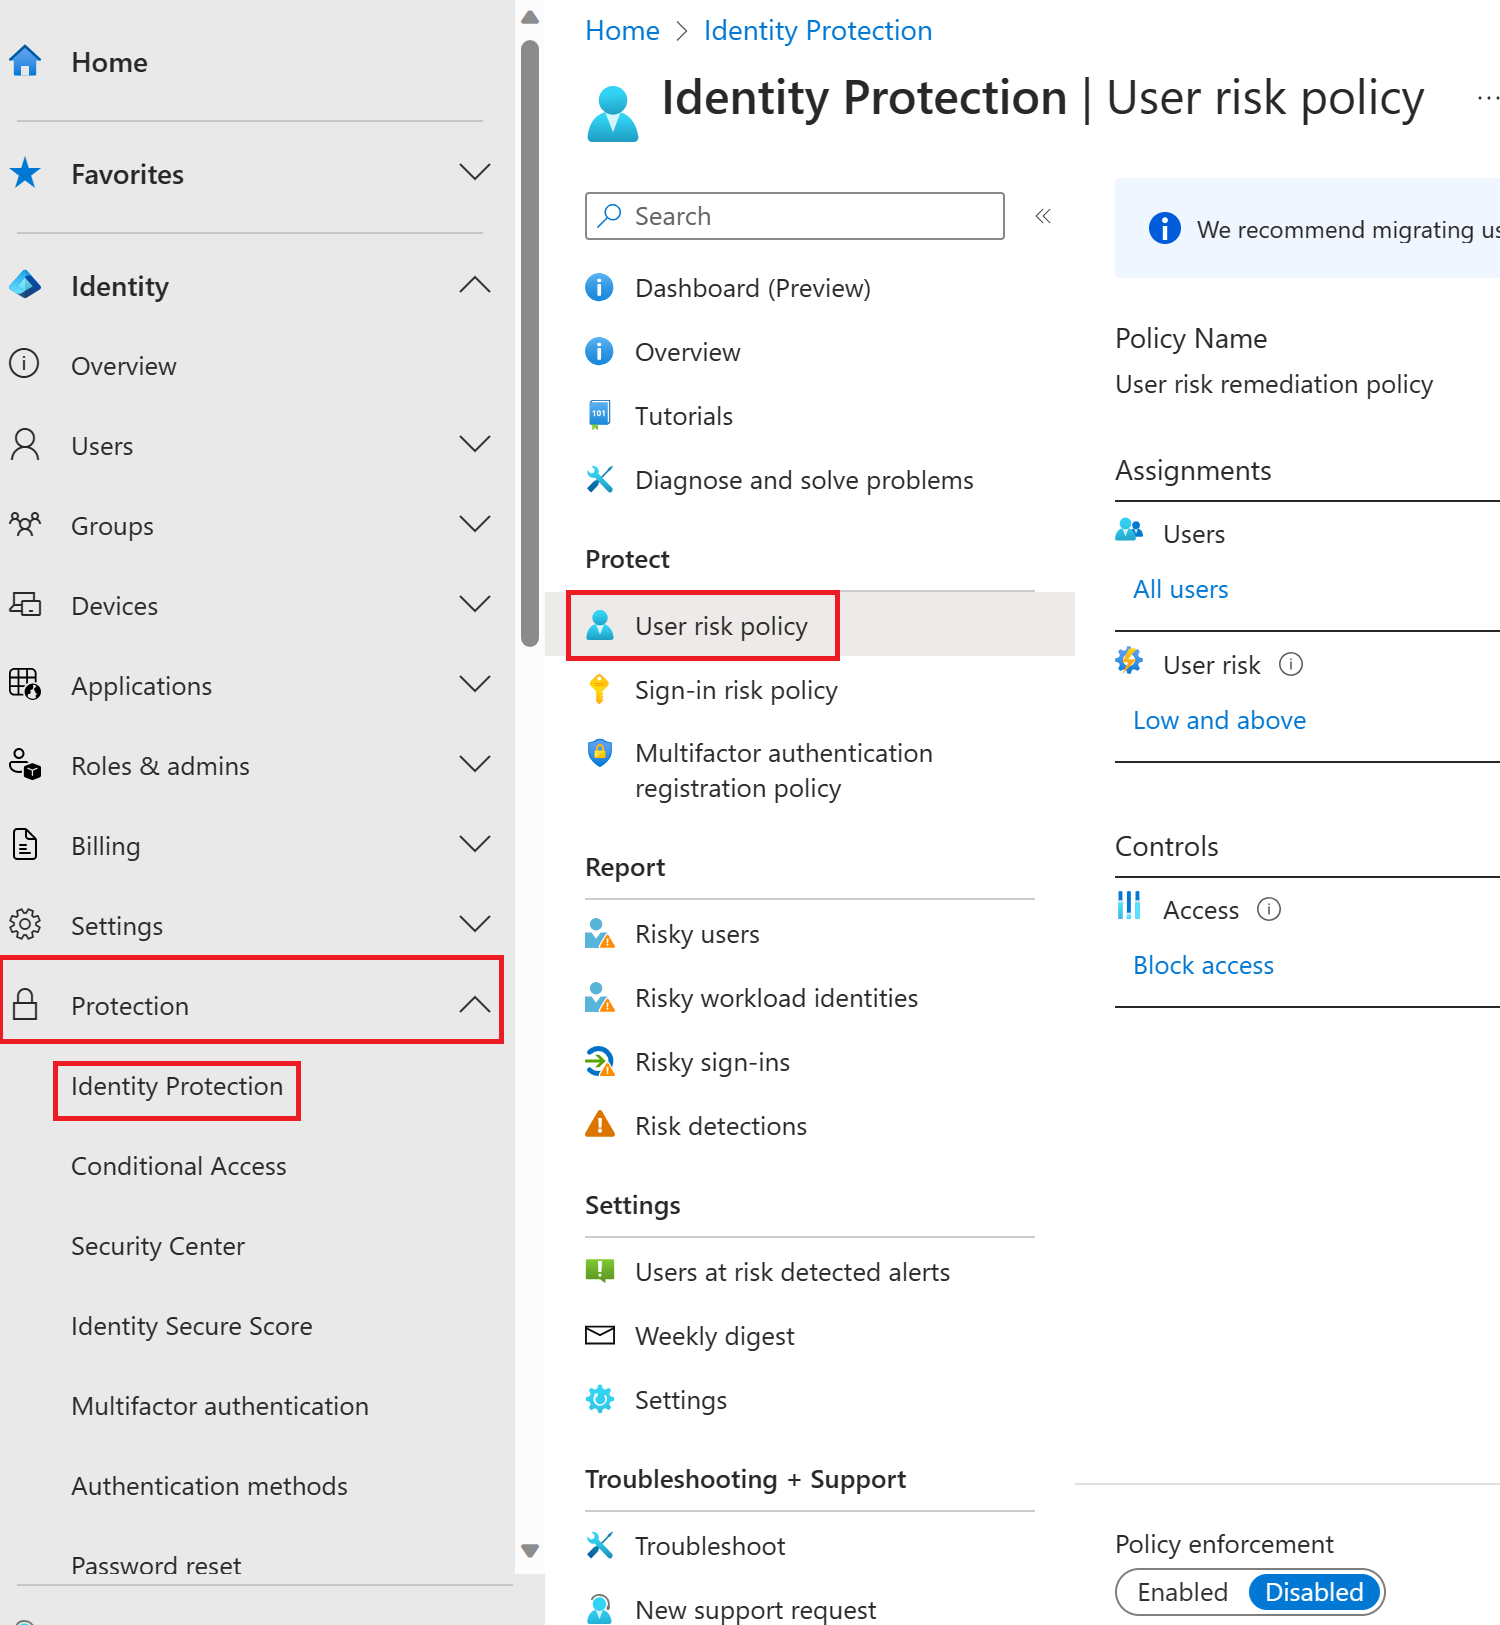
Under Assignments, select All users and review the available options. You can select from All users or Select individuals and groups if limiting your rollout. Additionally, you can choose to exclude users from the policy.
Under User risk, select Low and above.
In the User risk pane, select High and then select Done.
Under Controls, then Access, and then select Block access.
In the Access pane, review the available options.
Tip
Microsoft's recommendation is to Allow access and Require password change.
- Select the Require password change check box and then select Done.
- Under Enforce Policy, select On and then select Save.
Enable sign-in risk policy
- On the Identity protection blade, in the left navigation, select Sign-in risk policy.
- As with the User risk policy, the Sign-in risk policy can be assigned to users and groups and allows you to exclude users from the policy.
- Under Sign-in risk, select Medium and above.
- In the Sign-in risk pane, select High and then select Done.
- Under Controls, then Access, and then select Block access.
- Select the Require multifactor authentication check box and then select Done.
- Under Enforce Policy, select On and then select Save.
Exercise configure Microsoft Entra multifactor authentication registration policy
Policy configuration
Multifactor authentication provides a means to verify who you are using more than just a username and password. It provides a second layer of security to user sign-ins. For users to be able to respond to MFA prompts, they must first register for multifactor authentication.
Sign in to the Microsoft Entra admin center using a Global administrator account.
Open the portal menu and then select Identity.
On the Identity men, select Protection.
On the Security blade, in the left navigation, select Identity protection.
In the Identity protection blade, in the left navigation, select Multifactor authentication registration policy.
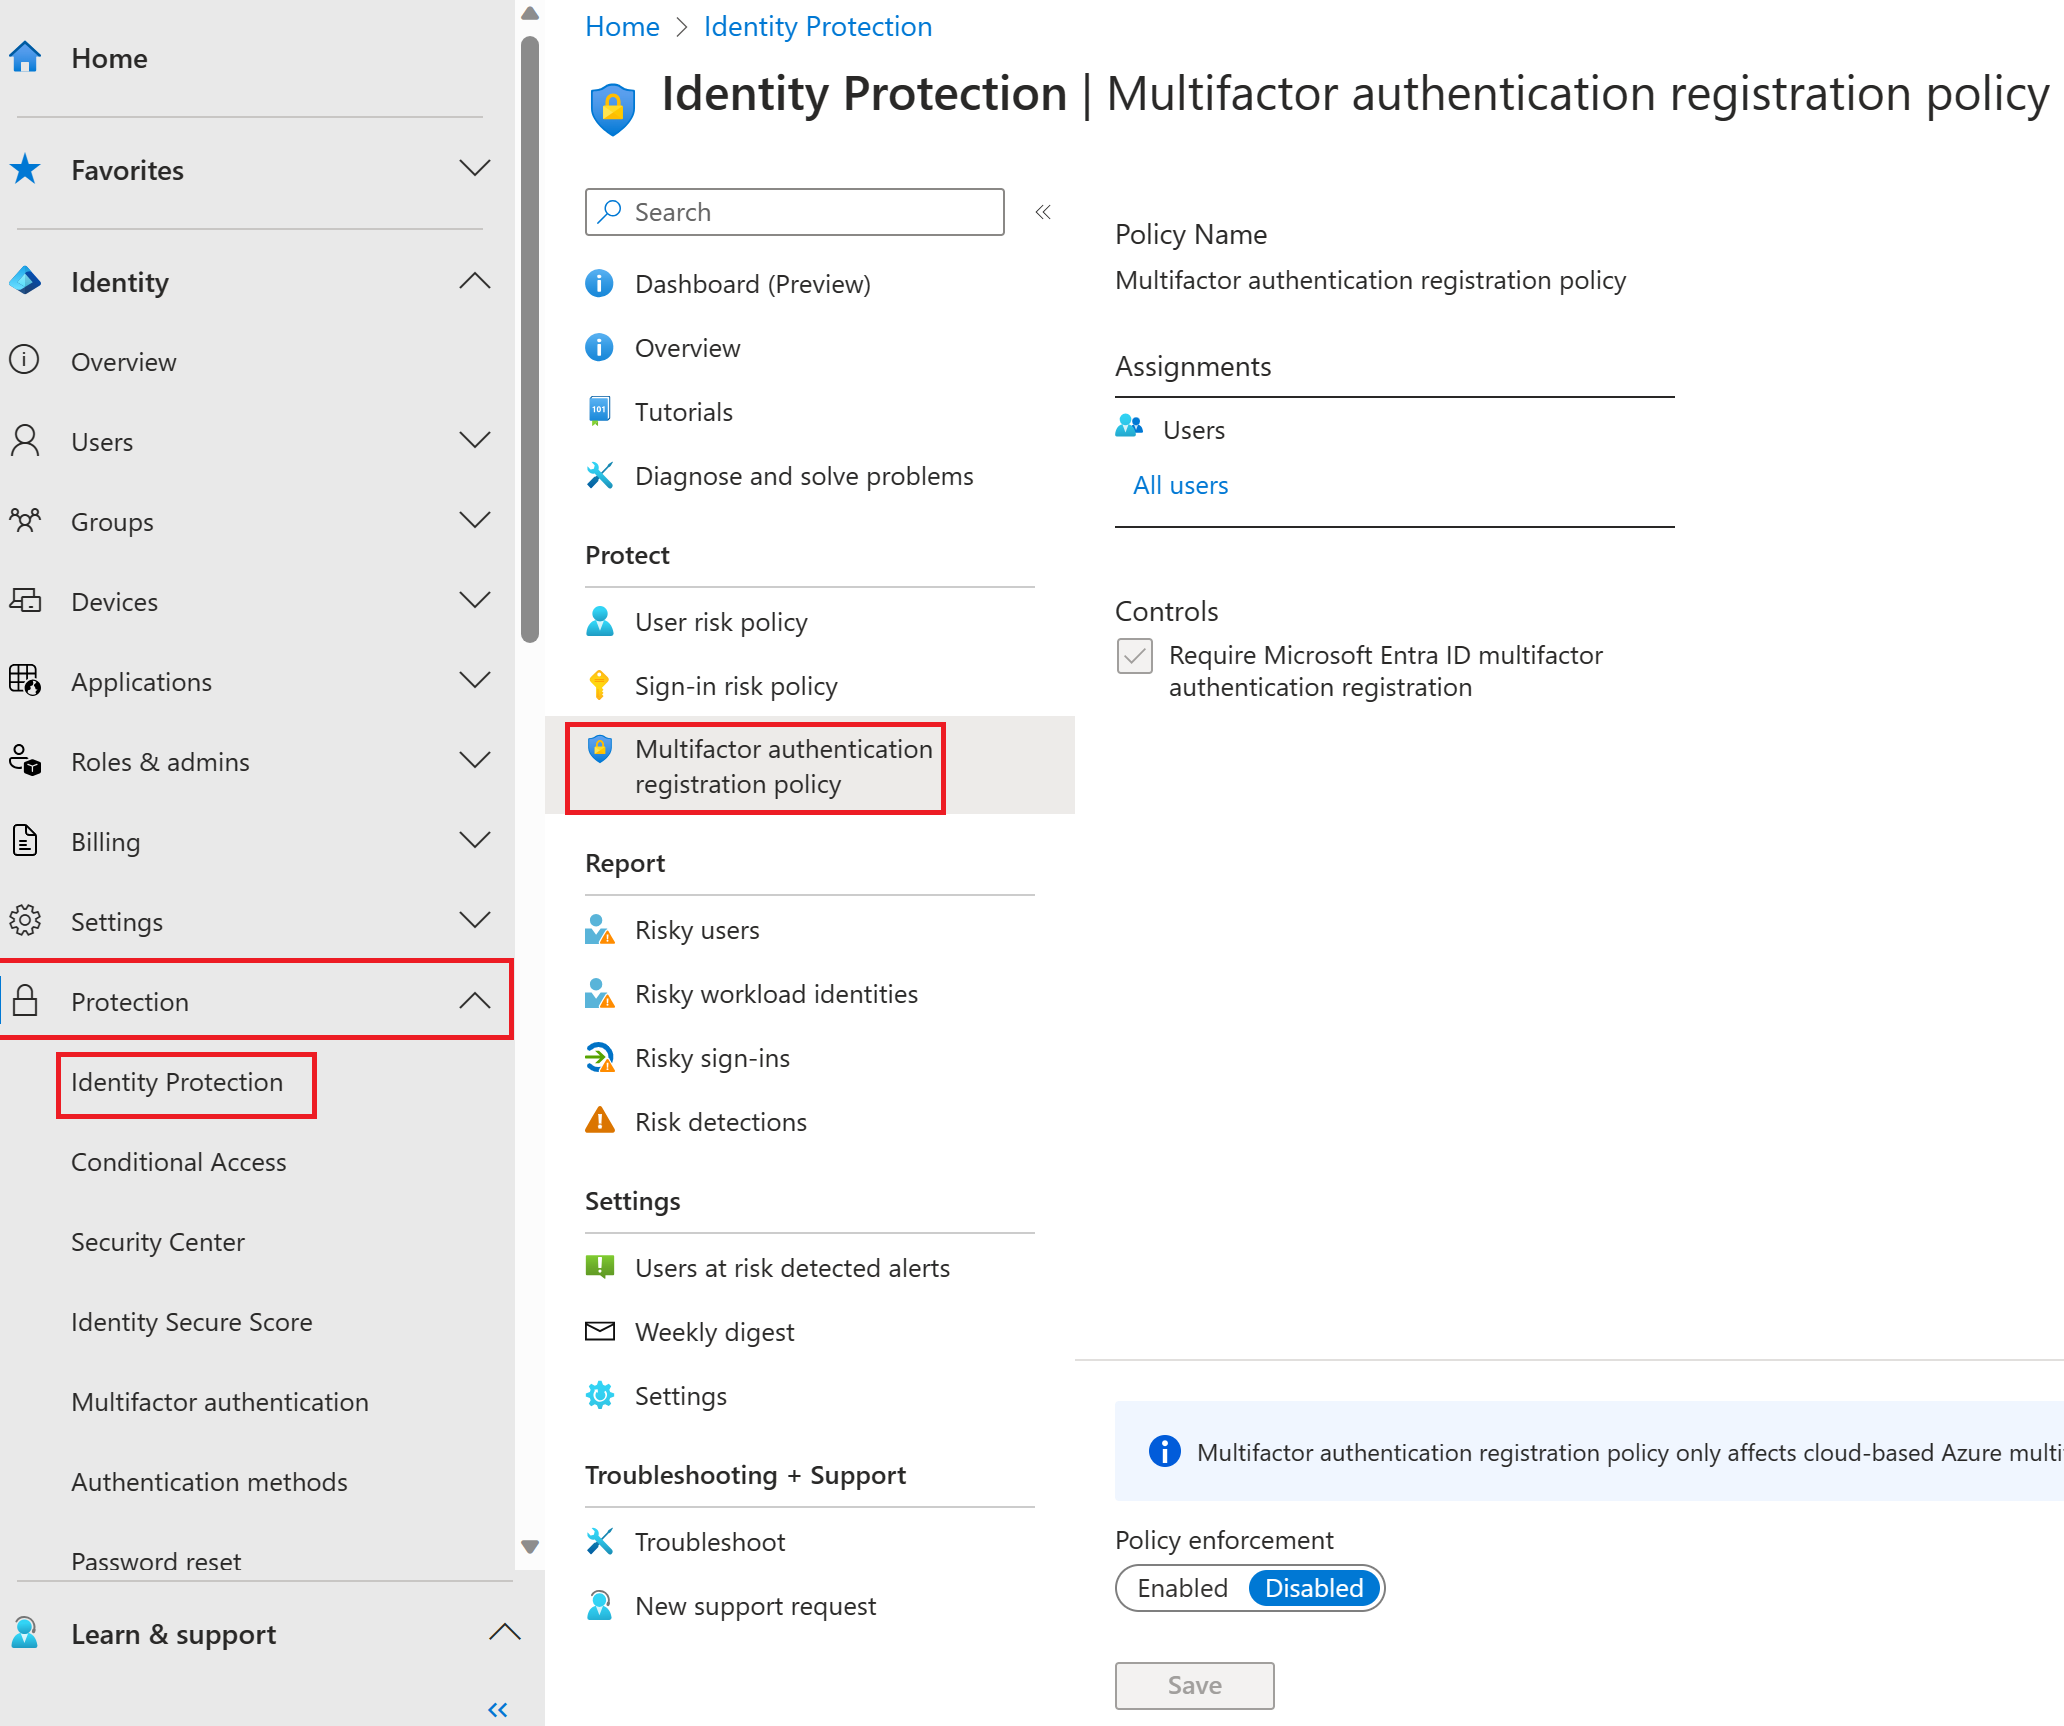
Under Assignments, select All users and review the available options. You can select from All users or Select individuals and groups if limiting your rollout. Additionally, you can choose to exclude users from the policy.
Under Controls, notice that the Require Microsoft Entra ID multifactor authentication registration is selected and cannot be changed.
Under Enforce Policy, select Enabled and then select Save.
Monitor, investigate, and remediate elevated risky users
Identity Protection – Investigate Risk (Simple Explanation)
-
Purpose:
-
Identity Protection helps organizations find and analyze security risks related to user accounts and sign-ins.
-
It shows where there might be weak points in your security system.
-
-
Three Main Reports Available:
-
🧍♀️ Risky Users: Lists users who may have suspicious or risky accounts (like if their account might be hacked).
-
🔑 Risky Sign-ins: Shows sign-ins that look unusual or unsafe (like logging in from a new country or device).
-
⚠️ Risk Detections: Shows detailed risk events detected by the system (like leaked credentials, malware IP, etc.).
-
-
Download Option:
-
You can download all these reports as .CSV files to check or analyze them in Excel or other tools.
-
Download limits:
-
Risky Users → up to 2,500 recent records
-
Risky Sign-ins → up to 2,500 recent records
-
Risk Detections → up to 5,000 recent records
-
-
-
Using Microsoft Graph API:
-
Organizations can use the Microsoft Graph API to connect (integrate) this risk data with other tools or databases.
-
This helps in combining data from multiple sources for better overall analysis.
-
-
Where to Find These Reports:
-
Go to Microsoft Entra Admin Center
-
Select Identity
-
Then go to Protection → Identity Protection
-
✅ In short:
Identity Protection gives 3 reports (risky users, risky sign-ins, risk detections) to help you find and study account risks. You can download them, analyze them, or combine them with other data to improve your organization’s security.
Navigating the reports
Report View:
-
When you open any report, it shows a list of all detections (risk events) for the time period selected at the top.
-
-
Customizing Columns:
-
Admins can add or remove columns in the report to show only the information they want to see.
-
-
Download Options:
-
Reports can be downloaded in either:
-
🟢 .CSV format (good for Excel)
-
🟣 .JSON format (good for technical tools or APIs)
-
-
-
Filtering Data:
-
You can filter the data using options at the top (for example, by date, risk level, user, or location).
-
-
Selecting an Entry:
-
If you click on a specific detection or sign-in, more options appear at the top of the report:
-
✅ Confirm sign-in as safe
-
⚠️ Mark sign-in as compromised
-
🚫 Confirm user as compromised
-
🗑️ Dismiss the user risk
-
-
-
Details View:
-
When you select a detection, a details panel opens below.
-
This panel shows more information about that specific risk and allows admins to take actions (like investigate or fix the issue).
-
✅ In short:
Admins can view, customize, filter, and download risk reports. They can also click on individual items to see more details and take actions like marking sign-ins or users as safe or compromised.
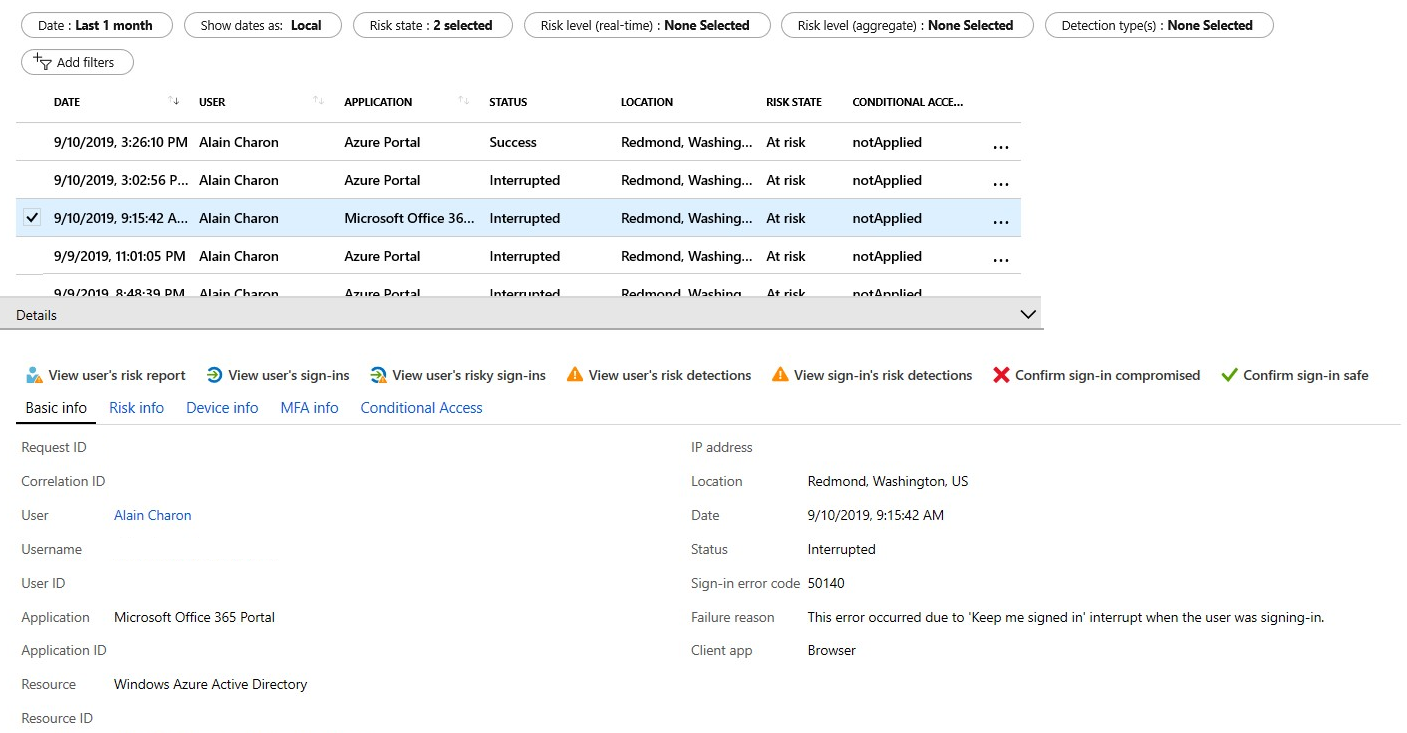
Risky users
With the information provided by the risky users report, administrators can find:
- Which users are at risk, have had risk remediated, or have had risk dismissed?
- Details about detections.
- History of all risky sign-ins.
- Risk history.
Administrators can then choose to take action on these events. They can choose to:
- Reset the user password.
- Confirm user compromise.
- Dismiss user risk.
- Block user from signing in.
- Investigate further using Azure ATP.
Risky sign-ins
The risky sign-ins report contains filterable data for up to the past 30 days (one month).
With the information provided by the risky sign-ins report, administrators can find:
- Which sign-ins are classified as at risk, confirmed compromised, confirmed safe, dismissed, or remediated.
- Real-time and aggregate risk levels associated with sign-in attempts.
- Detection types triggered.
- Conditional Access policies applied.
- MFA details.
- Device information.
- Application information.
- Location information.
Administrators can then choose to take action on these events. Administrators can choose to:
- Confirm sign-in compromise.
- Confirm sign-in safe.
Risk detections
The risk detections report contains filterable data for up to the past 90 days (three months).
With the information provided by the risk detections report, administrators can find:
- Information about each risk detection including type.
- Other risks triggered at the same time.
- Sign-in attempt location.
Administrators can then choose to return to the user's risk or sign-ins report to take actions based on information gathered.
The risk detection report also provides a clickable link to the detection in the Microsoft Defender for Cloud Apps (MDCA) portal where you can view additional logs and alerts.
Note
Our system detects that the risk event that contributed to the risk user risk score was a false positive or that the user risk was remediated with policy enforcement such as completing an MFA prompt or secure password change. Therefore, our system will dismiss the risk state, and a risk detail of “AI confirmed sign-in safe” will surface and no longer contribute to the user’s risk.
Remediate risks and unblock users
After completing your investigation, you'll want to take action to remediate the risk or unblock users. Organizations also have the option to enable automated remediation using their risk policies. Organizations should try to close all risk detections that they're presented with in a time period your organization is comfortable with. Microsoft recommends closing events as soon as possible because time matters when working with risk.
Remediation
All active risk detections contribute to the calculation of a value called user risk level. The user risk level is an indicator (low, medium, high) for the probability that an account has been compromised. As an administrator, you want to get all risk detections closed, so that the affected users are no longer at risk.
Some risk detections are marked by Identity Protection as "Closed (system)" because the events were no longer determined to be risky.
Administrators have the following options to remediate:
- Self-remediation with risk policy.
- Manual password reset.
- Dismiss user risk.
- Close individual risk detections manually.
Self-remediation with risk policy
If an organization allows self-remediation through its risk policies, users can fix certain security issues on their own. This is done using multifactor authentication (MFA) or self-service password reset (SSPR). When a risk is detected, users who have already set up MFA and SSPR can verify their identity or reset their password to unblock themselves. Once they do this, the risk is marked as resolved or closed.
However, not all detections are serious enough to need self-remediation. In such cases, administrators should still review these detections to decide if further actions are needed — like blocking access from specific locations, adjusting security settings, or tightening the organization’s risk policies to prevent future threats.
Manual password reset
If requiring a password reset using a user risk policy isn't an option, administrators can close all risk detections for a user with a manual password reset.
Administrators are given two options when resetting a password for their users:
Generate a temporary password - By generating a temporary password, you can immediately bring an identity back into a safe state. This method requires contacting the affected users since they need to know what the temporary password is. Because the password is temporary, the user is prompted to change the password to something new during the next sign-in.
Require the user to reset password - Requiring the users to reset passwords enables self-recovery without contacting help desk or an administrator. This method only applies to users who are registered for MFA and SSPR. For users who haven't been registered, this option isn't available.
Dismiss user risk
If a password reset isn't an option for you because, for example, the user has been deleted, you can choose to dismiss user risk detections.
When you select Dismiss user risk, all events are closed and the affected user is no longer at risk. However, because this method doesn't affect the existing password, it doesn't bring the related identity back into a safe state.
Close individual risk detections manually
By closing individual risk detections manually, you can lower the user risk level. Typically, risk detections are closed manually in response to a related investigation, such as when talking to a user reveals that an active risk detection isn't required anymore.
When closing risk detections manually, you can choose to take any of the following actions to change the status of a risk detection:
Confirm user compromised.
Dismiss user risk.
Confirm sign-in safe.
Confirm sign-in compromised.
Unblocking users
An administrator chooses to block a sign-in based on their risk policy or investigations. A block occurs based on either sign-in or user risk.
Unblocking based on user risk
To unblock an account blocked due to user risk, administrators have the following options:
Reset password - You can reset the user's password.
Dismiss user risk - The user risk policy blocks a user if the configured user risk level for blocking access has been reached. You can reduce a user's risk level by dismissing user risk or manually closing reported risk detections.
Exclude the user from policy - If you think that the current configuration of your sign-in policy is causing issues for specific users, you can exclude the users from it.
Disable policy - If you think that your policy configuration is causing issues for all your users, you can disable the policy.
Unblocking based on sign-in risk
To unblock an account based on sign-in risk, administrators have the following options:
- Sign in from a familiar location or device - A common reason for blocked suspicious sign-ins are sign-in attempts from unfamiliar locations or devices. Your users can quickly determine whether this reason is the blocking reason by trying to sign in from a familiar location or device.
- Exclude the user from policy - If you think that the current configuration of your sign-in policy is causing issues for specific users, you can exclude the users from it.
- Disable policy - If you think that your policy configuration is causing issues for all your users, you can disable the policy.
Microsoft Graph is a single, unified API from Microsoft that lets you access data from different Microsoft services, including Entra Identity Protection. It helps developers and administrators get detailed information about user risks and sign-ins directly through API queries instead of using the portal.
There are three main APIs related to Identity Protection:
-
riskDetection API: This lets you get a list of all detected risks linked to both users and sign-ins, along with details about each detection (like what caused the risk and when it happened).
-
riskyUsers API: This shows information about users who have been identified as risky by Identity Protection — for example, users whose accounts may be compromised.
-
signIn API: This provides details about sign-ins, including their risk state, risk level, and other related information about each login attempt.
These APIs help organizations monitor and analyze risk data automatically or integrate it with other security systems. To get started, you can connect to Microsoft Graph and try these APIs using the Graph Explorer tool or check the full documentation on the official Microsoft Graph website: https://graph.microsoft.io/
Connect to Microsoft Graph
There are four steps to accessing Identity Protection data through Microsoft Graph: retrieve your domain name, create a new app registration, configure API permissions, and configure a valid credential.
Retrieve your domain name
- Sign in to the Microsoft Entra admin center.
- Browse to Identity, then open Settings, and select Domain names.
- Take note of the .onmicrosoft.com domain. You'll need this information in a later step.
Create a new app registration
In the Microsoft Entra admin center, browse to Identity and Applications, then App registrations.
Select New registration.
On the Create page, perform the following steps:
- In the Name textbox, type a name for your application (for example: Microsoft Entra Risk Detection API).
- Under Supported account types, select the type of accounts that will use the APIs.
- Select Register.
Copy the Application ID.
Configure API permissions
From the Application you created, select API permissions.
On the Configured permissions page, in the toolbar on the top, select Add a permission.
On the Add API access page, choose Select an API.
On the Select an API page, select Microsoft Graph, and then select Select.
On the Request API permissions page:
- Select Application permissions.
- Select the checkboxes next to IdentityRiskEvent.Read.All and IdentityRiskyUser.Read.All.
- Select Add permissions.
Select Grant admin consent for domain.
Configure a valid credential
From the Application you created, select Certificates and secrets.
Under Client secrets, select New client secret.
Give the client secret a Description and set the expiration time period according to your organizational policies.
Select Add.
Note
If you lose this key, you'll have to return to this section and create a new key. Keep this key a secret: Anyone who has it can access your data.
Authenticate to Microsoft Graph and query the Identity Protection risk detections API
At this point, you should have:
- The name of your tenant's domain
- The Application (client) ID
- The client secret or certificate
To authenticate, send a post request to https://login.microsoft.com with the following parameters in the body:
- grant_type:
client_credentials - resource:
https://graph.microsoft.com - client_id:
- client_secret:
If successful, this request returns an authentication token. To call the API, create a header with the following parameter:
Authorization`="<token_type> <access_token>"
When authenticating, you can find the token type and access token in the returned token.
Send this header as a request to the following API URL: https://graph.microsoft.com/v1.0/identityProtection/riskDetections.
The response, if successful, is a collection of identity risk detections and associated data in the OData JSON format, which can be parsed and handled as you see fit.
Sample
This sample shows the use of a shared secret to authenticate. In a production environment, storing secrets in code is generally frowned upon. Organizations can use managed identities for Azure resources to secure these credentials.
Here’s sample code for authenticating and calling the API using PowerShell. Just add your client ID, the secret key, and the tenant domain.
    $ClientID      = "<your client ID here>"        # Should be a ~36 hex character string; insert your info here

    $ClientSecret  = "<your client secret here>"    # Should be a ~44 character string; insert your info here

    $tenantdomain  = "<your tenant domain here>"    # For example, contoso.onmicrosoft.com

    $loginURL      = "https://login.microsoft.com"

    $resource      = "https://graph.microsoft.com"

    $body          = @{grant_type="client_credentials";resource=$resource;client_id=$ClientID;client_secret=$ClientSecret}

    $oauth        = Invoke-RestMethod -Method Post -Uri $loginURL/$tenantdomain/oauth2/token?api-version=1.0 -Body $body

    Write-Output $oauth

    if ($oauth.access_token -ne $null) {

        $headerParams = @{'Authorization'="$($oauth.token_type) $($oauth.access_token)"}

        $url = "https://graph.microsoft.com/v1.0/identityProtection/riskDetections"

        Write-Output $url

        $myReport = (Invoke-WebRequest -UseBasicParsing -Headers $headerParams -Uri $url)

        foreach ($event in ($myReport.Content | ConvertFrom-Json).value) {

            Write-Output $event

        }

    } else {

        Write-Host "ERROR: No Access Token"

    }
Get all of the offline risk detections (riskDetection API)
With Identity Protection sign-in risk policies, you can apply conditions when risk is detected in real time. But what about detections that are discovered offline? To understand what detections occurred offline and, thus, wouldn't have triggered the sign-in risk policy, you can query the riskDetection API.
GET https://graph.microsoft.com/v1.0/identityProtection/riskDetections?$filter=detectionTimingType eq 'offline'
Get all of the users who successfully passed an MFA challenge triggered by risky sign-ins policy (riskyUsers API)
To understand the value Identity Protection risk-based policies have on your organization, you can query all of the users who successfully passed an MFA challenge triggered by a risky sign-ins policy. This information can help you understand which users Identity Protection has falsely detected as a risk and which of your legitimate users are performing actions that the AI deems risky.
GET https://graph.microsoft.com/v1.0/identityProtection/riskyUsers?$filter=riskDetail eq 'userPassedMFADrivenByRiskBasedPolicy'
Implement security for workload identities
Microsoft Entra Identity Protection has historically protected users in detecting, investigating, and remediating identity-based risks. Identity protection has extended these capabilities to workload identities to protect applications, service principals, and Managed Identities.
A workload identity is an identity that allows an application or service principal access to resources, sometimes in the context of a user. These workload identities differ from traditional user accounts as they:
- Can’t perform multifactor authentication.
- Often have no formal lifecycle process.
- Need to store their credentials or secrets somewhere.
These differences make workload identities harder to manage and put them at higher risk for compromise.
Requirements to use workload identity protection
To make use of workload identity risk, including the new Risky workload identities (preview) blade and the Workload identity detections tab in the Risk detections blade, in the Azure portal you must have the following.
Microsoft Entra ID Premium P2 licensing
Logged in user must be assigned either:
- Security administrator
- Security operator
- Security reader
What types of risks are detected?
| Detection name | Detection type | Description |
|---|---|---|
| Microsoft Entra threat intelligence | Offline | This risk detection indicates some activity that is consistent with known attack patterns based on Microsoft's internal and external threat intelligence sources. |
| Suspicious Sign-ins | Offline | This risk detection indicates sign-in properties or patterns that are unusual for this service principal. |
| The detection learns the baselines sign-in behavior for workload identities in your tenant in between 2 and 60 days, and fires if one or more of the following unfamiliar properties appear during a later sign-in: IP address / ASN, target resource, user agent, hosting/non-hosting IP change, IP country, credential type. | ||
| Unusual addition of credentials to an OAuth app | Offline | This detection is discovered by Microsoft Defender for Cloud Apps. This detection identifies the suspicious addition of privileged credentials to an OAuth app. This can indicate that an attacker has compromised the app, and is using it for malicious activity. |
| Admin confirmed account compromised | Offline | This detection indicates an admin has selected 'Confirm compromised' in the Risky Workload Identities UI or using riskyServicePrincipals API. To see which admin has confirmed this account compromised, check the account’s risk history (via UI or API). |
| Leaked Credentials (public preview) | Offline | This risk detection indicates that the account's valid credentials have been leaked. This leak can occur when someone checks in the credentials in public code artifact on GitHub, or when the credentials are leaked through a data breach. |
Add conditional access protection
Using Conditional Access for workload identities, you can block access for specific accounts you choose when Identity Protection marks them "at risk." Policy can be applied to single-tenant service principals that have been registered in your tenant. Third-party SaaS, multi-tenanted apps, and managed identities are out of scope.
Explore Microsoft Defender for Identity
Microsoft Defender for Identity (previously called Azure Advanced Threat Protection or Azure ATP) is a cloud-based security tool that helps protect your organization from advanced cyber threats. It works by using data and signals from your on-premises Active Directory (AD) to find and investigate any suspicious activity or compromised user accounts.
Here’s what Defender for Identity helps security teams do:
-
Monitor user behavior:
It continuously watches how users and devices behave, using machine learning and analytics to detect unusual or risky actions. -
Protect user identities:
It keeps your Active Directory identities and credentials safe from attackers who try to steal passwords or misuse accounts. -
Detect advanced attacks:
It identifies suspicious user activities, insider threats, and complex cyberattacks happening across your organization’s network. -
Simplify investigations:
It provides all the incident details in a clear, timeline-based view, making it easier for security teams to quickly understand and respond to threats.
In short, Microsoft Defender for Identity helps organizations detect, analyze, and respond to security threats targeting user accounts and Active Directory systems — giving better visibility and faster protection against attacks.
Process flow for Defender for Identity
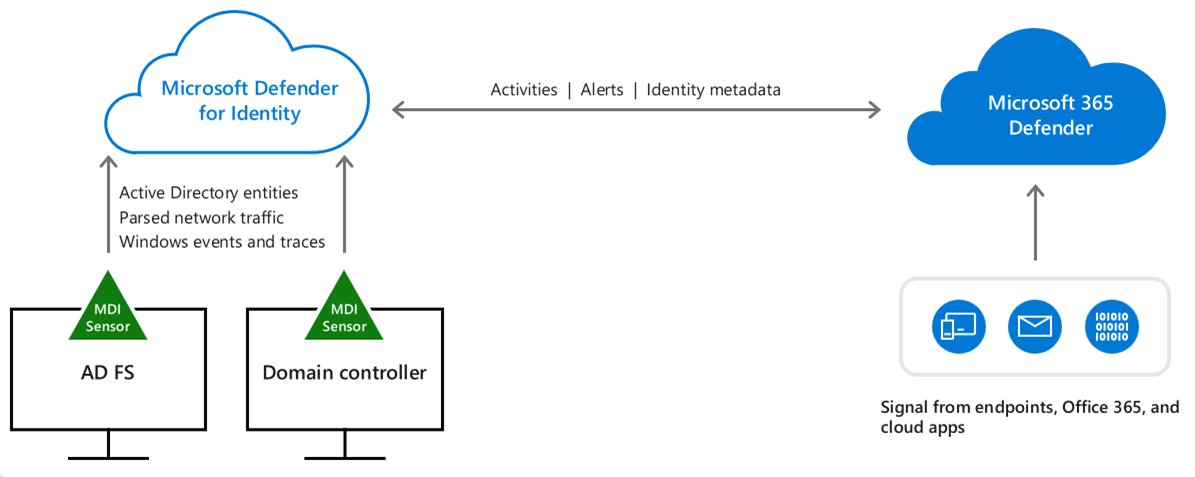
Defender for Identity consists of the following components:
Defender for Identity portal - The Defender for Identity portal allows the creation of your Defender for Identity instance, displays the data received from Defender for Identity sensors, and enables you to monitor, manage, and investigate threats in your network environment.
Defender for Identity sensor - Defender for Identity sensors can be directly installed on the following servers:
- Domain controllers: The sensor directly monitors domain controller traffic, without the need for a dedicated server, or configuration of port mirroring.
- Active Directory Federated Services (AD FS): The sensor directly monitors network traffic and authentication events.
Defender for Identity cloud service - Defender for Identity cloud service runs on Azure infrastructure and is currently deployed in the US, Europe, and Asia. Defender for Identity cloud service is connected to Microsoft's intelligent security graph.
Implement access management for Azure resources
Assign Azure roles
Decide Who Needs Access
You can assign roles to different types of security principals (identities):
-
👤 User: A single person who needs access. You can also assign roles to users from other tenants.
-
👥 Group: Use this when you want to give the same access to multiple users at once.
-
⚙️ Service Principal: Used to give an application access to Azure resources.
-
🔑 Managed Identity: Used when an application manages its own credentials securely without storing passwords.
🔹 2. Choose the Right Role
Roles define what actions the user or app can perform. You can use built-in roles or create custom ones.
Common built-in roles include:
-
Owner: Full access to everything (including assigning roles).
-
Contributor: Can create and manage resources, but cannot assign roles.
-
Reader: Can only view resources, not make changes.
-
User Access Administrator: Can assign access to others.
-
Plus, there are many task-specific roles (e.g., Virtual Machine Contributor).
🔹 3. Choose the Right Scope
The scope defines where the role applies — it can be broad or narrow.
There are four levels of scope in Azure:
-
Management group – highest level (covers multiple subscriptions).
-
Subscription – includes all resource groups and resources under it.
-
Resource group – a specific collection of related resources.
-
Resource – a single item, like one virtual machine or storage account.
Examples:
-
Assigning Reader at the management group level → user can view everything under it.
-
Assigning Billing Reader at the subscription level → group members can view billing data for all resources.
-
Assigning Contributor at the resource group level → app can manage all resources only in that group.
🟢 Tip: Always give the least privilege — only the access that’s truly needed. This reduces risk if an account is ever compromised.
🔹 4. Check Permissions
Before assigning a role, make sure the person doing it has permission to assign roles (for example, they might need to be an Owner or User Access Administrator).
🔹 5. Assign the Role
Once you’ve decided the user (or app), role, and scope, you can assign the role using:
-
The Azure Portal (graphical interface)
-
Azure PowerShell
-
Azure CLI
-
Azure SDKs
-
REST APIs
Each subscription can have up to 2000 role assignments, and each management group can have up to 500.
✅ In short:
Azure RBAC controls who can do what in Azure. You pick the user, choose the right role, set the scope, and assign the role carefully using least-privilege access to keep your environment secure.
Assign an Azure role from the portal
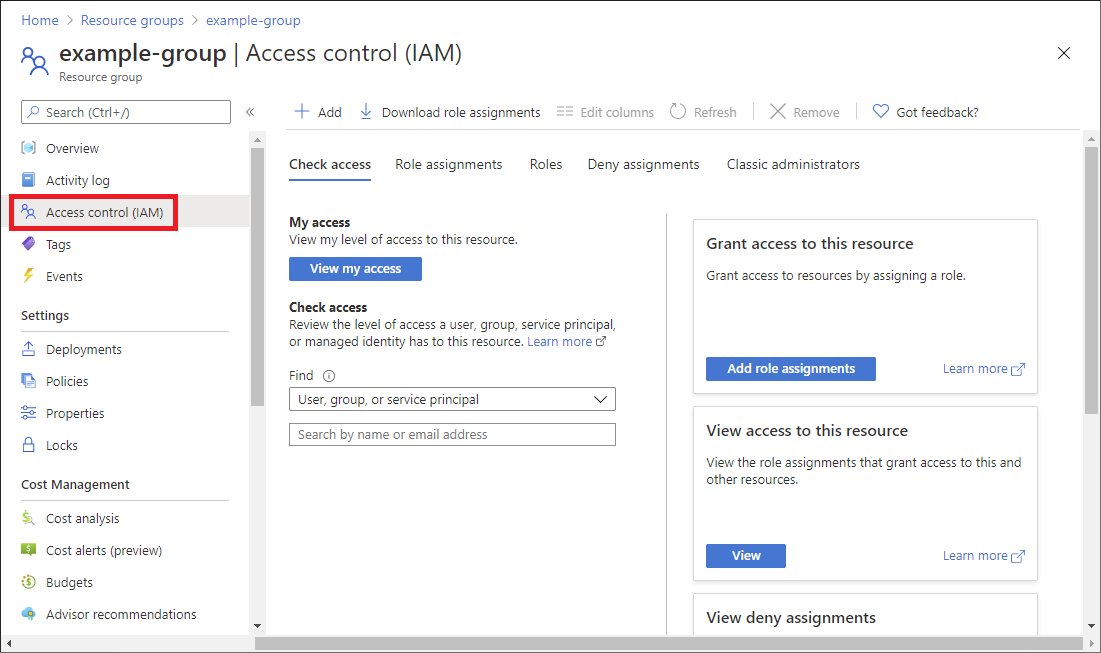
Whether you are in the User, Group, Resource Group, or Subscription you'll generally use the Access content (IAM) page to make the assign. It's also known as identity and access management (IAM) and appears in several locations in the Azure portal.
Assign an Azure role with script
PowerShell using the Microsoft Graph PowerShell cmdlet
New-AzRoleAssignment -ObjectId <objectId> `
-RoleDefinitionName <roleName> `
-Scope /subscriptions/<subscriptionId>/resourcegroups/<resourceGroupName>/providers/<providerName>/<resourceType>/<resourceSubType>/<resourceName>
CLI scripting
az role assignment create --assignee "{assignee}" \
--role "{roleNameOrId}" \
--resource-group "{resourceGroupName}"
Configure custom Azure roles
Sometimes, the built-in Azure roles (like Owner, Contributor, or Reader) may not exactly fit your organization’s needs. In such cases, you can create your own custom Azure roles.
Custom roles let you define specific permissions that match what your users or applications actually need — nothing more, nothing less. For example, you might create a role that allows a user to manage only virtual machines but not storage accounts.
Just like built-in roles, custom roles can be assigned to users, groups, and service principals. You can assign them at different scopes, such as:
-
Management group (currently in preview)
-
Subscription
-
Resource group
Custom roles are saved in Microsoft Entra ID (Azure Active Directory) and can be shared across multiple subscriptions within that directory.
You can create and manage these custom roles using:
-
The Azure Portal
-
Azure PowerShell
-
Azure CLI
-
The REST API
Each Microsoft Entra directory can have up to 5,000 custom roles.
Create the custom role from the user interface
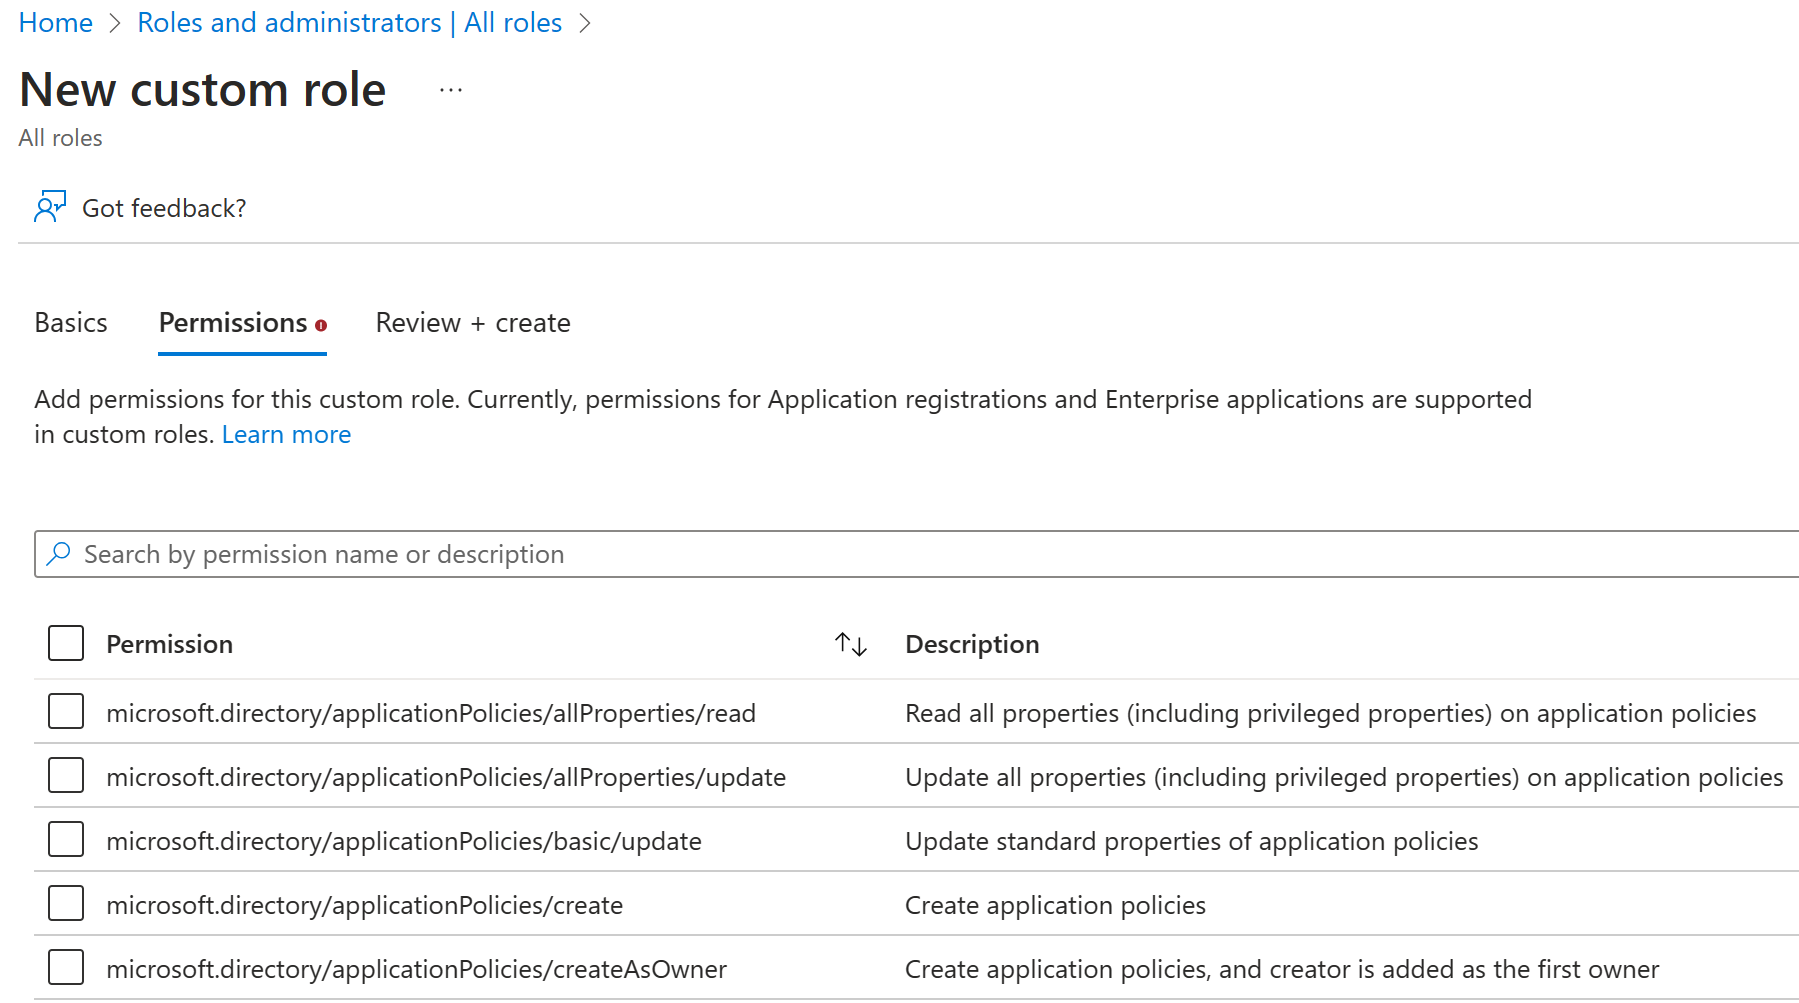
You would assign a custom role to a user, group, or other resource the same as you do for built-in. Your admin gets to control exactly with capabilities the custom role has access to. The principle of least privilege let's you pick just the capabilities you need. To create the custom role:
- Open Microsoft Entra admin center.
- From the Identity menu, Select Roles and administration.
- Select + New custom role.
- Then name and assign the capabilities needed.
Create a custom role from a JSON template
You can use a JSON file to create a custom role. Here's a sample:
{
    "properties": {
        "roleName": "Billing Reader Plus",
        "description": "Read billing data and download invoices",
        "assignableScopes": [
            "/subscriptions/your-subscription-number"
        ],
        "permissions": [
            {
                "actions": [
                    "Microsoft.Authorization/*/read",
                    "Microsoft.Billing/*/read",
                    "Microsoft.Commerce/*/read",
                    "Microsoft.Consumption/*/read",
                    "Microsoft.Management/managementGroups/read",
                    "Microsoft.CostManagement/*/read",
                    "Microsoft.Support/*"
                ],
                "notActions": [],
                "dataActions": [],
                "notDataActions": []
            }
        ]
    }
}
The asterisk (*) is used as a wildcard. If you need to assign all of the read permissions from the Billing resource that use this command Microsoft/Billing/*/read. The wildcard can exist at any level.
Create and configure managed identities
Managed identities let applications securely access Azure resources without storing passwords or secrets. Azure automatically creates and manages an identity in Microsoft Entra ID, which the app can use to get authentication tokens and connect to services like Azure Key Vault safely. This removes the need for developers to handle credentials manually.
Benefits of using managed identities
- You don't need to manage credentials. Credentials aren’t even accessible to you.
- You can use managed identities to authenticate to any resource that supports Microsoft Entra authentication, including your own applications. Managed identities can be used without any extra cost.
Types of managed identity
| Identity type | Description and usage |
|---|---|
| System-assigned | Some Azure services allow you to enable a managed identity directly on a service instance. When you enable a system-assigned managed identity, an identity is created in Microsoft Entra ID. The identity is tied to the lifecycle of that service instance. When the resource is deleted, Azure automatically deletes the identity for you. By design, only that Azure resource can use this identity to request tokens from Microsoft Entra ID. |
| User-assigned | You might also create a managed identity as a standalone Azure resource. You can create a user-assigned managed identity and assign it to one or more instances of an Azure service. For user-assigned managed identities, the identity is managed separately from the resources that use it. |
Always remember that managed identities are assigned to an application. So, you need to configure and manage the identity within the services they're being used. If you have an application running in a virtual machine (Linux or Windows), then you add and configure the identity there. If you're using a managed identity with a cloud-app, function, or app service, then you configure and manage it there. Let's look at adding a managed identity to a cloud-built app using the App Service.
Managed identity in Azure portal for an App Service
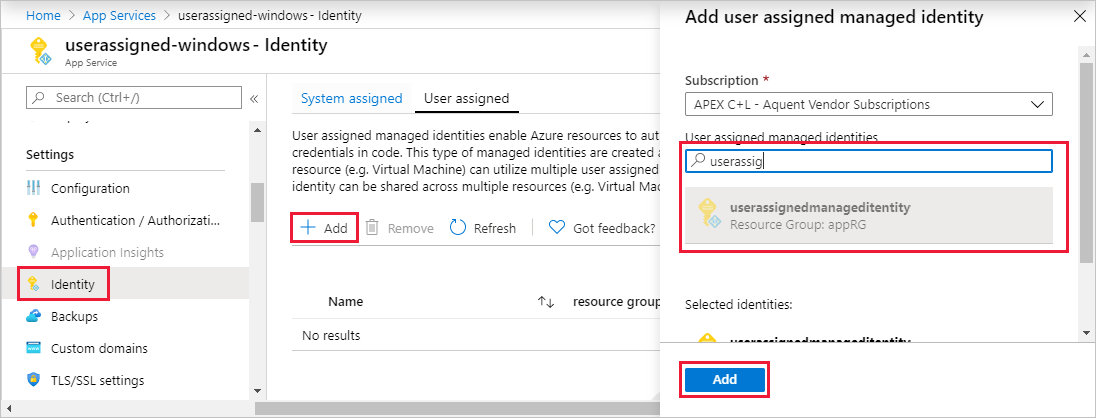
The basic steps, to create and add an identity to your app, are:
- Build your App.
- Open the App in the Azure portal.
- Select Identity from the menu then select either System assigned or User assigned.
- Select the + Add item and complete the wizard.
You can perform a similar action using script within the CLI, PowerShell, or with a template. Sample could look like:
Using the CLI
az webapp identity assign --resource-group <group-name> --name <app-name> --identities <identity-name>
Or using PowerShell with the AZ.ManagedServiceIdentity module installed
Update-AzFunctionApp -Name <app-name> -ResourceGroupName <group-name> -IdentityType UserAssigned -IdentityId $userAssignedIdentity.Id
Or within a template
"identity": {
    "type": "UserAssigned",
    "userAssignedIdentities": {
        "<RESOURCEID>": {}
    }
}
Value of managed identity
When building an app, you need a secure way to let it access resources. Using managed identities helps you follow the Zero Trust principle — meaning you give only the minimum access needed. Assign the managed identity just the permissions and resources it requires to work. This least-privilege approach keeps your applications and data safe from unnecessary exposure or misuse.
Access Azure resources with managed identities
Managed identities in Azure (a feature of Microsoft Entra ID) let services securely access other Azure resources without storing credentials. Each Azure service supports managed identities at its own pace, so check availability and known issues first. Once a managed identity is set up for a resource, you can grant it access to other resources it needs — securely and without manual credential management.
Add access to other resources
After you've enabled managed identity on an Azure resource, such as an Azure App Service application or Azure virtual machine, you might need to grant access to more resources. Let's say you want add access to a storage account to your managed identity.
Sign in to the Azure portal using an account associated with the Azure subscription under which you've configured the managed identity.
Navigate to the desired resource on which you want to modify access control. In this example, we're giving an Azure virtual machine access to a storage account, so we navigate to the storage account.
Select Access control (IAM).
Select Add > Add role assignment to open the Add role assignment page.
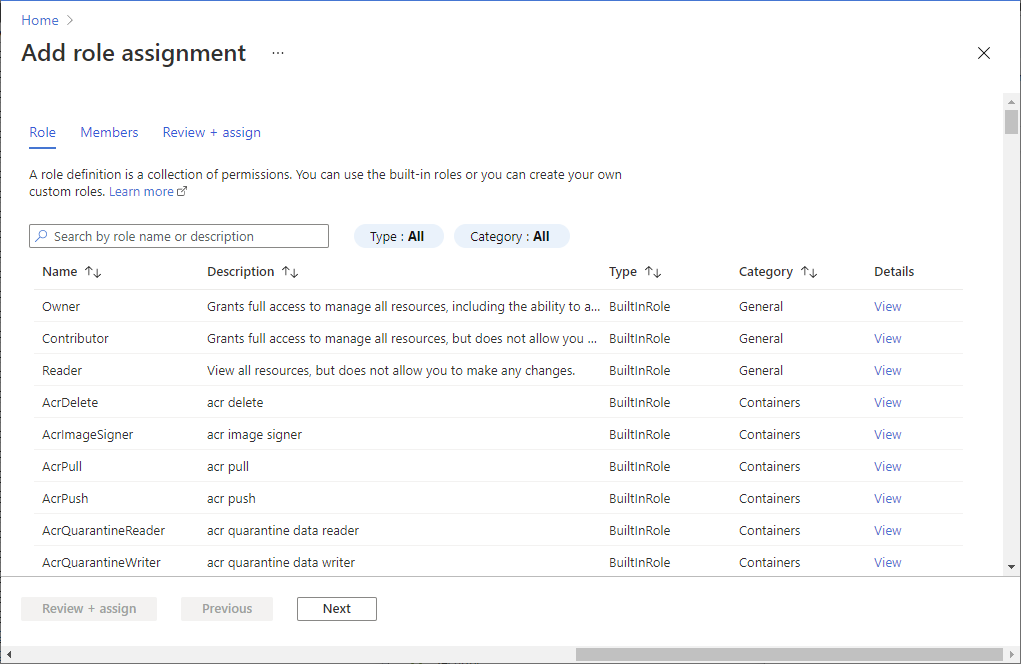
Pick the Owner, Contributor, or Reader based on the least privilege rules for your applications needs.
Select the managed identity you want assigned.
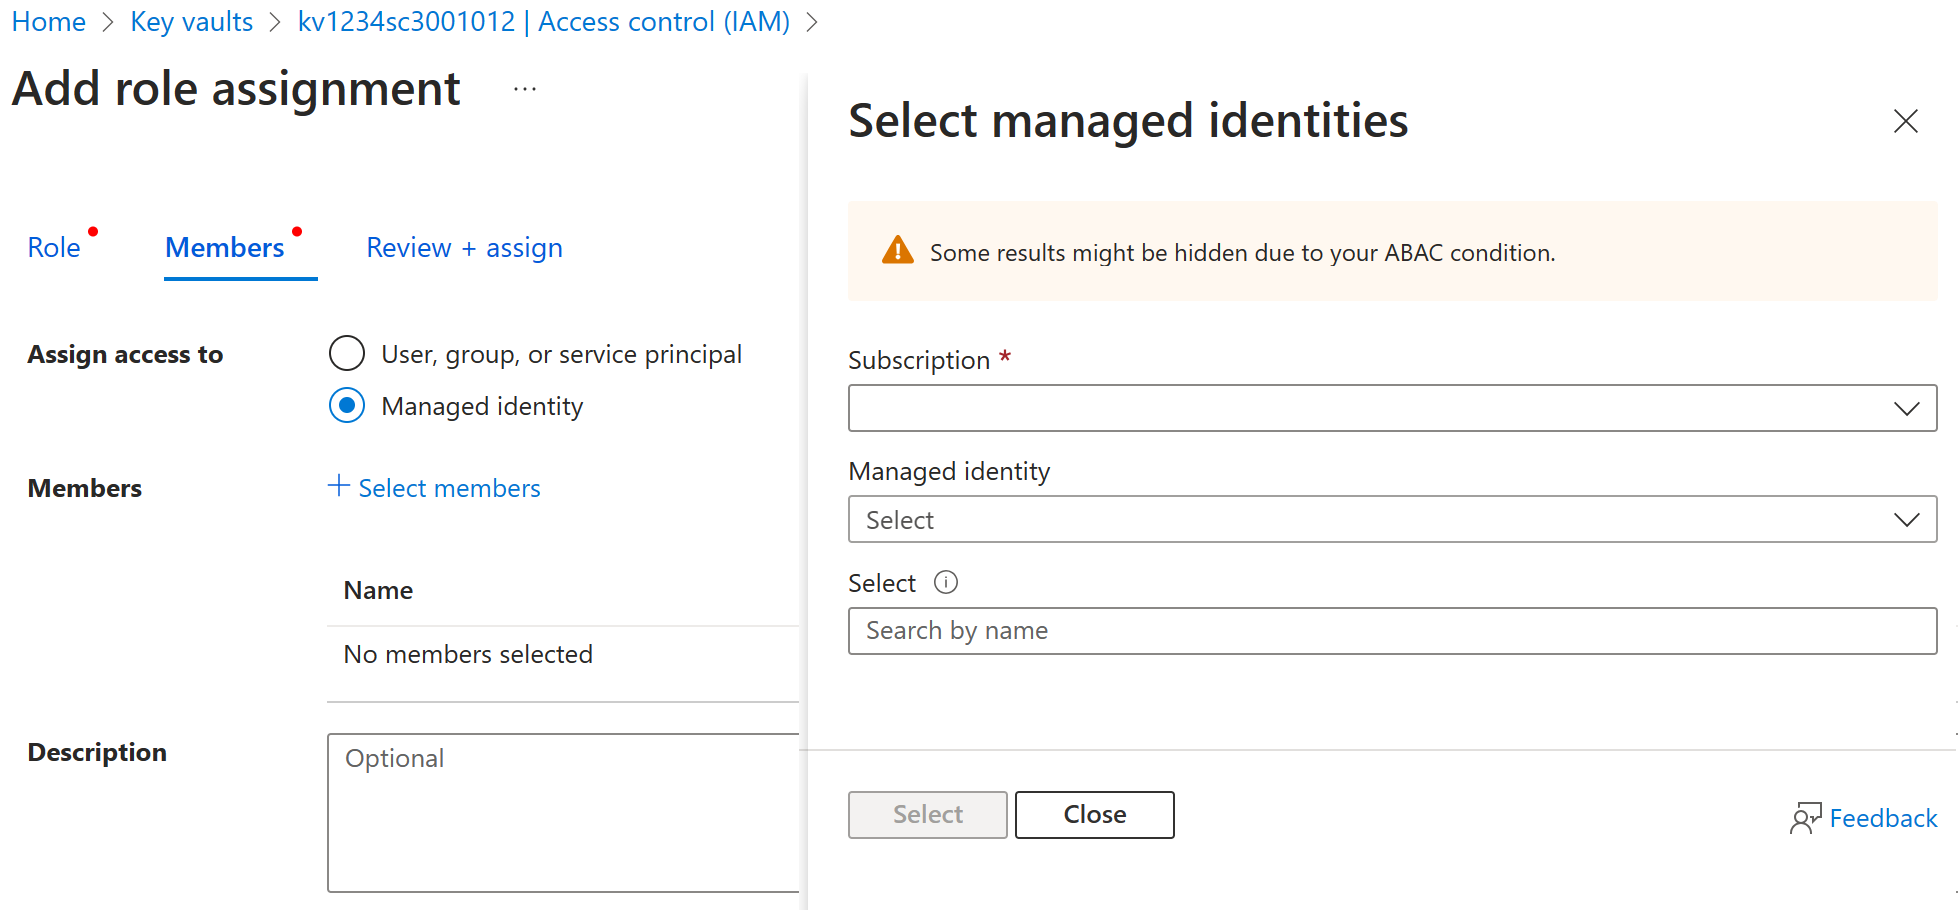
Complete the assignment with the Review + assign option.
Analyze Azure role permissions
In Azure, permissions define what actions a user or group can perform — like viewing, editing, or managing resources. Permissions are granted through roles and can be assigned at the user or group level (ultimately affecting the user). There are two types of users:
-
Member users – internal users with full organization access.
-
Guest users – external users with limited permissions by default.
What is a sample of the default permissions for users?
| Member Users | Guest Users |
|---|---|
| Enumerate list of users and their contacts | Read own properties |
| Invite guest users | Invite guest users |
| Can create Security and Microsoft 365 Groups | Can search for nonhidden groups by name |
| Register new applications | Read properties of registered and enterprise applications |
Note
This is just a small subset, to show differences. If you want a full list of the Default User Permissions
Controlling permissions - add and restrict
| User settings | Roles and administrators |
|---|---|
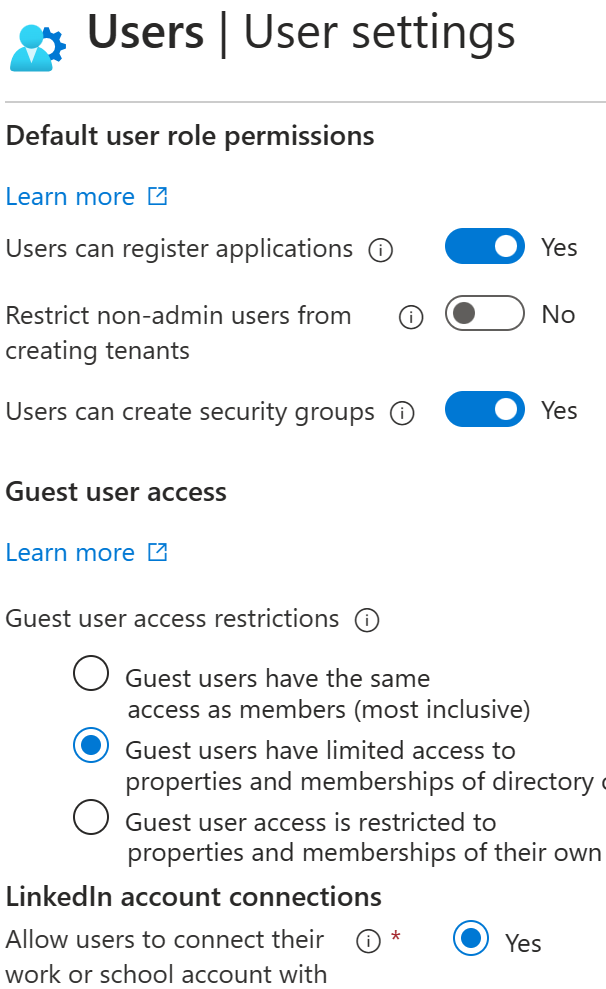 |  |
You can use the User Settings inside of Microsoft Entra ID – Manage menu to restrict or control the default permissions of the default users. Or you can use Roles and administrators to add new permissions onto your users and group. Always use the concept of Least Privilege and make sure the users only have the rights they need. In User settings you can restrict the user's ability to:
- Register applications
- Access the Azure portal
- Block LinkedIn connections
- Manage settings for external collaboration
By adding roles to a given user account or group, you can add permissions on to member users, guest users, and service principals. Adding roles gives permissions to perform specific activities. Actions are limited, which allows the rule of least privilege.
Exploring available permissions
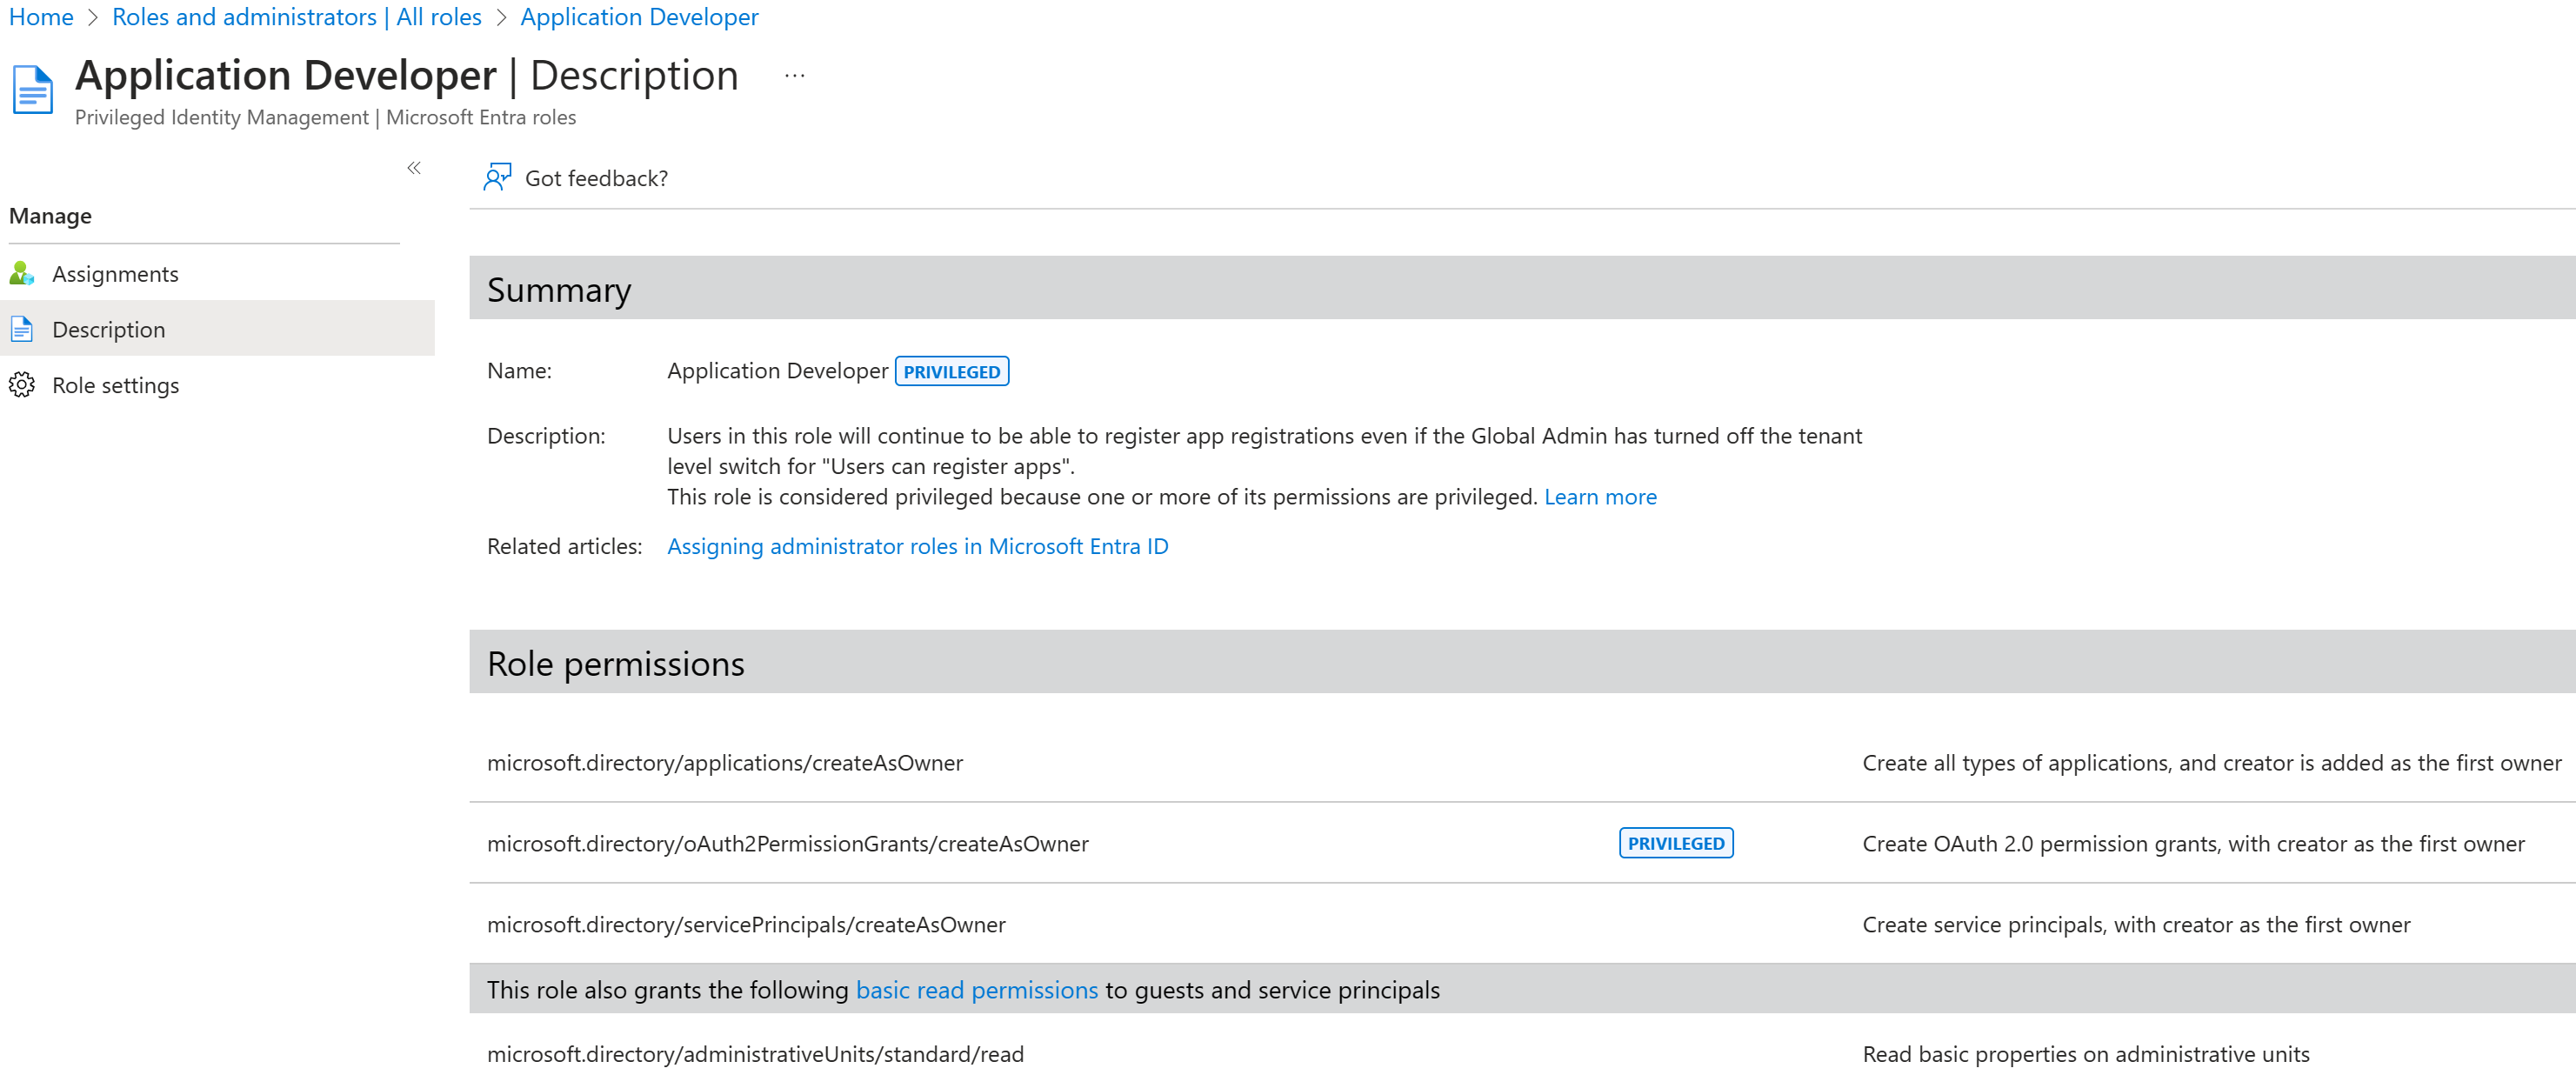
You only want to grant the permissions a user needs. So be careful to know what all permissions are granted when you assign a role. You can see the list of permissions in the Attribute definition reader. To open it, launch Microsoft Entra ID, then open the Roles and administrators screen. Next select a role, and open its description page from the ellipsis (...) menu. Depending on the role you chose, you'll see a large number of permissions or possibly a small number. Two sets of permissions:
- Role permissions
- Guest and service principal basic read permissions
Configure Azure Key Vault RBAC policies
You can control access to Azure Key Vault using either Role-Based Access Control (RBAC) or Key Vault access policies. Both methods secure your secrets, certificates, and keys, but they differ in management style — access policies provide more detailed, fine-grained control, while RBAC is easier to manage. Choose the approach that best fits your organization’s security requirements.
Assign a Key Vault access policy
A Key Vault access policy defines what actions a user, application, or group can perform on secrets, keys, and certificates stored in Azure Key Vault. You can assign these policies through the Azure portal, Azure CLI, or Azure PowerShell. Each Key Vault supports up to 1024 access policy entries, with each entry granting permissions to one security principal. To simplify management and stay within limits, it’s recommended to assign access policies to groups instead of individual users — making it easier to manage permissions for multiple people at once.
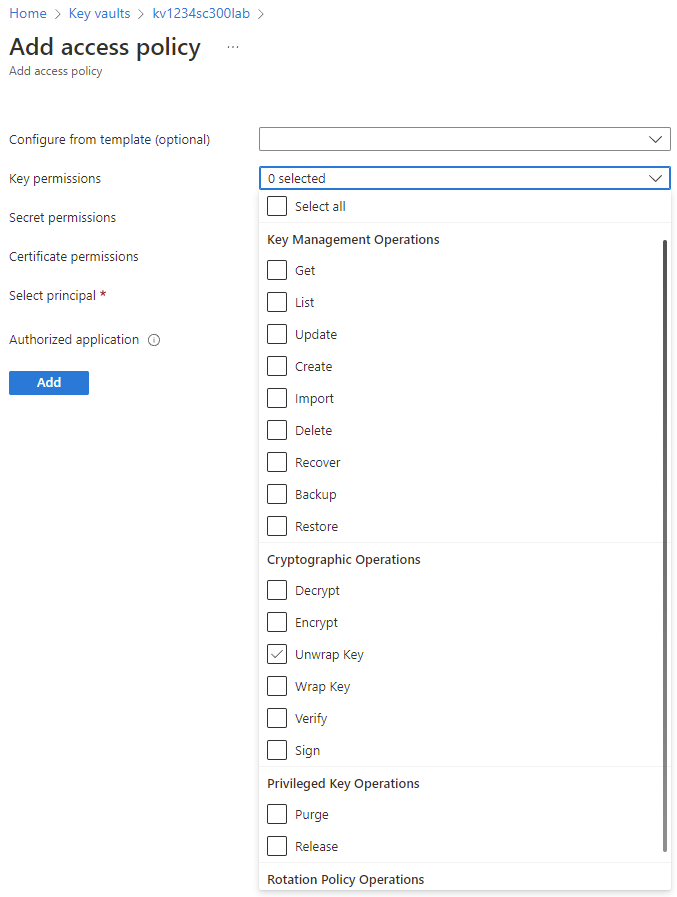
Open Key Vault in the Azure portal.
Select your key vault or create a new one.
From the menu select Access policies, then select + Add Access Policy.
Use the dialog to assign the specific permission you want service principal to have.
Note
Service principal represents the user, group, or application you're assigning the policy to.
Select Add to save and apply the access policy.
You can complete this activity using a saved template, PowerShell, CLI, and the Azure portal.
Assign a Key Vault access using Role-based access control (RBAC)
Role-Based Access Control (RBAC) in Azure Key Vault lets you manage permissions for keys, secrets, and certificates in a unified way across all your key vaults. With Azure RBAC, you can assign permissions at different scope levels — management group, subscription, resource group, or specific resources. It also allows setting separate permissions for individual keys, secrets, or certificates.
There are two actions required to use roles to access data within your Key Vault.
Enable role-based access control in your key vault.
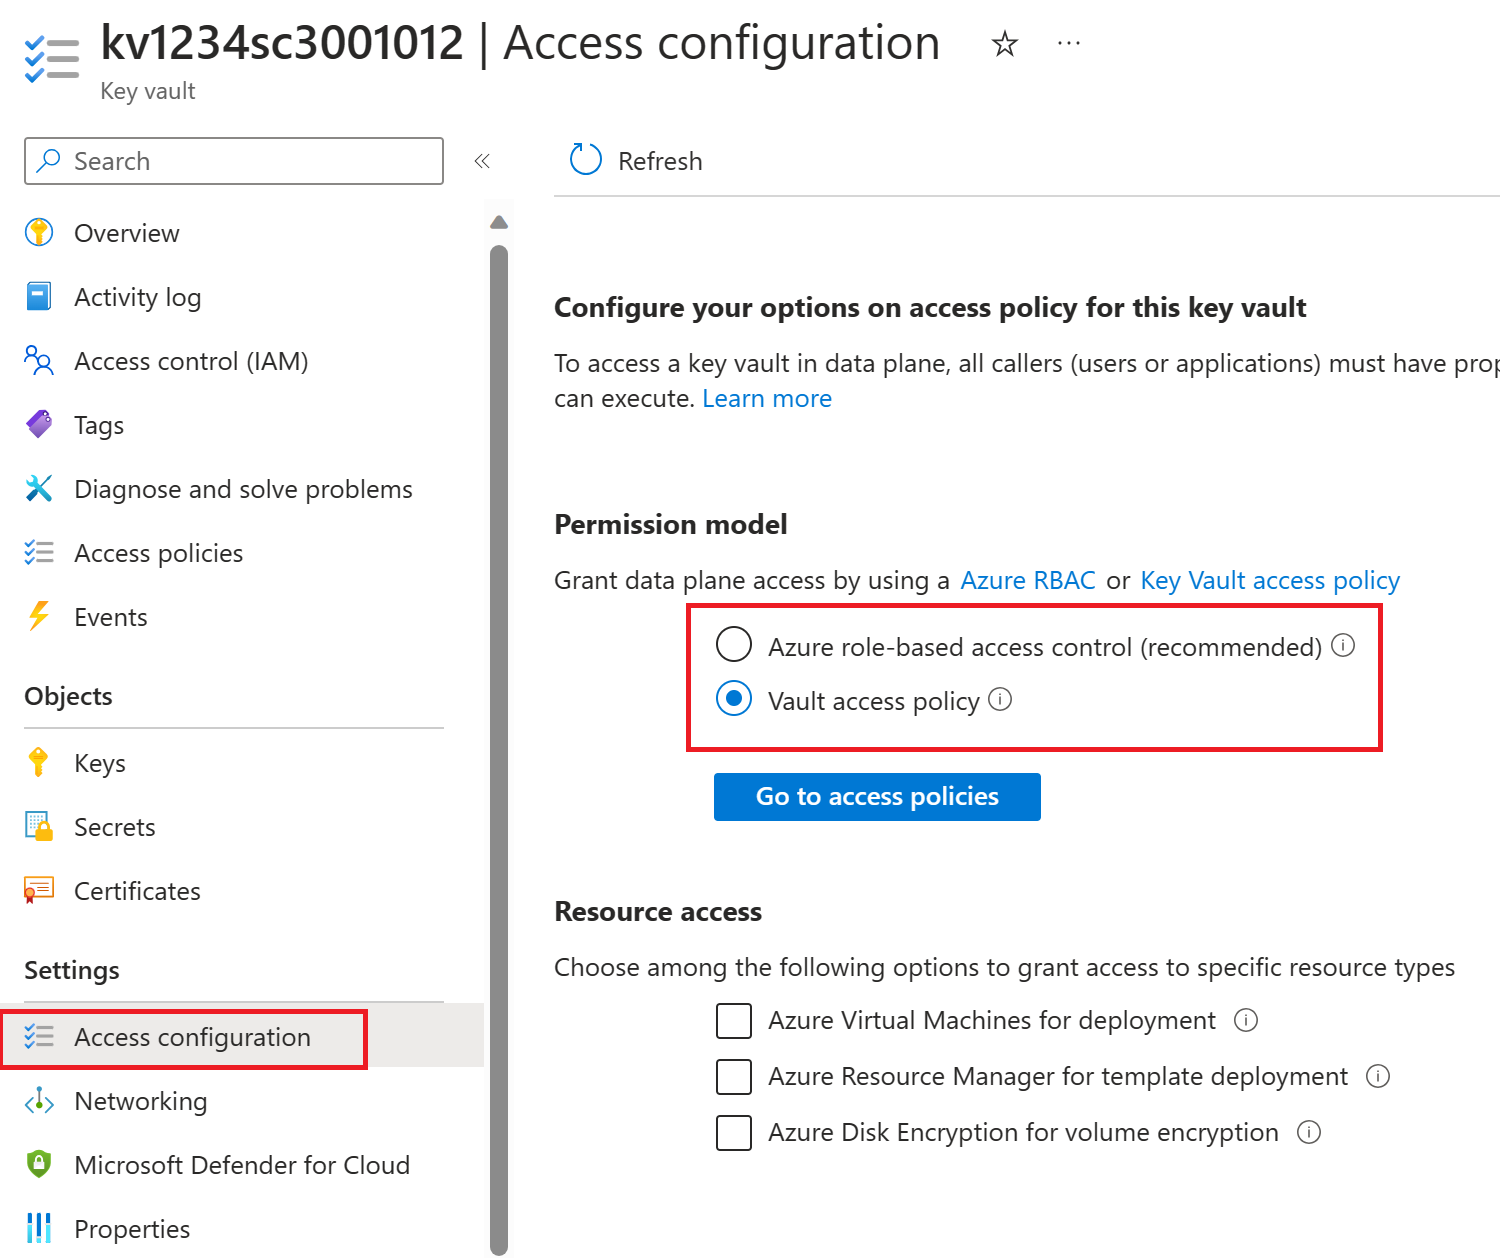
Open key vault Identity and Access (IAM) from the menu. Then assign the role as you've done in other scenarios; like managed identity.
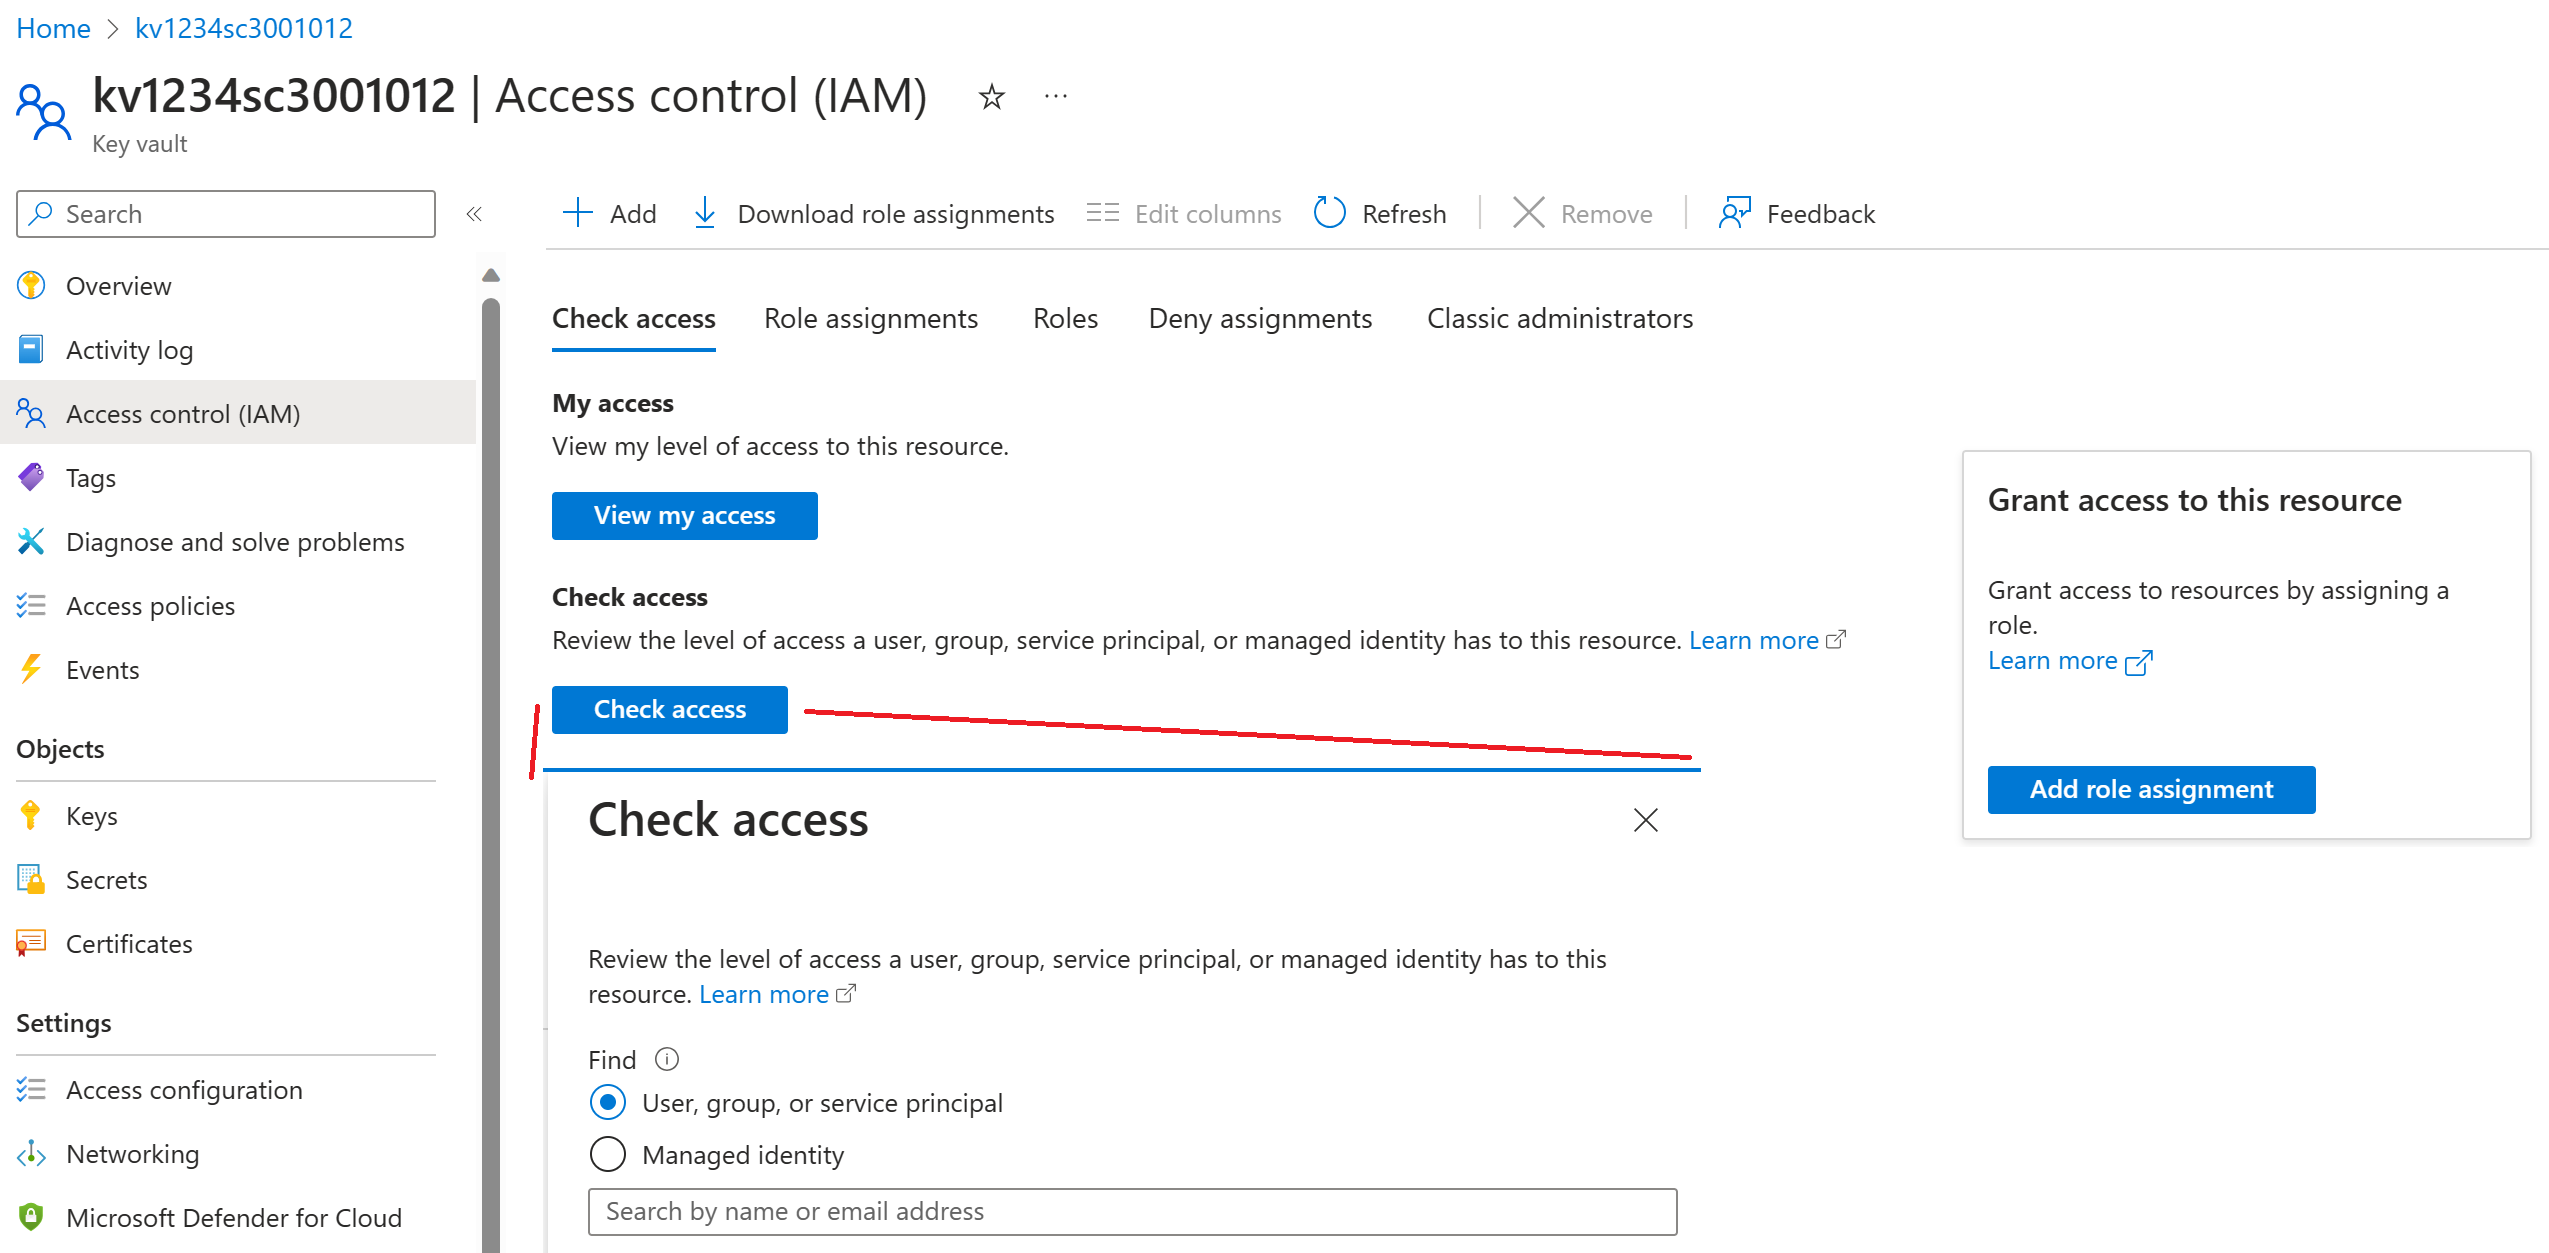
| Built-in role | Description |
|---|---|
| Key Vault Administrator | Perform all data plane operations on a key vault and all objects in it, including certificates, keys, and secrets. Can't manage key vault resources or manage role assignments. |
| Key Vault Certificates Officer | Perform any action on the certificates of a key vault, except manage permissions. |
| Key Vault Crypto Officer | Perform any action on the keys of a key vault, except manage permissions. |
| Key Vault Crypto Service Encryption User | Read metadata of keys and perform wrap/unwrap operations. |
| Key Vault Crypto User | Perform cryptographic operations using keys. |
| Key Vault Reader | Read metadata of key vaults and its certificates, keys, and secrets. Can't read sensitive values such as secret contents or key material. |
| Key Vault Secrets Officer | Perform any action on the secrets of a key vault, except manage permissions. |
| Key Vault Secrets User | Read secret contents. |
Retrieve objects from Azure Key Vault
Azure Key Vault is a secure tool for storing secrets, keys, and certificate. Once stored, these items can be used by users and applications to perform actions and operations in a secure method. The process to retrieve any of these resources is common. So we'll look at how to review a secret from a key vault.
Add a secret to your key vault
To add a secret to the vault, follow the steps:
Navigate to your new key vault in the Azure portal
On the Key Vault settings pages, select Secrets.
Select on Generate/Import.
On the Create a secret screen choose the following values:
Setting Value to enter Upload options Manual Name mySC300keyvaultSecret Value This is my secret Select Create.
Retrieve a secret using the Azure portal
This process is simple. Open your key vault, then open the secret you created. Select the Show secret value button.
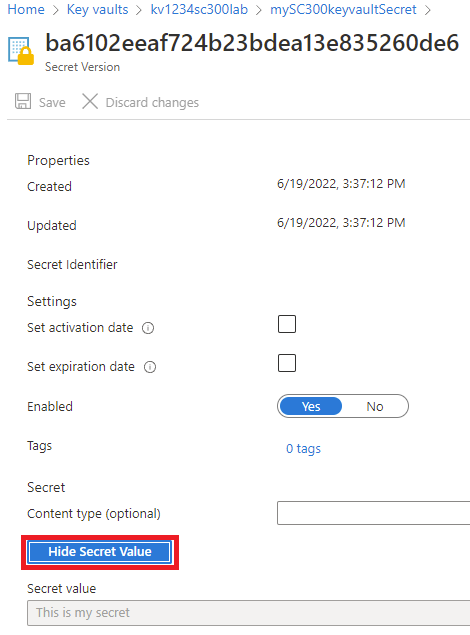
Retrieve a secret using CLI or PowerShell
You can quickly and easily grab a secret from your key vault using scripting languages.
CLI
az keyvault secret show --name "mySC300keyvaultSecret" --vault-name "<your-unique-keyvault-name>" --query "value"
PowerShell
$secret = Get-AzKeyVaultSecret -VaultName "<your-unique-keyvault-name>" -Name "mySC300keyvaultSecret" -AsPlainText
Retrieve a secret in an application
If you're building an application that needs access to your key vault secrets, certificates, and keys that can be done. You can access the key vault using .NET, Node.js, Python, and other languages.
MODULE 6
Explore Global Secure Access
Microsoft Entra Internet Access and Private Access securely connect users, partners, and workloads to any app or resource from anywhere. They combine identity, device, and network security into one solution, continuously adjusting access based on risk. Using a single management portal and Microsoft’s global private network, organizations get fast, secure, and seamless access to both public and private resources.
Microsoft Entra Internet Access
Microsoft Entra Internet Access secures access to Microsoft services, SaaS, and public internet apps while protecting users, devices, and data against internet threats. Secure access to public internet apps through the identity-centric, device-aware, cloud-delivered Secure Web Gateway (SWG) of Microsoft Entra Internet Access.
Key features
- Prevent stolen token replay attacks with compliant network checks in Conditional Access.
- Apply universal tenant restrictions to prevent data exfiltration.
- Enriched logs with network and device signals.
- Improve the precision of risk assessments on users, locations, and devices.
- Acquire network traffic from the desktop client or from a remote network.
- Dedicated public internet traffic forwarding profile.
- Protect user access to the public internet while using Microsoft Secure Web Gateway (SWG).
- Regulate access to websites based on their content categories and domain names.
- Apply universal Conditional Access policies for all internet destinations.
Microsoft Entra Private Access
- Zero Trust based access to a range of IP addresses and/or Fully Qualified Domain Names (FQDNs) without requiring a legacy VPN.
- Modernize legacy app authentication with Conditional Access.
- Provide a seamless end-user experience by deploying side-by-side with your existing non-Microsoft SSE solutions.
Before you begin
Licensing:
- Microsoft Entra ID P1 or P2 license
- Microsoft Entra Internet Access license and/or Microsoft Entra Private Access license
Roles:
- Global Secure Access Administrator role assigned to at least one administrator.
Deploy and configure Microsoft Entra Internet Access
Deploying Microsoft Entra Internet Access takes four main steps. Once completed, users with the Global Secure Access client on their Windows devices can securely access Microsoft services from anywhere. Conditional Access ensures users must connect through the Global Secure Access client or an approved remote network to access resources like Exchange Online and SharePoint Online.
Steps
| Steps | Description |
|---|---|
| 1. Enable the Microsoft traffic forwarding profile. | With the Microsoft profile enabled, Microsoft Entra Internet Access acquires the traffic going to Microsoft services, like Exchange Online and SharePoint Online. |
| 2. Install the Global Secure Access Client on end-user devices. | Download and install the client app to capture and control access from the client. |
| 3. Enable tenant restrictions. | Configure which tenants / organizations are allowed or blocked |
| 4. Enable enhanced Global Secure Access signaling and Conditional Access. | Use Conditional Access and Global Secure Access to prevent attacks. |
Enable Microsoft traffic forwarding profile
- Sign in to the Microsoft Entra admin center as a Global Secure Access Administrator.
- Browse to Global Secure Access > Connect > Traffic forwarding.
- Enable the Microsoft traffic profile.
Turns on Microsoft traffic forwarding and creates the following configurations in Microsoft Entra:
| Configuration Setup | Description |
|---|---|
| Policies (network routing) | 1. Exchange Online, 2. SharePoint Online and OneDrive for Business, and 3. Entra ID and MSGraph - These use fully qualified domain names or IP subnets to manage network traffic. |
| Conditional Access Policy | Linked Conditional Access policies - Captures all traffic to Microsoft Services, routes to the network policies defined earlier if conditions are met. |
| User and Group | Specify specific users or groups that this traffic forward applies to. |
Deploy Global Secure Access client for Windows (or Android)
The client is quick and easy to install. It can be deployed via mobile device management tools like Microsoft Intune, or manually installed on each device. You need to download the client from the Microsoft Entra admin center, then use your choice of deployment methods.
Download the client
- Sign in to the Microsoft Entra admin center as a Global Secure Access Administrator.
- Browse to Global Secure Access > Connect > Client download.
- Select Download Client.
Install the client
- Copy the Global Secure Access client setup file to your client machine.
- Run the GlobalSecureAccessClient.exe setup file. Accept the software license terms.
- The client is installed and users are prompted to sign in with their Microsoft Entra credentials.
- Users sign in and the connection icon turns green. Double-clicking on the connection icon opens a notification with client information showing a connected state.
You can install the Android client instead using either Microsoft Intune or Microsoft Defender for Endpoint on Android. The process is similar, but you get the client app from the Android store.
Set up Tenant Restrictions
Sign in to the Microsoft Entra admin center as at least a Security Administrator.
Browse to Identity > External Identities > Cross-tenant access settings, then select Organizational settings.
Select Add organization.
On the Add organization pane, type the full domain name (or tenant ID) for the organization.
Select the organization in the search results, and then select Add.
The organization appears in the Organizational settings list. At this point, all access settings for this organization are inherited from your default settings. To change the settings for this organization, select the Inherited from default link under the Inbound access or Outbound access column.
Modify the organization's settings.
Enable Global Secure Access
Once you created the tenant restriction policies, you can utilize Global Secure Access to apply tagging for tenant restrictions. An administrator with both the Global Secure Access Administrator and Security Administrator roles must take the following steps to enable enforcement with Global Secure Access.
- Sign in to the Microsoft Entra admin center as a Global Secure Access Administrator.
- Browse to Global Secure Access > Global Settings > Session Management > Tenant Restrictions.
- Select the toggle to Enable tagging to enforce tenant restrictions on your network.
- Select Save.
How it works
| Steps | Description |
|---|---|
| 1. | Contoso configures a tenant restrictions v2 policy in their cross-tenant access settings to block all external accounts and external apps. Contoso enforces the policy using Global Secure Access universal tenant restrictions. |
| 2. | A user with a Contoso-managed device tries to access a Microsoft Entra integrated app with an unsanctioned external identity. |
| 3. | Authentication plane protection: Microsoft Entra ID, with Contoso's policy, blocks unsanctioned external accounts from accessing external tenants. |
| 4. | Data plane protection: If the user again tries to access an external unsanctioned application by copying an authentication response token they obtained outside of Contoso's network and pasting it into the device, the user is blocked. The token mismatch triggers reauthentication and blocks access. For SharePoint Online, any attempt at anonymously accessing resources is blocked. |
It improves security without using VPNs or managing IP address lists and helps protect against token theft and malicious access, especially for Microsoft apps like SharePoint Online.
Enable Global Secure Access signaling
Sign in to the Microsoft Entra admin center as a Global Secure Access Administrator.
Browse to Global Secure Access > Global settings > Session management > Adaptive access.
Select the toggle to Enable Global Secure Access signaling in Conditional Access.
Browse to Protection > Conditional Access > Named locations.
Confirm you have a location called All Compliant Network locations with location type Network Access. Organizations can optionally mark this location as trusted.
Build your Conditional Access policy for networks
- Sign in to the Microsoft Entra admin center as at least a Conditional Access Administrator.
- Browse to Protection > Conditional Access.
- Select Create new policy.
- Give your policy a name. We recommend that organizations create a meaningful standard for the names of their policies.
- Under Assignments, select Users or workload identities.
- Under Include, select All users.
- Under Exclude, select Users and groups and choose your organization's emergency access or break-glass accounts.
- Review Target resources > Include, and select Select apps.
- Choose Office 365 Exchange Online, and/or Office 365 SharePoint Online, and/or any of your SaaS apps.
- The specific Office 365 cloud app in the app picker is currently NOT supported, so don't select this cloud app.
- Review the Conditions > Location.
- Set Configure to Yes.
- Under Include, select Any location.
- Under Exclude, select Selected locations.
- Select the All Compliant Network locations.
- Choose Select.
- Explore Access controls:
- Grant, select Block Access, and select Select.
- Confirm your settings and set Enable policy to On.
- Select the Create button to create to enable your policy.
Deploy and configure Microsoft Entra Private Access
Similar to configuring Microsoft Entra Internet Access, there are four main steps for getting Microsoft Entra Private Access deployed within your company. After you complete these four steps, users with the Global Secure Access client installed on a Windows device can connect to your primary resources, through a Quick Access app, and private network connector.
Steps
| Steps | Description |
|---|---|
| 1. Configure a Microsoft Entra private network connector and connector group. | Create connection between an on-premises server and Global Secure Access. |
| 2. Configure Quick Access to your private resources. | Define specific fully qualified domain names (FQDNs) or IP addresses of private resources to include in Microsoft Entra Private Access. |
| 3. Enable the Private Access traffic forwarding profile. | Turn on Private Access and link from on-premises router to remote networks. |
| 4. Install and configure the Global Secure Access Client on end-user devices. | Deploy the client software onto devices, so they can access the traffic flow. |
Configure a Microsoft Entra private network connector and connector groups
Connectors are lightweight agents installed on Windows Server.
-
They provide secure outbound access to private apps.
-
Connectors can be grouped to handle traffic for specific applications.
Configuring the Windows Server for connectors
Requires Windows Server 2012 R2 or later.Installed on a server inside the private network.Connects private apps to Microsoft Entra Private Access securely.
- For high availability in your environment, we recommend having more than one Windows server.
- The minimum .NET version required for the connector is v4.7.1+.
- Require Transport Layer Security (TLS) 1.2 be enabled on Windows Server.
Open ports for outbound
| Port number | What the port is used for |
|---|---|
| 80 | Downloading certificate revocation lists (CRLs) while validating the TLS/SSL certificate |
| 443 | All outbound communication with the Application Proxy service |
Allow access to some URLs
| URL | Port | What the port is used for |
|---|---|---|
site.msappproxy.net, and site.servicebus.windows.net | 443/HTTPS | Communication between the connector and the Application Proxy cloud service |
| crl3.digicert.com, crl4.digicert.com, ocsp.digicert.com, crl.microsoft.com, oneocsp.microsoft.com, and ocsp.msocsp.com | 80/HTTP | The connector uses these URLs to verify certificates. |
login.windows.net, secure.aadcdn.microsoftonline-p.com, site.microsoftonline.com, site.microsoftonline-p.com, site.msauth.net, site.msauthimages.net, site.msecnd.net, site.msftauth.net, site.msftauthimages.net, site.phonefactor.net, enterpriseregistration.windows.net, management.azure.com, policykeyservice.dc.ad.msft.net, ctldl.windowsupdate.com, and www.microsoft.com/pkiops | 443/HTTPS | The connector uses these URLs during the registration process. |
| ctldl.windowsupdate.com, and www.microsoft.com/pkiops | 80/HTTP | The connector uses these URLs during the registration process. |
Install the connector using Microsoft Entra
- Sign in to the Microsoft Entra admin center as a Global Administrator of the directory that uses Application Proxy.
- Select your username in the upper-right corner. Verify sign-in to a directory that uses Application Proxy. If you need to change directories, select Switch directory and choose a directory that uses Application Proxy.
- Browse to Global Secure Access > Connect > Connectors.
- Select Download connector service.
- Read the Terms of Service. When ready, select Accept terms & Download.
- Install the connector using the Run option at the bottom of the screen.
- Install the service by following the instructions in the wizard. When prompted to register the connector with the Application Proxy for your Microsoft Entra tenant, provide your Global Administrator credentials.
Verify the connector installed
On Windows Server:
- Select the Windows key and enter services.msc to open the Windows Services Manager.
- Check to see if the status for the following services is Running.
- Microsoft Entra private network connector enables connectivity.
- Microsoft Entra private network connector Updater is an automated update service.
- The updater checks for new versions of the connector and updates the connector as needed.
- If the status for the services isn't Running, right-click to select each service and choose Start.
In Microsoft Entra:
- Sign in to the Microsoft Entra admin center as a Global Administrator of the directory that uses Application Proxy.
- Browse to Global Secure Access > Connect > Connectors.
- All of your connectors and connector groups appear on this page.
- Verify the details by viewing the connector.
- Expand the connector to view the details.
- An active green label indicates that your connector can connect to the service. However, even though the label is green, a network issue could still block the connector from receiving messages.
Create groups of connectors
- For quicker assignments, you can group different connectors together.
- Browse to Global Secure Access > Connect > Connectors.
- Select New connector group.
- Give your new connector group a name, then use the dropdown menu to select which connectors belong in this group.
- Select Save.
Configure Quick Access for Global Secure Access
Set up Quick Access name and connector group
On the Quick Access page, you provide a name for the Quick Access app, select a connector group, and add application segments, which include FQDNs and IP addresses. You can complete all three steps at the same time, or you can add the application segments after the initial setup is complete.
- Sign in to the Microsoft Entra admin center with the appropriate roles.
- Browse to Global Secure Access > Applications > Quick access.
- Enter a name. We recommend using the name Quick Access.
- Select a Connector group from the dropdown menu. Existing connector groups appear in the dropdown menu.
- Created in the previous step.
- Select the Save button at the bottom of the page to create your "Quick Access" app without FQDNs and IP addresses.
Add an application segment
The Add Quick Access application segment portion of this process is where you define the FQDNs and IP addresses that you want to include in the traffic for Microsoft Entra Private Access. You can add these resources when you create the Quick Access app or return to add more or edit them later.
Sign in to the Microsoft Entra admin center.
Browse to Global Secure Access > Applications > Quick Access.
Select Add Quick Access application segment.
In the Create application segment panel, select a Destination type.
Enter the appropriate details for the selected destination type. Depending on what you select, the subsequent fields change accordingly.
IP address:
- Internet Protocol version 4 (IPv4) address, such as 192.0.2.1, that identifies a device on the network.
- Provide the ports that you want to include.
Fully qualified domain name (including wildcard FQDNs):
- Domain name that specifies the exact location of a computer or a host in the Domain Name System (DNS).
- Provide the ports to include.
- NetBIOS isn't supported. For example, use contoso.local/app1 instead of contoso/app1.
IP address range (CIDR):
- Classless Inter-Domain Routing (CIDR) represents a range of IP addresses. An IP address is followed by a suffix indicating the number of network bits in the subnet mask.
- For example, 192.0.2.0/24 indicates that the first 24 bits of the IP address represent the network address, while the remaining 8 bits represents the host address.
- Provide the starting address, network mask, and ports.
IP address range (IP to IP):
- Range of IP addresses from start IP (such as 192.0.2.1) to end IP (such as 192.0.2.10).
- Provide the IP address start, end, and ports.
Enter the ports and select the Apply button.
- Separate multiple ports with a comma.
- Specify port ranges with a hyphen.
- Spaces between values are removed when you apply the changes.
- For example, 400-500, 80, 443.
The following table provides the most commonly used ports and their associated networking protocols:
Port Protocol 22 Secure Shell (SSH) 80 Hypertext Transfer Protocol (HTTP) 443 Hypertext Transfer Protocol Secure (HTTPS) 445 Server Message Blocks (SMB) file sharing 3389 Remote Desktop Protocol (RDP)
Select the Save button when finished.
Assign users and groups for Quick Access
- Sign in to the Microsoft Entra admin center.
- Browse to Global Secure Access > Applications > Quick Access.
- Select the Edit application settings button from Quick Access.
- Select Users and groups from the side menu.
- Add users and groups as needed.
You can enable specific Conditional Access policies as needed.
Now that you have your Quick Access app configured, your private resources added, users assigned to the app, you can enable the Private access profile from the Traffic forwarding area of Global Secure Access.
The Private Access traffic forwarding profile routes traffic to your private network through the Global Secure Access Client. Enabling this traffic forwarding profile allows remote workers to connect to internal resources without a VPN. With the features of Microsoft Entra Private Access, you can control which private resources to tunnel through the service and apply Conditional Access policies to secure access to those services. Once your configurations are in place, you can view and manage all of those configurations from one place.
- Sign in to the Microsoft Entra admin center.
- Browse to Global Secure Access > Connect > Traffic forwarding.
- Select the checkbox for Private access profile.
Deploy Global Secure Access client for Windows (or Android)
The client is quick and easy to install. It can be deployed via mobile device management tools like Microsoft Intune, or manually installed on each device. You need to download the client from the Microsoft Entra admin center, then use your choice of deployment methods.
Download the client
- Sign in to the Microsoft Entra admin center as a Global Secure Access Administrator.
- Browse to Global Secure Access > Connect > Client download.
- Select Download Client.
Install the client
- Copy the Global Secure Access client setup file to your client machine.
- Run the GlobalSecureAccessClient.exe setup file. Accept the software license terms.
- The client is installed and users are prompted to sign in with their Microsoft Entra credentials.
- Users sign in and the connection icon turns green. Double-clicking on the connection icon opens a notification with client information showing a connected state.
You can install the Android client instead using either Microsoft Intune or Microsoft Defender for Endpoint on Android. The process is similar, but you get the client app from the Android store.
Explore how to use the Dashboard to drive Global Secure Access
To access the dashboard:
- Sign in to the Microsoft Entra admin center as a Global Secure Access Administrator.
- Browse to Global Secure Access > Dashboard.
The Global Secure Access dashboard shows a simple visual view of network traffic handled by Microsoft Entra Private Access and Internet Access. It combines data from users, devices, and tenant settings into one place. Using easy-to-read widgets, it helps administrators quickly see traffic activity, usage patterns, and overall network visibility.
- Volume of devices using the Global Secure Access client
- Changes in the number of active devices
- Alerts and important notifications
- Service usage patterns
- Most used destinations
- Unique users accessing the network across all your tenants
- Most popular website categories
- Most used private application segments
Global Secure Access snapshot
This widget provides a summary of how many users and devices are using the service and how many applications were secured through the service.
- Users: The number of distinct users seen in the last 24 hours. The data uses the user principal name (UPN).
- Devices: The number of distinct devices seen in the last 24 hours. The data uses the device ID.
- Workloads: The number of distinct destinations seen in the last 24 hours. The data uses fully qualified domain names (FQDNs) and IP addresses. The Global Secure Access snapshot has a filter to show data by Internet Access, Private Access, or Microsoft traffic.
Alerts and notifications
This widget shows network activity and helps identify suspicious activities or trends identified by the network data. Common alerts are:
- Unhealthy remote network: An unhealthy remote network has one or more device-links disconnected.
- Increased external tenants activity: The number of users accessing external tenants increased.
- Token and device inconsistency: The original token is used on a different device.
- Web content blocked: Access to the website is blocked. Navigate to a related alert detail page with additional information.
Usage profiling
The Usage profiling widget displays usage patterns over a selected period of time. Select the Display by filter to view the following usage categories:
- Transactions
- Users
- Devices
- Bytes sent
- Bytes received
Top used destinations
The top-visited destinations widget shows all types of traffic and sorts by the number of transactions. You can select a different traffic type to narrow down the results. There are several filters available:
- Transactions: The destinations with the highest number of transactions, showing the total number of transactions in the last 24 hours.
- Users: The destinations most used by users, showing the number of distinct users (UPN) accessing the destination in the last 24 hours.
- Devices: The destinations most used by devices, showing the number of distinct device IDs accessing the destination in the last 24 hours.
- Bytes sent: The destinations (IP address) with the highest number of bytes sent, showing the total number of bytes sent in the last 24 hours.
- Bytes received: The destinations (IP address) with the highest number of bytes received, showing the total number of bytes received in the last 24 hours. Select the View all destinations button to see more details about the destinations.
Cross-tenant access
Global Secure Access provides visibility into the number of users and devices that are accessing other tenants. This widget displays the following information:
- Sign-ins: The number of sign-ins through Microsoft Entra ID to Microsoft services in the last 24 hours. This widget provides you with information about the activity in your tenant.
- Total distinct tenants: The number of distinct tenant IDs seen in the last 24 hours.
- Unseen tenants: The number of distinct tenant IDs that were seen in the last 24 hours, but not in the previous seven days.
- Users: The number of distinct user sign-ins to other tenants in the last 24 hours.
- Devices: The number of distinct devices that signed in to other tenants in the last 24 hours. Select the Configure tenant restrictions button to navigate to the Session management area of Global Secure Access, where you can check the settings of your tenant restrictions.
Web category filtering
The Web category filtering widget displays the top categories of web content that are blocked or allowed. These categories can be used to determine what sites or categories of sites you might want to block. Sort the results using the following categories:
- Transactions: Shows the total number of transactions in the last 24 hours.
- Users: The number of distinct users (UPN) accessing the destination in the last 24 hours.
- Devices: The number of distinct device IDs accessing the destination in the last 24 hours. Select View all web categories to view more details about your network traffic.
Device status
The Device status widgets display the active and inactive devices that you deployed.
- Active devices: The number of distinct device IDs seen in the last 24 hours and the % change during that time.
- Inactive devices: The number of distinct device IDs that were seen in the last seven days, but not during the last 24 hours. The % change during the last 24 hours is also displays
Create remote networks for use with Global Secure Access
| Steps | Description |
|---|---|
| Basics | Define the name of your remote network and the region where you want to connect. |
| Connectivity | Enter the data about your on-premises router, where the signal comes from. |
| Traffic Forwarding | Add a traffic forwarding profile to define the type traffic network traffic to allow through. |
| Review Configuration | In this step, you confirm the setup of the remote network and gather settings you need to configure in the on-premises router. |
| Setup on-premises router | Use the management console of your on-premises router to enter the Microsoft connectivity settings from the previous step. |
Configure - Basics
Sign in to the Microsoft Entra admin center as a Global Secure Access Administrator.
Browse to Global Secure Access > Connect > Remote networks.
Basics tab - Select the Create remote network button and provide the details.
Values requested Name Region
Set up - Connectivity
Select Next: Connectivity.
Values requested Name Device type - usually a router IP address of the device Type of redundancy to enable Bandwidth
Enable - Traffic forwarding profiles
Select Next to open the Traffic forwarding setup.
- You can create a new traffic forwarding profile, or select one created during Microsoft Entra Private Access or Microsoft Entra Internet Access.
Complete configuration - Set up your on-premises router
Use Conditional Access with Global Secure Access
After deploying your Global Secure Access, you can use Conditional Access to add more layers of security and protection. Organizations who use Conditional Access along with the Global Secure Access, can prevent malicious access to Microsoft apps, SaaS apps, and private line-of-business (LoB) apps using multiple conditions to provide defense-in-depth. These conditions might include device compliance, location, and more to provide protection against user identity or token theft.
There are several new types of checks introduced into Conditional Access with Global Secure Access:
| Conditional Access check | What it does |
|---|---|
| Compliant network check | This compliant network check ensures users connect from a verified network connectivity model for their specific tenant and are compliant with security policies enforced by administrators. |
| Private Access apps | Applying Conditional Access policies to your Microsoft Entra Private Access apps is a powerful way to enforce security policies for your internal, private resources. |
| Source IP restoration | With a cloud based network proxy between users and their resources, the IP address that the resources see doesn't match the actual source IP address. Source IP restoration in Global Secure Access allows backward compatibility for Microsoft Entra customers to continue using original user Source IP. |
To use the Compliant network check and the Source IP restoration capabilities, you need to have Global Secure Access signaling for Conditional Access enabled. This step only has to be performed once, before we go into the direct Conditional Access options. You perform this step before using any of the below features in Conditional Access.
Enable Global Secure Access signaling for Conditional Access
To enable the required setting to allow the compliant network check, an administrator must take the following steps.
- Sign in to the Microsoft Entra admin center as a Global Secure Access Administrator.
- Browse to Global Secure Access > Global settings > Session management > Adaptive access.
- Select the toggle to Enable CA Signaling for Microsoft Entra ID (covering all cloud apps). Continuous Access Evaluation (CAE) signaling is automatically enabled for Office 365 (preview).
- Browse to Protection > Conditional Access > Named locations.
- Confirm you have a location called All Compliant Network locations with location type Network Access. Organizations can optionally mark this location as trusted.
Compliant Network Check
Compliant Network Check ensures users can access company resources only when they connect through an approved Global Secure Access network. It works during sign-in and while users are active (using Continuous Access Evaluation) for supported apps like Exchange Online and SharePoint Online. This helps protect against token theft and prevents users from other organizations’ networks from accessing your resources.
Protect your resources behind the compliant network
The compliant network Conditional Access policy can be used to protect your Microsoft and other applications. A typical policy will 'Block' access for all network locations except Compliant Network.
- Sign in to the Microsoft Entra admin center as at least a Conditional Access Administrator.
- Browse to Protection > Conditional Access.
- Select Create new policy.
- Give your policy a name. We recommend that organizations create a meaningful standard for the names of their policies.
- Under Assignments, select Users or workload identities.
- Under Include, select All users.
- Under Exclude, select Users and groups and choose your organization's emergency access or break-glass accounts.
- Under Target resources > Include, and choose Select apps.
- Choose Office 365 Exchange Online, and/or Office 365 SharePoint Online, and/or any of your SaaS apps.
- The specific Office 365 cloud app in the app picker is currently NOT supported, so don't select this cloud app.
- Under Conditions > Location.
- Set Configure to Yes.
- Under Include, select Any location.
- Under Exclude, choose Selected locations.
- Select the All Compliant Network locations.
- Choose Select.
- Under Access controls:
- Grant, select Block Access, and choose Select.
- Confirm your settings and set Enable policy to On.
- Select the Create button to create to enable your policy.
Conditional Access for Private Access apps
You can create a Conditional Access policy for your Quick Access or Private Access apps from Global Secure Access. Starting the process from Global Secure Access automatically adds the selected app as the Target resource for the policy. All you need to do is configure the policy settings.
Sign in to the Microsoft Entra admin center as at least a Conditional Access Administrator.
Browse to Global Secure Access > Applications > Enterprise applications.
Select an application from the list.
Select Conditional Access from the side menu. Any existing Conditional Access policies appear in a list.
Select Create new policy. The selected app appears in the Target resources details.
Configure the conditions, access controls, and assign users and groups as needed.
You see the addition of the Quick Access and Private Access selector from Global Secure Access.
Source IP Restoration
Source IP Restoration in Global Secure Access keeps the user’s original IP address visible. This helps admins continue using IP-based Conditional Access policies, get accurate risk detection in Identity Protection, and see the real user IP in Microsoft Entra sign-in logs.
Known limitations
When Source IP restoration is enabled, you can only see the user’s original IP address, not the Global Secure Access service IP. This feature works only for Microsoft services like SharePoint, Exchange, Teams, and Microsoft Graph. Also, with strict CAE location rules, users can still be blocked even if they are in a trusted IP range.
Enabling
Source IP Restoration is enabled when you turn on Global Secure Access signaling. Further configuration and changes shouldn't be required.
User exclusions
Conditional Access policies are powerful tools. We recommend excluding the following accounts from your policies:
- Emergency access or break-glass accounts to prevent tenant-wide account lockout.
- Service accounts and service principals, such as the Microsoft Entra Connect Sync Account. Service accounts are non-interactive accounts that aren't tied to any particular user.
Explore logs and monitoring options with Global Secure Access
You need to monitor the activity of the traffic flowing through your networks. Global Secure Access logs, provide data points you can review to gain insights into your network traffic.
Global Secure Access Audit logs
The Microsoft Entra audit log is a valuable source of information when researching or troubleshooting changes to your Microsoft Entra environment. Changes related to Global Secure Access are captured in the audit logs. Logs have categories, such as filtering policy, forwarding profiles, remote network management, and more.
Access audit logs from Global Secure Access or the Microsoft Entra admin center
From Global Secure Access
- Sign in to the Microsoft Entra admin center using one of the required roles.
- Browse to Global Secure Access > Audit logs. The filters are prepopulated with the categories and activities related to Global Secure Access.
From Microsoft Entra monitoring and health
- Sign in to the Microsoft Entra admin center using one of the required roles.
- Browse to Identity > Monitoring & health > Audit logs.
- Select the Date range you want to query.
- Open the Service filter, select Global Secure Access, and select Apply.
- Open the Category filter, select at least one of the available options, and select Apply.
Traffic logs
How to view the traffic logs
- Sign in to the Microsoft Entra admin center as at least a Reports Reader.
- Global Secure Access > Monitor > Traffic logs.
Various filters and export options are available for the traffic logs.
Enriched Office 365 logs
These logs provide
- Improved latency
- Additional information added to original logs
- Accurate IP address
How to view the logs
Viewing the enriched Microsoft 365 logs is a two-step process. First, you need to enable the log enrichment from Global Secure Access. Second, you need to configure Microsoft Entra diagnostic settings to route the logs to an endpoint, such as a Log Analytics workspace.
Enable the log enrichment
To enable the Enriched Microsoft 365 logs:
- Sign in to the Microsoft Entra admin center as a Global Administrator.
- Browse to Global Secure Access > Global settings > Logging.
- Select the type of Microsoft 365 logs you want to enable.
- Select Save.
Send logs to an endpoint
- Sign in to the Microsoft Entra admin center as at least a Security Administrator.
- Browse to Identity > Monitoring & health > Diagnostic settings.
- Select Add Diagnostic setting.
- Give your diagnostic setting a name.
- Select EnrichedOffice365AuditLogs.
- Select the Destination details for where you'd like to send the logs. Choose any or all of the following destinations:
- Send to Log Analytics workspace.
- Archive to a storage account.
- Stream to an event hub.
- Send to partner solution.
Log retention and storage
Traffic logs and remote network health logs: These logs are retained within the system for 30 days. This duration allows for ample time to review and analyze recent activities and network health status.
- Audit logs: The retention period for audit logs varies depending on your Microsoft Entra ID license.
- Office logs: Office logs are maintained for a shorter duration, up to only 24 hours.
- Get link
- X
- Other Apps
.png)
Comments
Post a Comment